Transcript
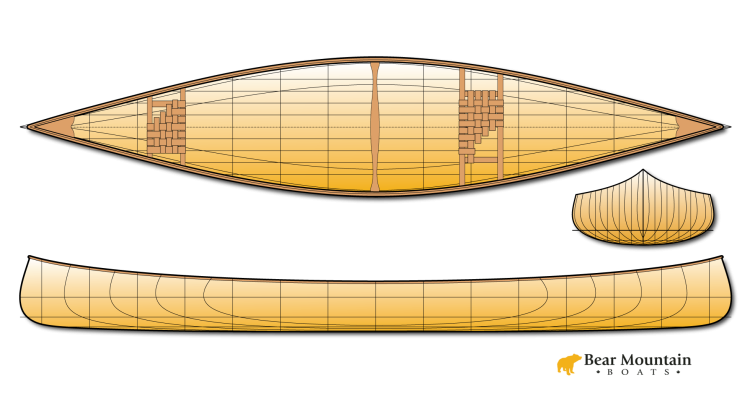
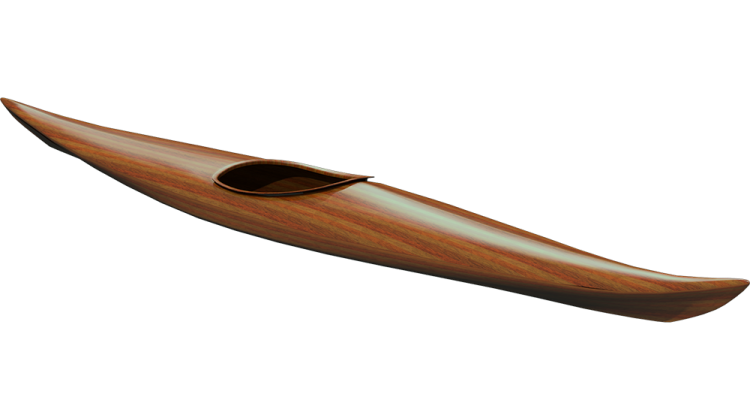
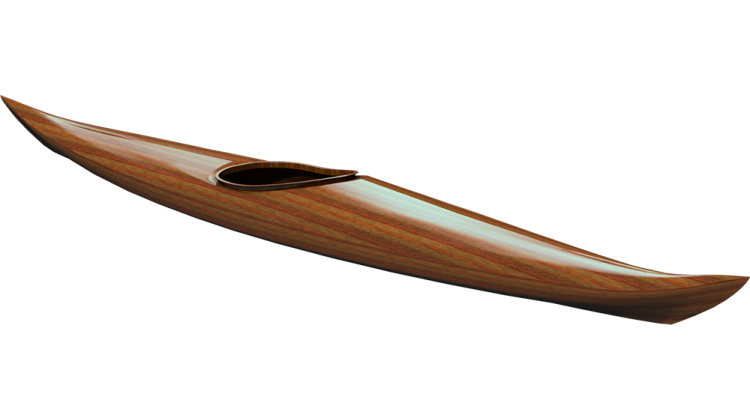
Hi, I'm Nick Schade at Guillemot Kayaks. Welcome to Episode 9 of my series on building Petrel Play, a cedar-strip kayak.
In the last episode I fit the recessed coaming into the deck. Observant viewers may have noticed the hull already fiberglassed in the background of some of the video, but I'm actually doing the glassing in this episode. I have shuffled the timing a bit just to keep similar tasks together.
There is no definitive order of steps for a project like this. A lot depends on your personal schedule and when you have time to take on a particular step.
Back in episode 7 I finished sanding out the hull and it was ready for fiberglassing. Other than removing the unglassed deck, I have not touched the hull since I finished sanding. While the deck did not have any fiberglass on it, I was able to just lift it off and place it aside.
People are often intimidated by the prospect of fiberglassing. It is probably different than any other project you have done, but it is really just systematically making fabric wet.
After sanding the wood should be smooth and free of any splinters or snags. In the best of all possible worlds I would have a couple extra hands to help hold the cloth off the boat while I rolled it out so I was assured the cloth was smooth and straight. But its just me so I carefully roll the cloth down the length of the kayak.
I roll the cloth on a slight diagonal, starting with the left edge of the roll close to the sheer line and finishing with the right edge near the sheer. This sets the weave of the fabric on a slight bias relative to the keel and other sharp features and helps the cloth drape more easily.
While trimming the length I detour down the side a bit to conserve of the wider excess on that side for future use.
When the cloth is smooth and wrinkle free while dry it should end up smooth and wrinkle free while wet. Major wrinkles can be carefully pulled out by giving the cloth a gentle tug.
Remaining small wrinkles can be transported to the edge using a dry chip brush. Pay attention to the yarn direction in the weave. Wrinkles move along the yarns perpendicular to the orientation of the wrinkles. Aim for the closest edge along the yarns.
An hour or so before I came into the shop this morning I turned the heat up to about 85 degrees Fahrenheit or 30 Celsius. I want the wood, fiberglass and epoxy warm. Warm epoxy is lower viscosity or runnier which means it soaks into the fabric quicker.
Like most chemical reactions, epoxy cures faster the warmer it is. So, this means you want to make small batches and get them on the boat quickly.
I thoroughly mix a 4 to 8 ounce batch of epoxy and pour it directly on the bottom. Since epoxy generates its own heat as it cures, spreading it out in a thin layer will slow down the cure.
I use a plastic squeegee to spread out the puddle along the horizontal surface. I'm not trying to scrape the liquid off, just make the puddle more uniform on a one or two foot section of the bottom.
I then pull resin from this reservoir puddle down onto the side.
These plastic squeeges have two slightly different sides, the moulded side where all the edges are rounded and flat side where the edges are sharp. I start with the rounded side which is better at distributing resin.
Holding the squeegee at a shallow angle will pull resin from where its thick and deposit it where there is not enough. As I get to the bottom edge I go a little flatter to keep from pulling to much on to the floor.
When the initial area is wetted from keel to sheer I look to pull the puddle down the length, moving from wet towards dry.
The squeegee is a bit like a snow plow, pulling the resin along and creating a line of excess that is then pulled over the edge.
I work with intention. Each time I touch the squeegee to the boat I have a plan for what I'm trying to do with it. I want to pull resin from a shiny spot towards a white spot where there is no resin or towards as grey spot where there is not enough resin.
If you reach a point where your squeegee work isn't doing anything, it doesn't mean you aren't trying hard enough. There is no point in fussing with minor imperfections at this point. Don't try to make it perfect yet. You can fix minor issues later. Instead, it is time to mix more epoxy.
As you proceed towards the ends you will reach a point where the bottom isn't very flat any more. Trying to dump a big puddle of resin will just end up with a lot on the floor. At this point I use a chip brush to transfer the resin from my mixing cup to the boat.
The goal is to quickly get the epoxy out of the cup on to the boat. I don't need to saturate every square inch with the brush.
I stroke from wet towards dry and from the center down to the sheer, working to pull the glass tight.
I want to empty my mixing cup quickly. A large mass of epoxy in the cup will tend to generate heat, causing the resin to become less workable. Spreading it out on the boat gives you more working time.
In a warm shop the resin in your cup may only be good for 10 minute but still very workable after 40 minutes when spread on the boat. I want to empty the cup in less than 5 minutes. I mix small batches to match my work rate.
Once I have the epoxy on the boat I can use whatever resin is left in the brush to touch up dry spot on the previous area.
Working the squeegee from wet towards dry distributes the resin that I applied with the brush.
Wrinkles can usually be pulled from the wet area in to the white area where they will often dissipate, or off the edges where they don't matter.
If that doesn't work, I don't keep trying. Instead I do some yarn management. Finding where the yarns reach the edge of the cloth I give them a slight tug to pull the wrinkle flat.
Even though I did not initially brush on epoxy to the point where everything was wet out, there is plenty to saturate the cloth after I spread it with the squeegee. The squeegee is much more efficient at distributing the resin than the brush. I can quickly achieve full saturation without overworking the resin or introducing air into the layup.
The OCD watchers in the audience may be stressing about those drips. Don't. The wood is going to suck up some excess resin, I also want to allow any bubbles to float to the surface. A bit too much resin now will allow the wood to saturate and ease removal of any bubbles shortly.
And, no, I'm not going to try to fold over that excess cloth sticking out off the bow.
The time between the first dump of epoxy to fully saturated has been 20 minutes. I now turn down the heat in the shop to about 70° F or 20° C.
Now is when I worry about details. Because I worked quickly to get the cloth saturated, I have plenty of time to get the wetout perfect.
I've made a little slide into the edge of a paper cup. Using the sharp edge of the squeegee, holding it at about 45° to the surface with moderate pressure, I scrape off the excess resin. Sliding the squeegee edge through the slot removes the grunge.
This grunge cupping process should remove any glossy spots and fill any starved spots, leaving a uniform matte finish.
The squeegee pulls the cloth tight and presses it down on to the wood. Too much resin will make the boat heavy and it is actually weaker than a layup with just enough resin.
Where wetting out the cloth took 20 minutes, I spend another 10 minutes cleaning up the layup. I'll then let the epoxy cure for several hours.
After the epoxy has set up enough to be somewhat stiff but still a bit sticky I add a light fill coat. I will be adding another layer of cloth to the hull later in the build. For now I want to fill the weave just enough that I will be able to give it a light sanding later.
I mix a small batch of epoxy and distribute it on to the hull with a brush.
These puddles get spread around the surface with a squeegee. A little epoxy here goes a long way. I'm just working the resin into the texture of the fiberglass cloth.
Someone is saying: But, you just went through all that effort to remove excess epoxy, now you're putting it back on?
Yes, after we finished wetting out the cloth we then needed to get it tight against the wood for the strongest layup. Now, the epoxy has set up enough that it is bonded tight to the wood.
So I can now add resin to fill the weave.
But, but, but you just said you're adding more cloth later, why fill the weave now?
Because by the time I add that cloth, the epoxy is going to be fully cured. I'm going to have to sand to assure a good bond. If I leave the full weave texture, I'll immediately sand into the cloth, making it weaker.
Now to mess with you even further, I'm doing the grunge cup thing again. Scraping off the excess. I only need enough resin to fill the weave sufficiently to allow a light sanding that doesn't cut into the glass.
With the fill coat complete I'll turn down the heat and let the epoxy cure overnight.
The next day I can remove the hull from the forms, but for the next episode we will get back to where I left the deck, doing a final sanding and glassing it.
Since I'll be doing more glassing in the next episode, post your question to the comments. hopefully, I'll be able to address them when I discuss glassing the deck.
I look forward to your questions, thanks for watching and happy paddling.
The Tools used: