Even though the blades of these paddles may be feathered, they are still glued on straight and square on the shaft. It helps to cut away some of the shaft on the power face of the blade before gluing on the blades, but this is not required.
I use the Tite-Bond III to glue the blades on either side of the shaft. The thin end of the blade aligned with the tip of the shaft and the thicker end is towards the middle of the shaft. Some good long clamps are nice for this process, but you could wrap everything with string or stretch wrap to hold it all while the glue dries.
I use my thickness sander to flatten out the power face of the paddle, but you can do it with hand tools such as a spoke shave. Likewise with the back face of the blade. Here we are just working on the outer end of the blade at first.
When the flattening process is done I cut out the outline of the blade shape. You can use your favorite paddle as a pattern, just remember to flip the pattern over for each end of the paddle.
[Music]
hey welcome back to the Guillemot Kayaks
workshop I'm Nick Schade I'm working on
a laminated kayak paddle in this episode
I'll glue the blades on and start rough
shaping the blade and shaft so I'll
start by saying the blade flat on the
front and then cut out the blade shape
and then work on starting to round over
the shaft so we'll get right to it now
we're ready to glue the blades on so I
have four blade halves here and I'll
take them off in pairs so this will be
prepare for one blade this will be the
pair for another blade and then we end
for end one and so now we have a fairly
closely matching set right there and
another fairly closely matching set
right here so we'll just give it a
little dry fit and I'm going to line up
the tips lightly clamp it here I'll line
up the butt end you can have it slightly
proud there and then it'll go like that
so now that we know it fits together we
will unclamp it put some glue on it
re clamp it up and do the next one
[Applause]
[Music]
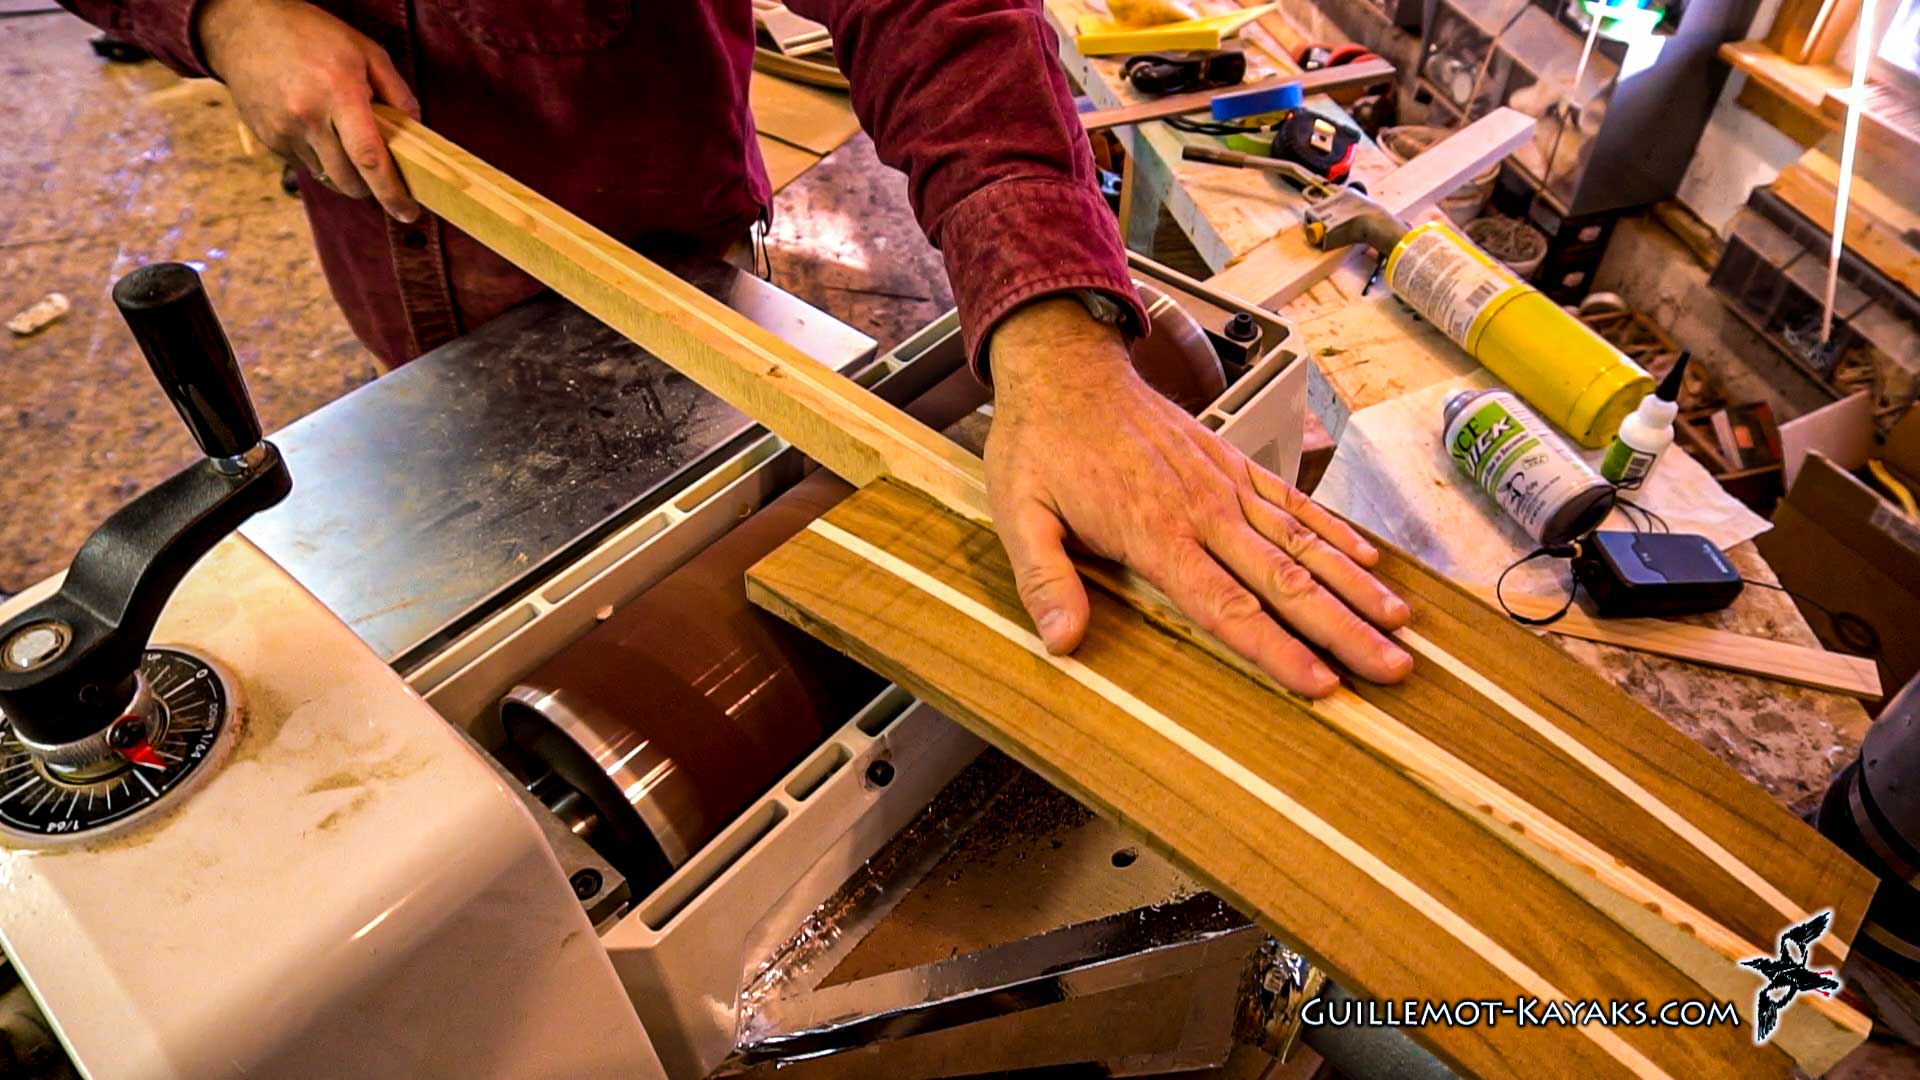
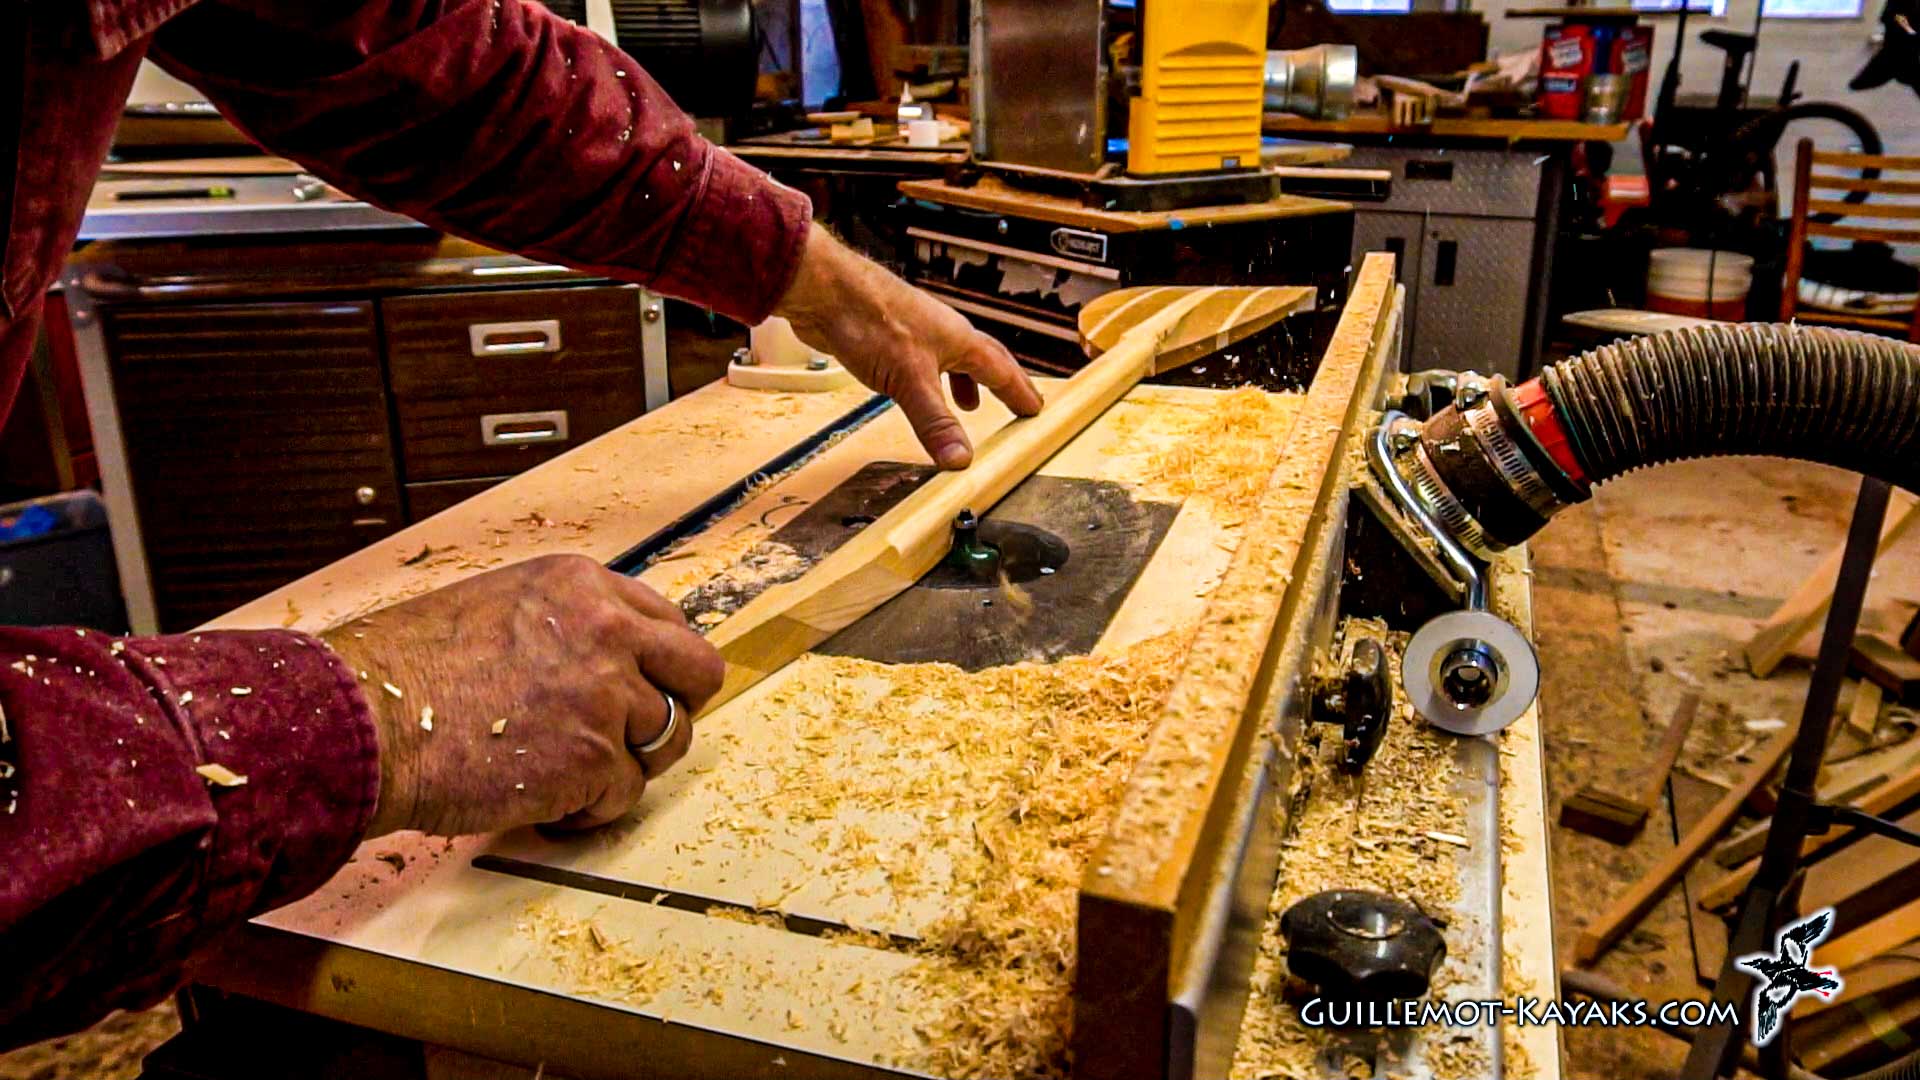
so I had my drum sander set up with 36
grit sandpaper and I've taken and
leveled out this surface here I gotten
the shaft even with the blades and the
blades flat all the way across so we
still have the curvature here it's just
that it's flat all the way across here
so 36 grit
I used that because it's very quick and
since I had that in place also I then
worked on leveling the back just from
the middle of the blade towards the tip
I've still got a quarter inch of
thickness here in these blades I'm
eventually going to get these down to
1/8 but I just want to start getting
that shape down so at the tip here is
flat all the way across on the back face
and the power face and that's what 36
grit I will replace the sanding paper on
this with 80 grit to just give that a
finer finish and then final sanding with
this will come much later after I've
done a lot more shaping
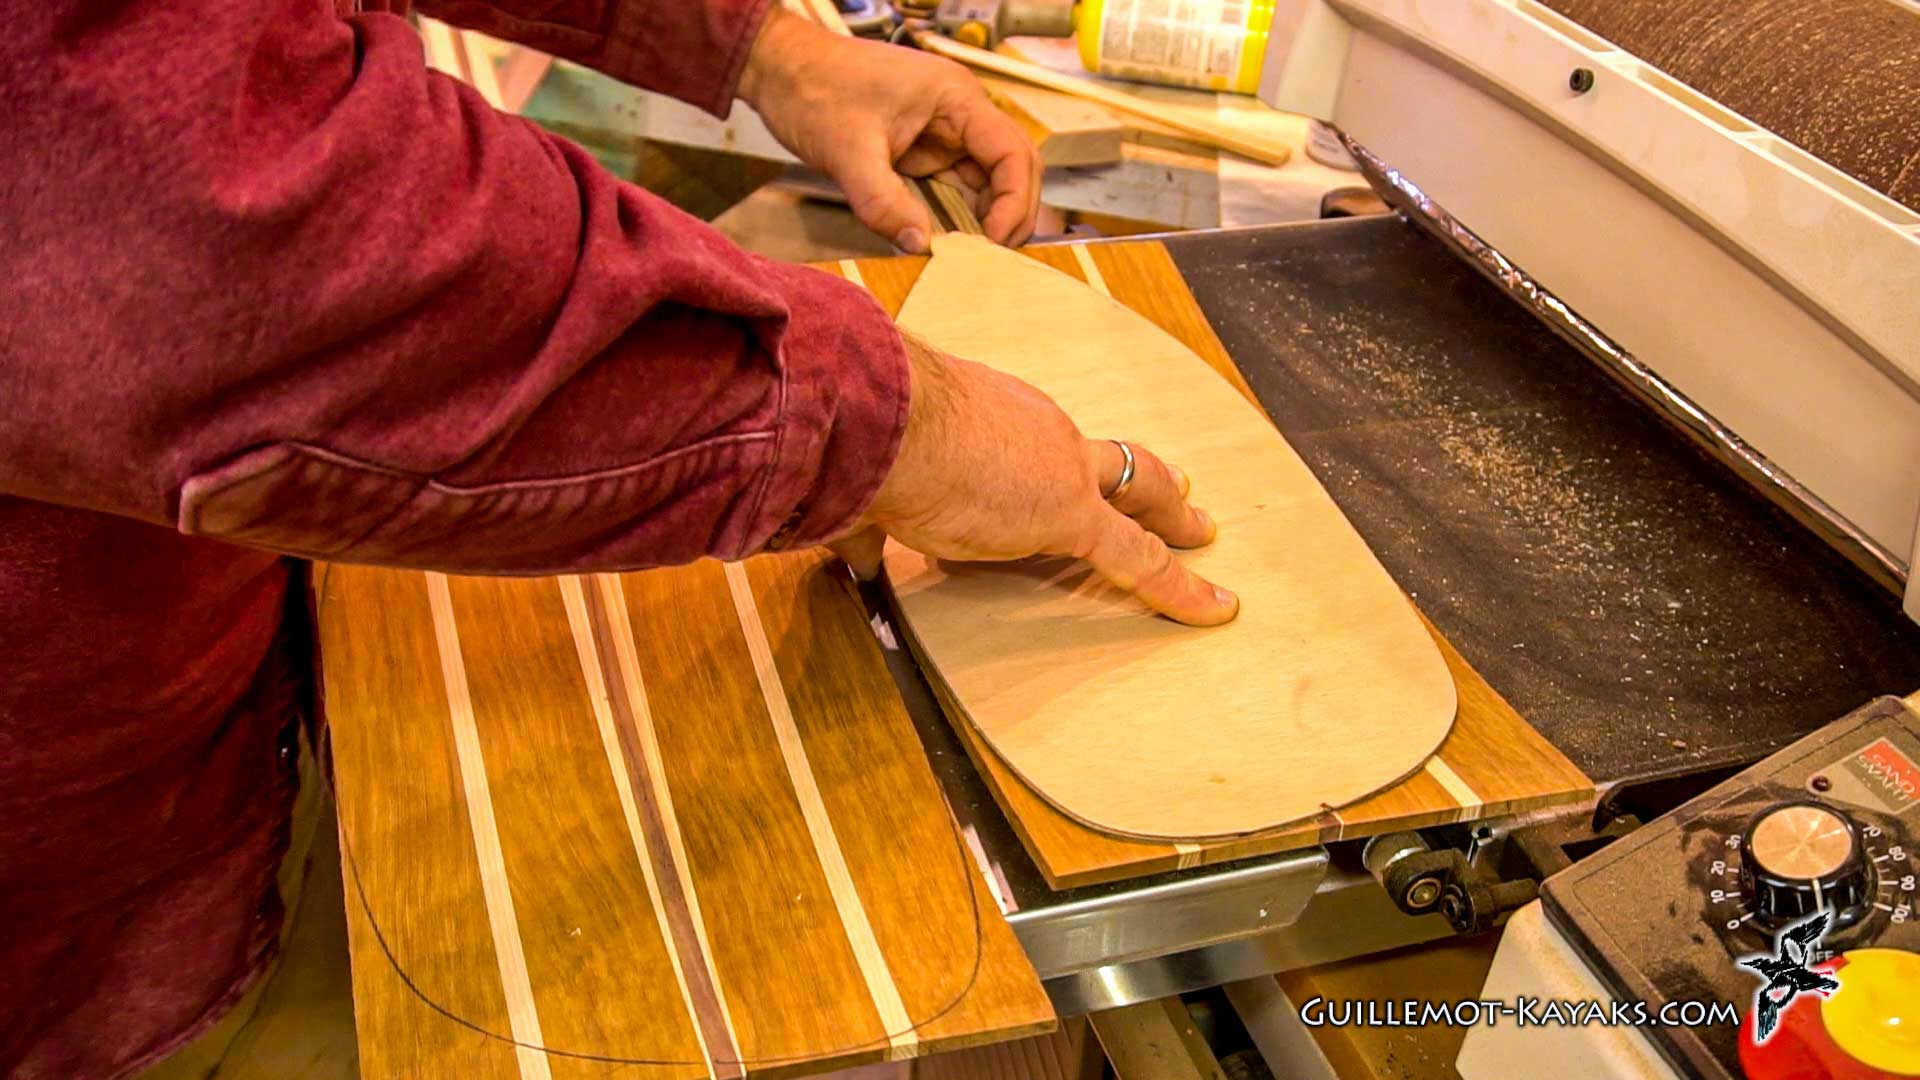
modern kayak paddle blades are
asymmetrical so you see here I've got a
bit of an angle on this blade it's the
tip is offset at a bit of an angle the
area in both sides of the centerline is
the same but the topside is pushed a
little bit out in the bottom side is
pushed a little bit in the theory being
there's as you put the paddle in the
water you're coming in at a bit of an
angle and this will create less torque
on the paddle as you start to apply
power you know in all honesty this
probably only really matters and really
high-performance paddlers Olympic level
paddlers and you know chances are they
don't care either
I find the the most common thing this
does just point out the newbies the
people that don't know how to kayak
first time with the paddle they'll often
end up with the paddle upside down you
know that's kind of a silly thing but
you know it's used to make fun of people
who don't know how to paddle I think a
symmetrical paddle would work just as
well for our modern needs but the style
these days is this asymmetrical paddle
has been that way for quite a while and
frankly I kind of like the look I think
it looks cool to be a little bit
asymmetrical so for an aesthetic reason
I go ahead and continue to do it but if
you want a symmetrical paddle go for it
don't let the fun not seize make fun of
you for it so I'm just taking this
template centering it on the blade and
then tracing the shape onto the paddle
in preparation for cutting this out
but as a consequence of the asymmetry we
want the left paddle and the right
paddle to be have the longer edge on the
same upper edge so this blade is
actually going to be over on the far end
like this
so this template should be flipped over
like that so I have an A and a B side
and I'm just making sure I flip the
template over before I trace it on so I
have a matched set of blades these rough
blades are a little bit narrower than my
template so what I'm gonna do is I'm
just gonna offset it so this side comes
out even over there and I'll offset it
equally the other way just putting the
centerline so it's on either side of
that accent strip and so that will work
just fine it's hard to see on the dark
wood
[Music]
[Music]
so this is a half inch radius round over
a bit on the router so I conceivably
could make a one-inch diameter dowel
with this round over back the shafts of
these are 1 in 1/8 by 1 and 1/4 so this
doesn't quite round it over it ends up
with a little bit of a flat spot on each
face works out well as far as the
bearing bearing these a flat spot to
wrap run against if I tried to make a
dowel on this with this bearing it would
end up cutting into it over cutting on
the subsequent collects after the first
one I'm just starting to round these
over I'm bringing it as close to the
blade as I can the full-length shafts
straight shafts I can obviously just do
the whole thing from blade to blade here
I've got the scarf I don't want to come
too close to this scarf I want to keep
it square at the corners here so I can
do the blending together so I'll come
quite close to the scarf but I'll leave
the corners at the scarf itself
[Music]
[Applause]
[Music]
[Music]
so these shafts have a good initial
shape they've got some flat spots on
them top and bottom left and right side
but it's a good starting point I'll do
some more work on refining the shape in
the long run I want to make sort of an
egg shape with the narrow part where the
knuckles are so again good starting
point and I'll blend these in by hand
when I did glue the scarfs up and up in
here I'll blend that into the back so
it's a good start onto the next step so
that about covers it for this episode if
you're enjoying this and you'd like to
build your own paddle I have plans
available there should be a link in the
description building a kayak paddle is a
fun project it's a fairly quick project
and there's a good introduction to some
of the skills you'll need if you want to
build your own boat
there's working with basic tools there's
some fiberglassing involved and it you
know it's something that you can get
done in a couple weekends and have
yourself a really beautiful thing that
works very well and it's a lot of fun
otherwise if you're not into that and
you just like watching the videos but
like to support me hit like share all
those things get the word out more
viewers is more support and I appreciate
all your support if you're really into
it I've got a patreon page again this
should be a link in the description so
in the next episode we'll be working
more on sculpting the shape of the blade
there's quite a bit of shaping to be
done getting the blade much thinner I
want to get it down to 1/8 inch thick
around the edges and have it all blended
together in a nice pleasing shape so
until then thanks for watching and happy
paddling.