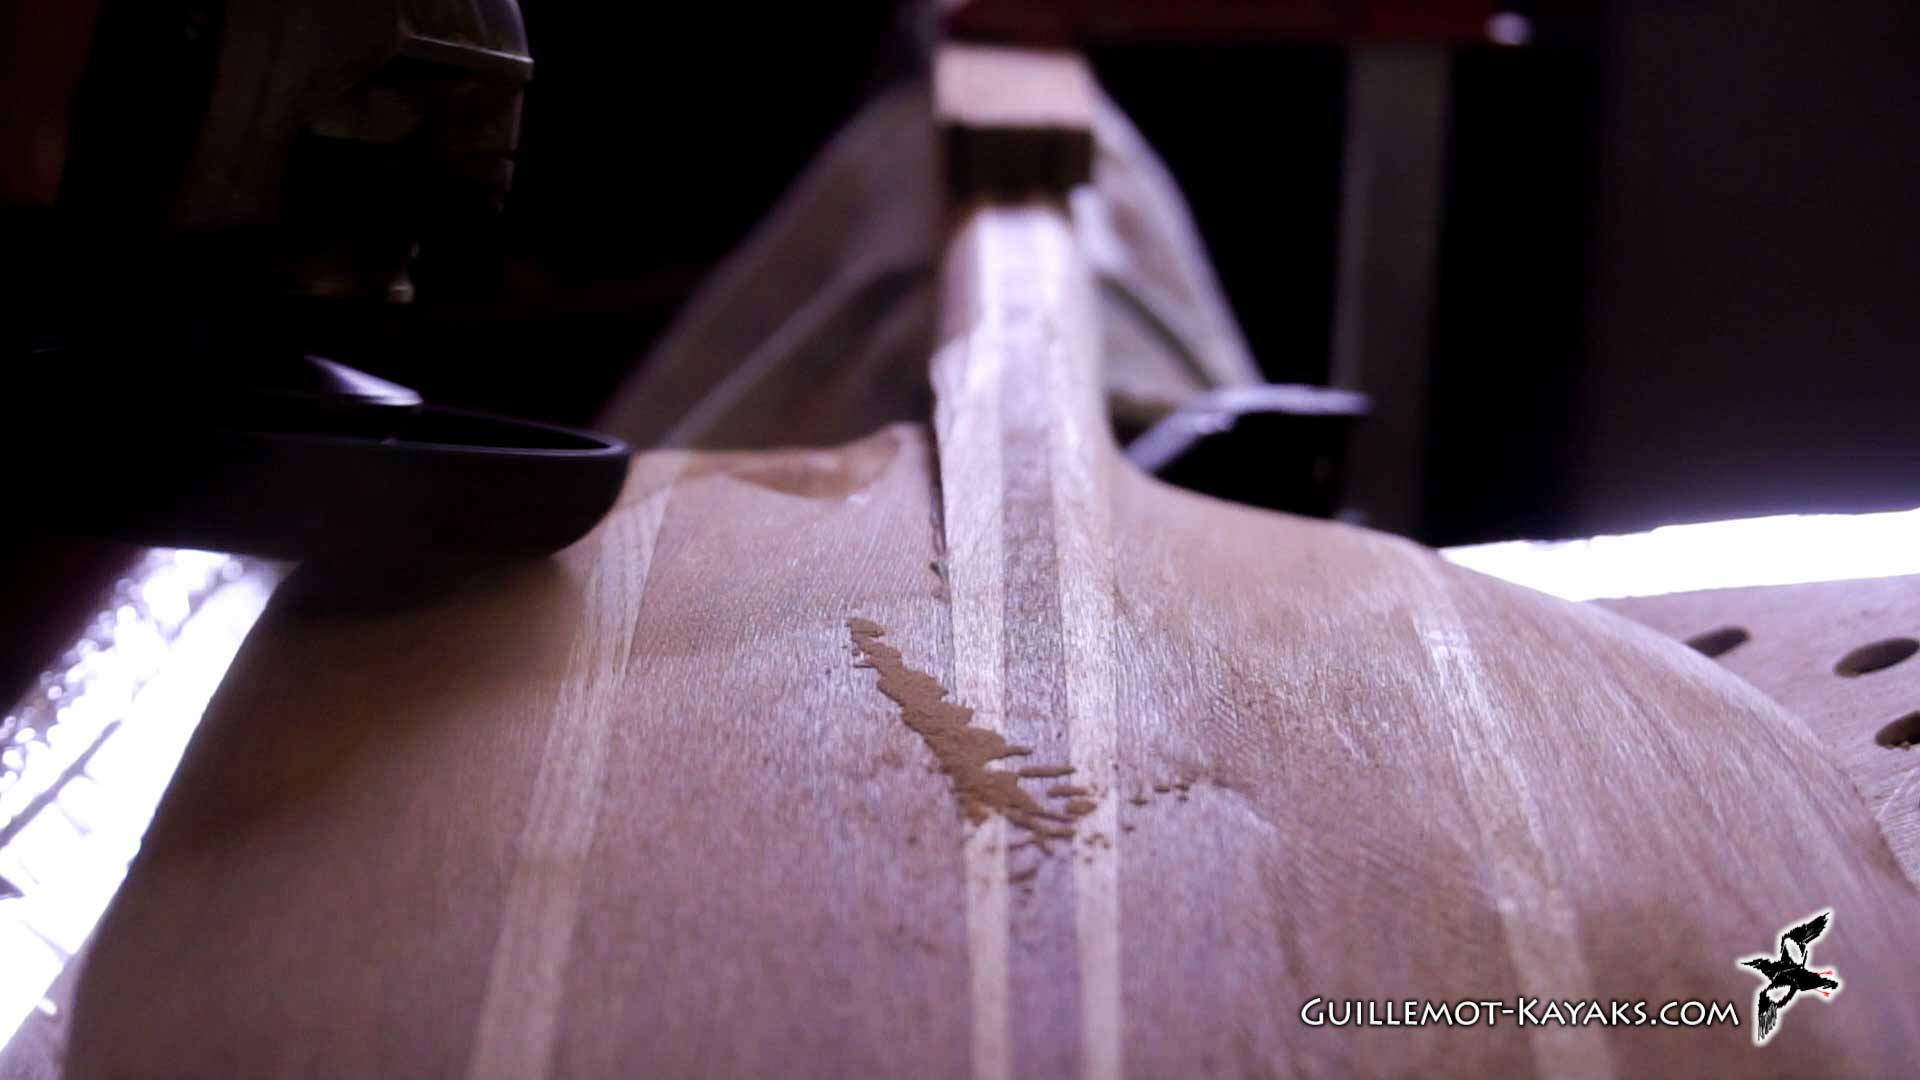
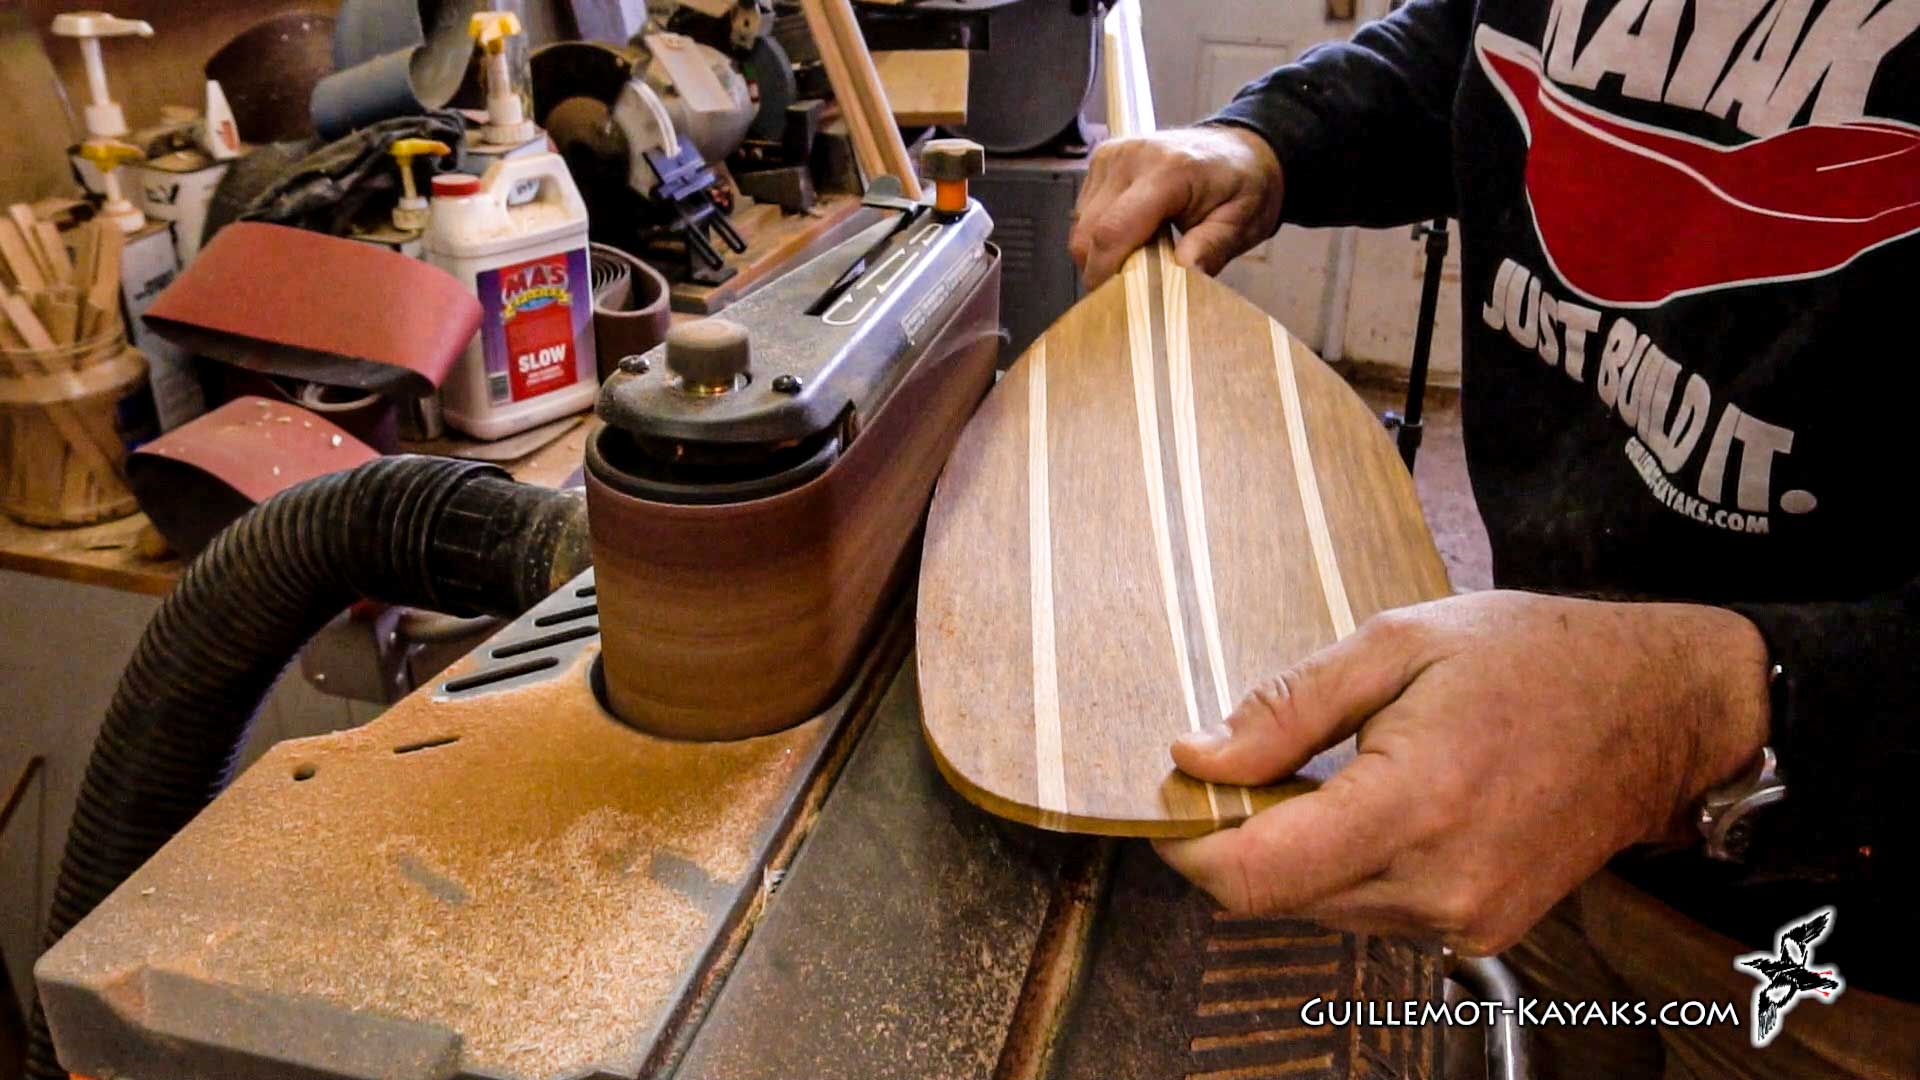
This is the hardest part of the process. I use a right angle grinder to do some freehand shaping and then refine the shape with hand tools. I try to make the edges of the blade nice and thin to keep the paddle light, while leaving the central section of the blade full thickness for strength.
The most common mistake is to leave the blade too thick because you are scared to go too far and make it too thin. Don't be too much of a wuss about it, aim for 1/8" thick all the way around the edge with a nice smooth taper from the middle. The blade eventually gets reinforced with fiberglass which makes it very tough and strong.
[Music]
hey welcome back to the Guillemot kayaks
workshop I'm Nick Schade and we're
working on making kayak paddles. so in
this episode I'm gonna start shaping the
blade I'll use some power tools to do
some rough shaping then start working
with some hand tools and finish up with
hand tools to get a really refined final
shape at this point the blade still has
that original taper that we cut into the
blade blanks it's about a half inch here
and tapers down to about a quarter inch
at this end and that's all the way
through the width of the blade this is a
pretty heavy blade right now I want to
take off quite a bit of weight I want
this taper to provide strength but I
don't need the full width all the way
out to the edge I'd like to get it down
to about 1/8 inch all the way around the
perimeter so that's two-and-a-half or
three millimeters something like that so
I'm just going to take and Mark around
this edge an eighth inch
people are generally afraid to take too
much wood off their paddle and end up
with a really heavy war-club obviously
you believe it thicker it's going to be
stronger my intention is to put
fiberglass on this and that's going to
give it a huge amount of strength so I
can take this down quite thin and still
have a strong paddle and have it be
lightweight I'm also gonna put a
reinforced edge all the way around it so
even though it's then it's gonna be a
good tough paddle so I want to mark that
eighth inch all the way around the
perimeter of all the blades
with the blades cut out and roughly
shaped it's now time to do the fine
shape and get it down where we want it
or at least a lot closer at this point
I've got the square edges left from the
shaft and it comes in at a sharp angle
here it's still quite thick back here so
I want to get it down to this eighth
inch thick mark that I made earlier and
I want to create a smooth transition in
the throat of the paddle here from the
back of the blade onto the shaft so
there's not a stress riser there again
this is going to get fiberglassed I want
the fiberglass to wrap smoothly around
that surface I want to continue this
radius down the shaft a bit on both
sides and then blend the blade up into
that so I'm going to be removing wood
from the blade to create the fillit I'm
gonna be removing wood from the shaft to
create the round over I don't want to
lose a lot of wood from the shaft
blending into that filler I want most of
the wood to be in the blade that I'm
removing so this is what it should look
like when I'm done with this process so
again I've got a nice smooth fill it up
in here the blade is about an eighth of
an inch thick both sides the radius of
this shaft continues down onto the blade
and again you can see the full with the
blade stock right in here but it quickly
rounds down to the thin shape of the
blade here in the middle of the blade is
just sort of crown slightly coming out
to eighth inch on either side I want
that all nice and smooth I'm using a
variety of tools for this the first
thing I'm doing is just starting to
round off this corner here and I'll use
a block plane or something like that
just to start to blend that in so when I
go to do this radius in here I don't
have that wood blocking my view of
what's going on so that radius is made
with the black plane and like this then
I'd take my right angle grinder and I've
got one of these nasty carbide I think
these are called the Galahad or
something like that right angle grinder
attachment and this is a coarse carbide
that really removes wood fast it has no
flex at all to it so it doesn't blend
well it tends to where you touch it it
cuts so I'm using that to remove most of
the wood in that little Philadelphia
tool here and I use this because it
removes a lot of wood really quickly
again it's not precision particularly
it's not going to do a fine job you know
it can with practice but that's not why
I'm using if I'm using it just to hog
the wood out and then I come in with my
other right angle grinder I've got 36
grit on here now you use that to start
to thin the blade down along the edges
here blending it in from the middle and
blending in whatever gouge I made with
the blue tool here and blending that
down to the side I use a couple
different tools to refine the shape in
here this microplane about a three
quarter inch diameter it's really nicely
up in there and I can use that to carve
away the wood and to start to blend this
in fare that out a little bit again I'm
trying not to cut into the shaft itself
I'm just trying to hit the darker wood
here and make a radius so it comes up
and smoothly connects with that surface
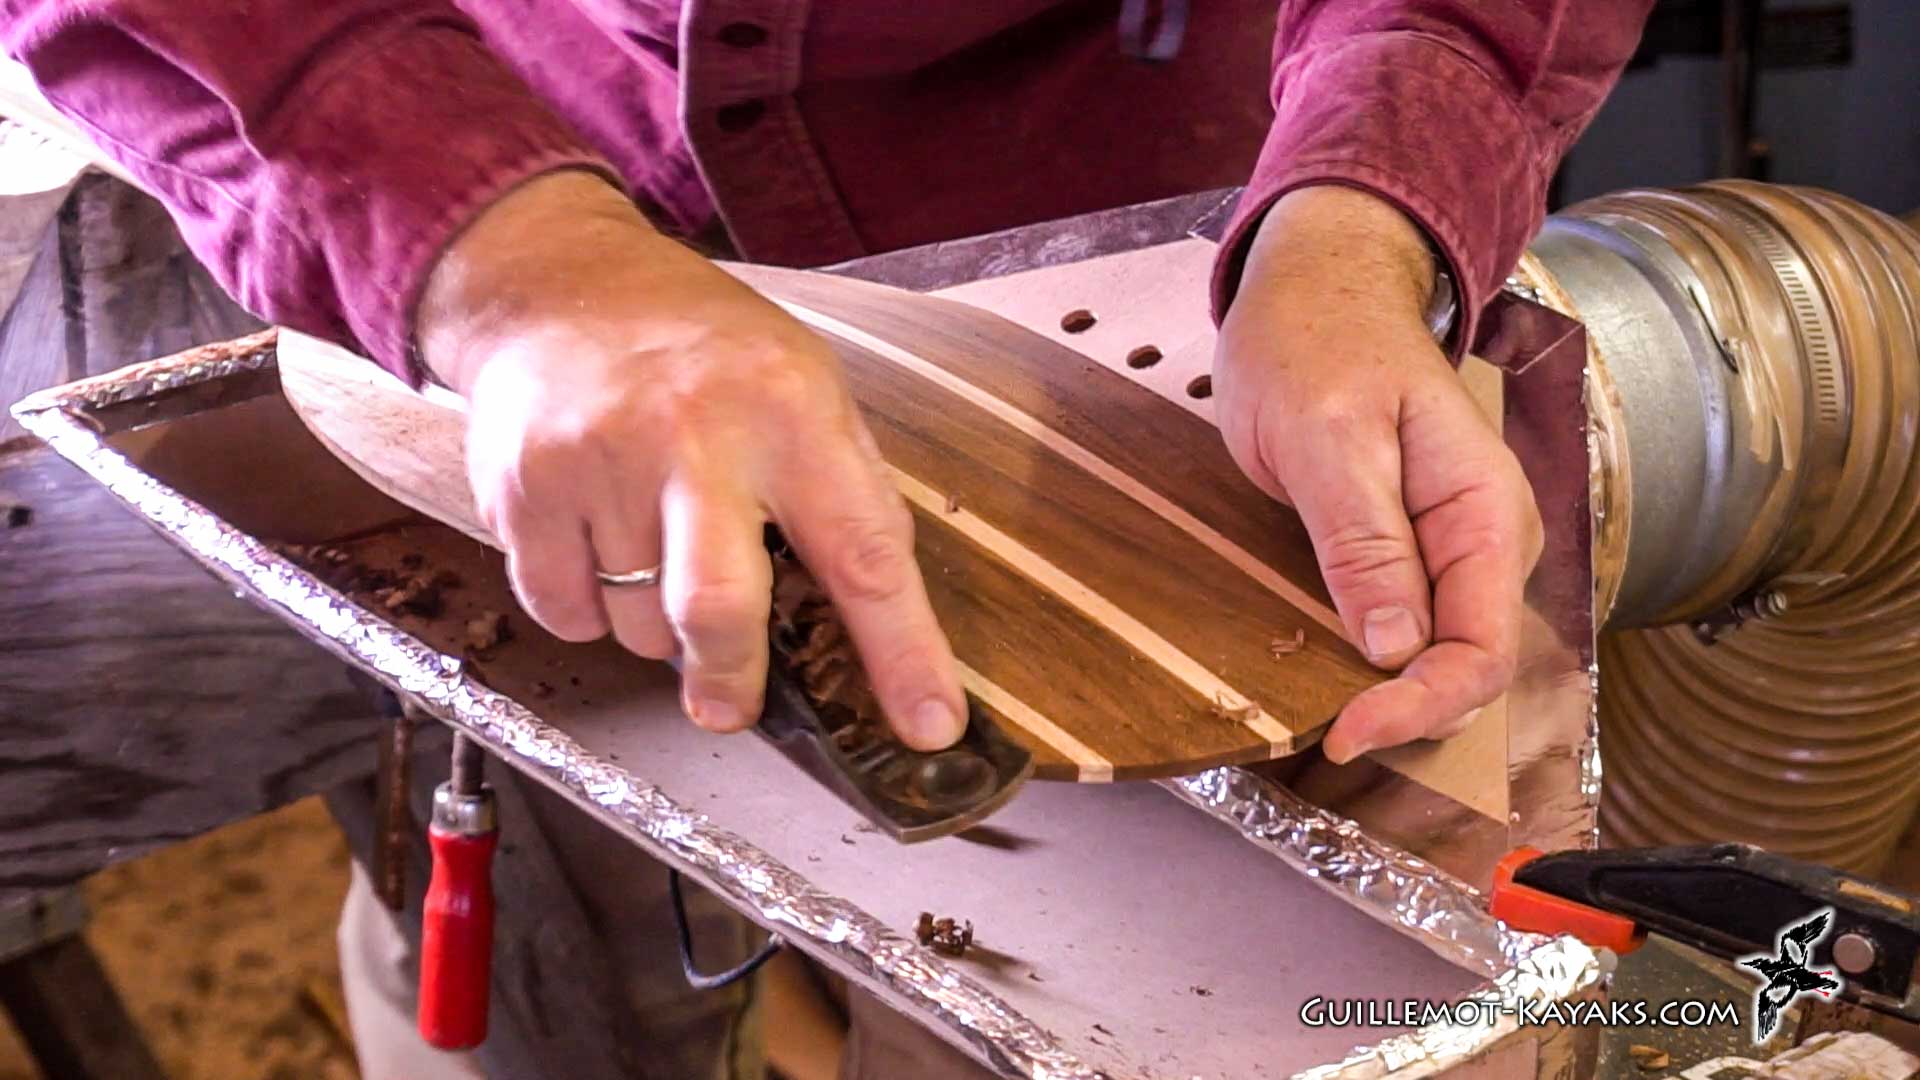
there the final shaping I'm doing with
this little luthiers plane it's got a
rounded sole on it and that again fits
right in there I'm looking to get rid of
all signs of the glue right in that seam
right there I also use a block plane to
come and refine this surface here ferret
out the right angle grinders again and
not very good at faring they're just
removing a lot of wood quickly and you
know I'd rather not use
the right angle grinders they take a lot
of dust in the air that's why I've got
the my dust collector here set up to try
and bring in a lot of that dust that I'm
making with the right angle grinder but
I can do a good job of fairing this down
again I'm aiming for that eighth inch
line I made along the edge send it down
all the way around and this makes the
blade lighter and makes it cut into the
water more smoothly and that will make a
really nice paddle so since I am using
the right angle grinder I have my set up
for working on this based around my dust
collection here that sawhorses and neat
aside I clamp the piece down to the
sawhorse over my dust collection so
hopefully most of the fine dust gets
immediately sucked into the dust
collector and I'm working on one side at
a time so I can clamp it either way and
work on this side comfortably it
wouldn't hurt for me to have this a
little bit higher but this is my
sawhorse height and so that's where I'm
going with again it's a matter of
getting rid of this excess wood in here
blending it into the shaft blending this
shaft down making everything nice and
smooth thin lightweight and still strong
[Music]
[Music]
[Applause]
[Music]
[Music]
[Applause]
[Music]
[Music]
[Music]
[Music]
[Music]
[Applause]
[Music]
[Applause]
[Applause]
[Music]
[Applause]
[Music]
[Applause]
[Music]
[Applause]
so now I'm going to do some cleanup on
the backside here just blend it all in
nicely it's a little bit hard to do good
planing the way I had it when I was
doing the grinding over the dust
collection there so here I have the
cut-offs from some of the blanks it just
give me a good support and this way I
can get a plane on there and apply some
pressure before I do that I need to
reestablish my eighth inch thickness
line around the edge here because I'd
sanded it off in the prior step so I'll
just go once again draw a neat ditch
line out here so at this point I want to
get this blade nice and uniformly thick
get the blend in here really smooth and
nice
make sure there's no to the flat spots
on the back face here and I'll use a
variety of tools to work on that I still
have the micro plane I've got a foam
block with some 16 80 grit sandpaper on
it there's some 80 grit sandpaper on the
sanding block the block plane I still
have my little
luthiers planed and get a variety of
rasp this is one of those Japanese flow
grasps Nicholson here see what it ended
up using a little rat tail file so
whatever I need to get into these shapes
and just blend everything together
[Music]
right here at the throat of the blade
where this shaft and the blade converge
we want to blend this all together so
there's no sharp edges there and get
that the cedar of the blade here to plan
smoothly in to the shaft to the Sitka
spruce and get a nice rounded corner at
the throat of the blade here so I'm
using a variety of tools to get in there
and just blend that all in and the
rounded edge of sandpaper on a foam
block again 60 or 80 grit does a really
nice job getting right in there and that
will make a nice
[Music]
and we'll do the same thing on the other
side so you see here it starts with a
square edge with straight edges on it
and we want to blend that into a nice
curved edge
so that's it for this episode so that's
it for this episode in the next episode
we'll do some finish sanding and put an
edging around the blade and if I'm lucky
I'll get some glass on the blades as
well we'll see how far we get in the
next episode if you enjoyed this episode
and learned anything give it a like or a
thumbs up share it with your friends and
subscribe to my youtube channel or
follow my Facebook page if you're really
into it I have a patreon page it
contributes to the production of these
videos and every little bit of support
helps so until the next episode thanks
for watching and happy paddling.