Transcript:
Hi, I'm Nick Schade at Guillemot Kayaks.
So, I find I have a little time between finishing up the Petrel Play series and starting my next significant build. I think I may be able to knock out a quick project in between. The idea I have is to make a skin on frame version of my microBootlegger Sport.
I was hoping to strip-build one of these last spring, or maybe this fall, but the last video project just took up too much time. With this build, I hope to accomplish two things: make a cool boat for my own use, and try to find a quicker way to produce an informative video.
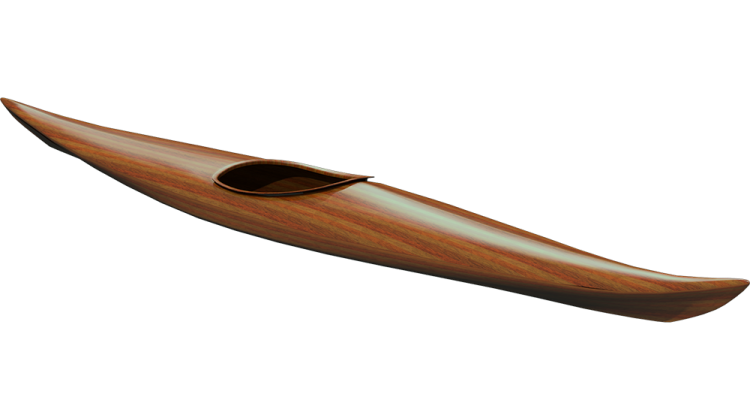
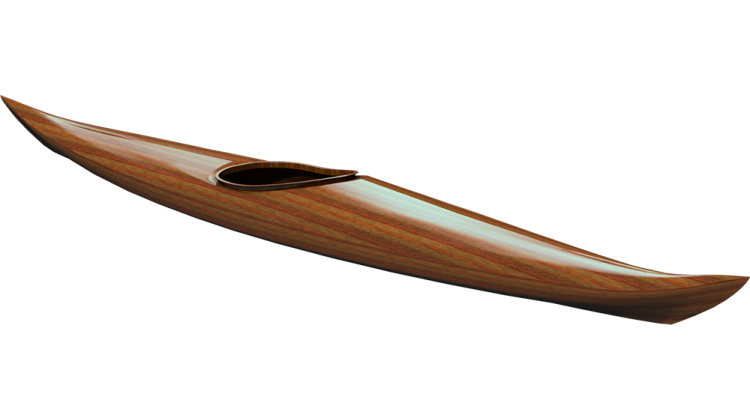
The boat I'm looking to build is one I designed in 2015 for a customer. I built it for him in 2016 and added the design to my Fine Strip-Planked boat classes and my catalog later that year.
The design really excites me. It is a cross between my microBootlegger Tandem, which is a fairly sedate two-person kayak, and my Petrel, which is a high performance sea kayak. It has elegant lines reminiscent of a 1920 rum runner, with a sophisticated transitional chined bottom shape of my favorite sea kayak. It is shorter overall than the Petrel, but has a similar waterline length, with a little more beam and more room in the cockpit.
As such it should it falls somewhere between my Petrel Play and the Petrel design. A fairly stable design with the ability to move quickly when needed. The microBootlegger is comfortable cruising on a quiet lake or ripping down a wave in a tide race.
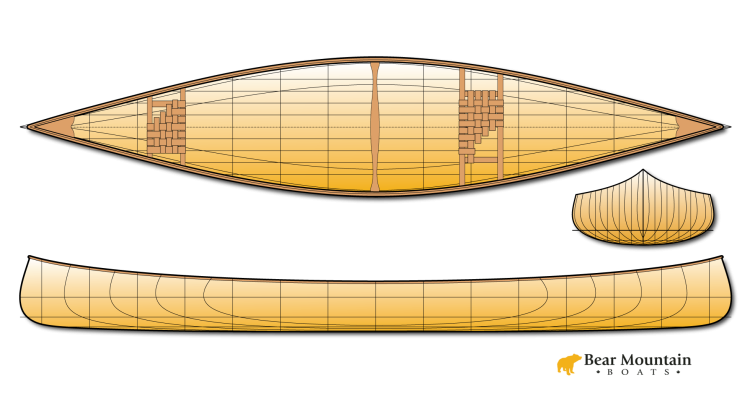
I have the strip built design developed and 3D modeled in MaxSurf. This model represents the desired surface shape of the kayak. Since I can build almost any shape with strip planking, I didn't model in too much construction detail.
The skin-on-frame building style I plan on using is called fuselage frame, where long strips, or stringers, of wood are bent around cross-sectional frames. This is actually very similar to strip-building, except, the frames are part of the finished boat, and there are big gaps between the strips. These gaps are covered with cloth as the skin.
To adapt the strip-built model to skin on frame construction, I need to figure out where the stringers will be and then create the frames to hold them in shape.
I want to keep the stringer shape as simple as possible. One way to simplify the shape is to be sure they only bend in one direction, or on one plane.
To accomplish this I create reference lines in the model. These references can be horizontal waterlines, or possibly diagonals running from the centerline out towards the side.
When seen from the end or body plan view they appear as straight lines, but when viewed from the side, you can see they cut the outer surface in curves. I can then retrace these curves to create stringer locations.
I switch between the different views to see that the stringer curves follow the guides in top and profiles views while staying flat and straight on the reference lines in the body plan.
This design does not have a traditional gunwale or sheer line. It is more of a continuously rounded cross section from the keel to the deck center. As the primary structural component, I am creating an inch and half wide stringer approximately mid-way up the side.
Below that I add a stringer following a diagonal that intersects the waterline.
To recreate the transitional chine I follow a diagonal that runs along the hard chine at the stern of the boat, then towards the bow where that chine softens, I add two separate diagonals intersecting the first at the widest point. I can use these to essentially split the stringer, creating two chines dividing off from the one.
I use a similar technique to create stringers on the deck.
Once I have a series of stringers defined, I can then skin those stringers with a surface. I need to be sure the stringers all run the same direction for the software to handle them correctly, but now I have basic shape for the boat. With a little refining I get a form that is quite similar to my original strip-built design.
The original cockpit is recessed front and back and curved upwards at the end. I want to simplify it to eliminate the front recess and flatten it out while keeping the rake.
This involves sliding the surface controls up or down until the bottom points all lay on a straight line.
With the shapes defined I need to decide where the frames will go. I start by determining the center of buoyancy, place that in the design and adjust the seat location accordingly.
The frames all draw their location off the seat location so I am not sitting directly on a frame, and the footpegs are between frames. And then filling in any gaps as needed.
I then pull the basic frame shapes into Vectorworks where I start placing stringers. The main stringer is oriented vertically along each frame.
I just place a representation of each stringer where it should cross the frame. The orientation of the cross section is determined by the angle of the diagonal and how the stringer will touch the skin.
The stringer sections are then clipped or subtracted from the frame shapes.
The fabric that will make the skin can stretch a bit when the kayak is sitting in the water. I don't want the skin to rub and abrade on the frames so, I curve in the edge between the stringers by subtracting sections of circles.
The centers of each frame gets cut out to save weight and so your legs have some place to go. I thought I would just offset the frame perimeter by a uniform amount, but this created funny shapes. I decide to instead base the shape of the hole on the outer skin shape and offset from there.
My plan is to stitch the skin to a flat plywood section around the coaming. To facilitate that I thought it would be a good idea to punch a bunch of stitch holes. Since I'll be cutting all these parts with my CNC machine, the vast number of holes shouldn't be too onerous.
Once I have got all the parts defined, I need to lay them out on plywood for the ShopBot to cut. I can do a bit of nesting and in setting to try to be efficient with the material.
In the next video I hope to cut out the parts and maybe cut some stringers. We'll see how far I get.
If you think this is an interesting project please let me know. Post your questions to the comments, and subscribe to see more videos like this. And best yet, help me focus more on providing you with good content by supporting me on my patreon site.
Thanks for watching and happy paddling.