Nick and Bill are building a petrel play SG kayak kit from Chesapeake Light Craft. In this stage, he and his friend Bill have attached the deck back to the hull and are preparing to fiberglass the deck. Nick explains the process of peeling off the tape, rounding the edges, and adjusting the deck-hull joint to ensure a smooth transition for the fiberglass.
They use various tools like rasps, planes, and sanding blocks to round the chines (sharp edges) and joints on the deck. Particular attention is paid to the areas where the stained and unstained surfaces meet, carefully knocking down high spots to maintain a crisp transition. The cockpit recess and hatches also receive similar treatment to prepare for the fiberglass.
At the hatch recess, Nick demonstrates creating a small thumb hole in the fillet to aid in draining water and accessing the hatch lid. He then addresses scuffing the deck-hull joint area to provide a rough surface for the epoxy to bond with during the glassing process. This involves using rasps and stiff sanding blocks to knock down any high spots or irregularities.
The final step covered is finish sanding the deck, taking extra care around the stained areas. Nick emphasizes using scotch-brite pads and avoiding sanding the puzzle joints to prevent damaging the stain. Throughout the process, he shares tips on tool usage, techniques, and maintaining the aesthetic appearance of the kayak.
Chapters
- 0:00 - Introduction and Context
- 0:24 - Preparing the Deck for Glassing
- 1:10 - Removing Tape and Rounding Edges
- 2:00 - Rounding Deck Chines and Joints
- 6:06 - Adjusting Deck-Hull Joint and Stain
- 10:13 - Rounding Cockpit Recess and Hatches
- 13:32 - Smoothing Ends and Creating Thumb Hole
- 16:13 - Sanding and Scuffing Deck-Hull Joint
- 19:07 - Adjusting Sharp Angles and Overhangs
- 27:23 - Refining Edges and Seams
- 36:05 - Final Surface Preparation
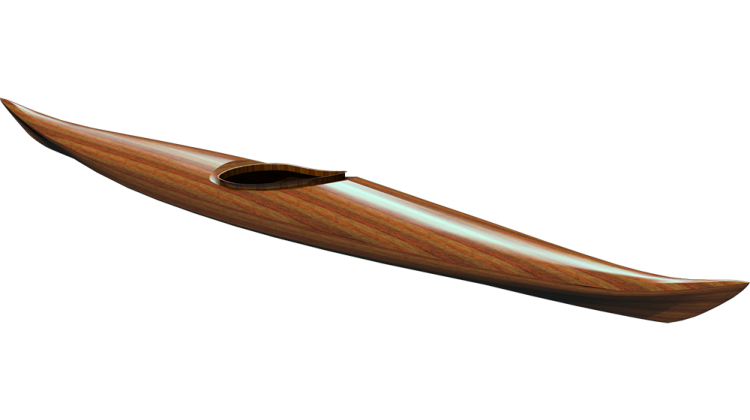
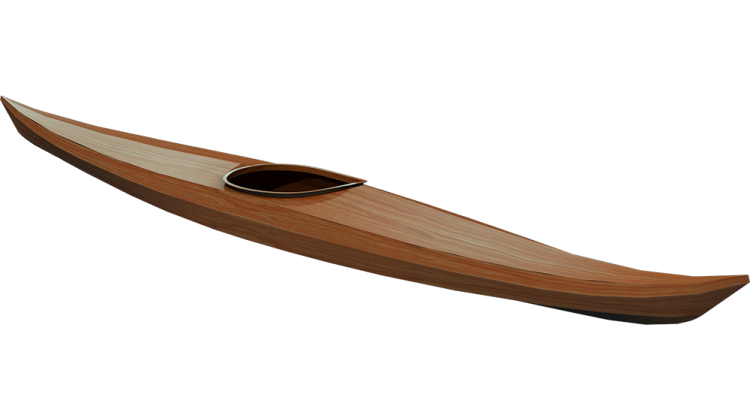
Hey, welcome back to The Guillemot Kayaks Workshop! I'm Nick Schade, this is Bill, and we are building the petrel play SG. This is a kit that Chesapeake Light Craft makes; it's my design, and we are building a Chesapeake Light Craft kit.
At this stage, we've attached the deck back to the hull. It's taped on the inside seam with some fiberglass tape, and now we would like to glass the deck. This deck glass will wrap down onto the hull, and that's will be reinforcing the outside seam of the deck to hull joint by just having a continuous piece of glass there. Hopefully today, we will get all the chines and so forth rounded over, touched up, fiber, then fiberglass the deck, and then the last thing I'd like to get is the combing in place. So let's get to it!
We will start out with peeling the tape off - lots of tape. This, and if you're wondering where the green tape is, I peeled that off; it may show up in the previous episode. I peeled it off while the epoxy was still a little bit soft just to make it a little bit easier to peel off, so it disappeared at some other point. But this strapping tape comes off easily later on in the process. There might be a few little threads of fiberglass left; most of that will come off in our later cleanup work.
Like we did on the hull, we want to round over the chines, the joints between the panels. The fiberglass doesn't like to wrap around anything too sharp, and a lot of these joints on the deck aren't particularly sharp, but the chine right here is. There's this is a pretty hard angle, and this is fairly structural. We're going to like, I say, be glassing down over onto the hull, so we want to get a good radius on that.
Using the rasp can be a good way to deal with this. We start out with sort of a quarter inch wide flat spot, and then you can ease that up and round that. We're making that flat spot, and I'm using the coarse side of the rasp to begin with to get the shape with that, and then we can clean it up with the finer side of the rasp - rounded back there. So we want a nice radius there.
There is a little bit of squeeze out from gluing the ends of the deck down onto that end pour, so some of that we can take off to the side, level it right flat down to the wood of glass, and they'll disappear. Alright, so let's start with the shear line here. Go full length both sides, and again, start with a quarter inch wide, and we can try some different tools. Here's a block plane; get that quarter inch wide with that, see what you're comfortable with.
"Okay, so when you say a quarter inch wide, what you're looking at is where the edges of your chamfer are, right? So this is the deck panel, this is the hull panel, and we've sort of split the difference between the angle of this and the angle of that, and we've made a flat spot in between there that's about a quarter inch wide, you know, which is, you know, five to six millimeters, something like that. And this isn't highly calibrated, but just try and keep that consistent."
"Yeah, yeah, you're splitting the difference between this face and this face, so about an eighth of an inch on either side of the, you know, if you're using a rasp, don't hold it down close to the surface. Don't hold it close to this surface; get the angle on both sides about the same."
"Right, yep."
"Got it, let go this way, right? You'll find that the grain of the plywood makes a difference in how easily it planes."
"Right, and then as the chine changes, you have to change the angle of the plane as well, yep."
"Just shave some of the glass off. Went down too far, my angle. That's the trick is to think about that angle, so get that quarter inch yep wide without trying to get anywhere near either face, right? Just a good chamfer in between both, we'll worry about rounding it over later, okay?"
"Yeah, and what I was trying to do is hit that edge alone, right? So I tilted."
"Yeah, if you're thinking you need to hit that edge alone, it's probably because the edge above it is sticking out too high, yeah? So it needs to be planed down. So if there's something sticking out, you want to plane it down."
"Yeah, these things are really pretty impressive in this. Oh yeah, since we've got the fiberglass there, yeah, it dulls the planes really quickly. The planes do a great job, yeah, but it dulls them. This is some sort of carbide material; it just doesn't dull it. It's just really aggressive, yeah? So you want to be careful with getting, you know, getting that first initial chamfer at a quarter inch wide. This will do a great job, and since you have the length here, it's easy to calibrate, see your angle there, where with the plane, when you're going along here, you know, finding that angle is a little bit trickier, yeah? Um, so a rasp or this thing, again, these are made by Cuts All, and they're really mean, nasty-looking things. Give that a try, all right."
"Yeah, that's much nicer, it, yeah, it's just easier."
"Yeah, just seeing what yours looks like. There's a few places where we had some epoxy seeping through the seam and filling up the tape, uhh, which leaves some lumps that we're going to have to deal with."
"Okay, all right, just got to round it a bit, look. All right, little wide. Yeah, I'm just feeling it, and right now, the downside of that coarse rasp we're using is it's a very fuzzy surface now, and I found I went over the whole thing just with my block plane, okay? Oh yeah, and that got rid of the fuzzies. I'm still doing the chamfer; I'm not doing the round over, uhhh. That cleans up the fuzzies on that. Oh yeah, that looks good now."
"And then once we've got the chamfer good, then it'll be a little bit more care on knocking the corners off of the chamfer, right, to get a nice round over. And the plane, you experience that, where it will grab the glass, yeah, and start to peel the glass up, yeah? And you, you know, we, we'll have these, you see these white scratches here? I see them, yeah. Those are sort of bro, epoxy pulling off the glass, okay? So we, we want to get rid of that. So the aggressive rasp tears into the glass a little bit and, um, breaks up the epoxy. So the fine side of the file here, start to round over that edge, and again, we're going to feel for a nice smooth surface there where you don't feel any edge, okay?"
"Okay, and you know, we'll do a first pass with the rasp, or you could do it with the sanding block, but with the sanding block, you want a fairly stiff sanding block. This is soft enough that if I started to do it up here, it would start eating into the color a little bit more aggressively than we want, probably fine on the hull side, where we've got a layer of glass there to protect everything. But we will want to not disturb the color over here to the best of our ability. We are going to come back here later and restain this section."
"So if we mess up, we have an opportunity to do something about it, right? We'd rather not mess it up; it'll look better like this than having it touched up, okay? Again, we went by with the quarter inch wide chamfer, and then we knock the corners off that chamfer, create a more rounded surface here, and running our hand over it, you can feel the edges going away, yep, yeah, all right."
Here's the continuation with capitalization, punctuation, and paragraph organization:
"Yeah, doesn't take too much, no, it doesn't take much at all. So here we've got a little bit of squeeze out from gluing the deck down. Again, I'm going to take the rasp and just level that. Oops, starting to chew into the wood there. If I wipe this down area down with a little denatured alcohol, I can see if I've removed all the fillet material, and yeah, it's all gone. There's a little left in the hole that'll clean up easily."
"Sh..."
"I check it out, see if that seems pretty good to you? No, it feels good. Right now we've got a really pointy end here. I'd like to make that a little less pointy, so I'm going to do just cut off the tip a little bit here. This is known as a circumcision, and then we will shape that up nicely."
"Just again, so the glass can go around it, so you don't put an eye out with your kayak. So you actually have a little bit of the fillet exposed, yeah?"
"Yeah, so again, so it feels nice and smooth, no little sharp bit sticking out. Do the same thing at the other end. Go here, yeah?"
"Sure, there's not a right answer on this. It's just whatever you think's going to look good."
"Okay, you don't need to push hard with those, full s's there. You go, I went a little deeper than you, but he, yeah, so now just ease all the corners. Careful which way you go, though. Let me see."
"Yes, I don't go as aggressively as you cuz I'm afraid to make a mistake. What constitutes a mistake here, going against the grain and, yeah?"
"So right, you can pull some grain out at this point, really. A mistake is just something that doesn't look nice, okay? It's really hard to do anything that's going to like make the boat not work anymore."
"Okay, so take a step back, you know, look at it from the side. So look at it from the side, get your eye down there. Oh, I got a flat spot here, yeah?"
"Right, so how do you get rid of that flat, you know, and is there anything wrong with that flat spot? I don't think so, no. Does it look good? I like it; actually, would it look better without a flat spot? I think that's aesthetic; it is aesthetics, absolutely. I just, you know, you don't like the flat spot. I don't like the flat spot, so you know, if I were, so go down like this, yeah? I find sort of the top of the flat spot right in here and knock that down a little bit and see how much did they remove there. Is the flat spot still there?"
"There's less, yeah. It, you know, it doesn't take much."
"Right, and it just sort of blending it in there, yeah? And then go to the finer side of the file, and again, run your hand over it, you don't feel anything weird going on, and, yeah, it's purely aesthetic, yeah? At this point, and you know, I, I just like to have, you know, something that's supposed to be flat should look flat, something that's supposed to be rounded should look rounded. If it's not sort of sure which it is, you got to make a choice, but choose one or the other, right?"
"Well that, I think that's good, yeah."
"Yeah, yeah, that's nice, yeah. No, that, that looks good. We've got the sort of long shear line here done pretty much now. We have these other chines on the deck, and most of these won't require much at all. There's a pretty shallow angle there that the glass will handle, but sometimes there's sort of an overhang where one side's higher than the other. You can feel something up here where just if I hook my fingers on it, there's something for my fingers to grab. In order to get rid of that, we're going to have to knock down the higher edge there. So right in here, there's a higher edge. I'm taking the plane and very carefully seeing if I can run it up there, and I, I talked about this in another episode. If you look under this plane, you could probably see light; it's not going to do anything if I hold it this way, so you can see under there, see light? And even if I turn it quite a bit, it's hard to turn it enough to get rid of that light."
"I'm just going to plane it down enough so there's no ledge left. There's a little bit of a ledge over here; we have some of the CA glue we used to spot weld this together when we glued the deck and hull together, and we had it all taped together. So before we taped the inside seam, when we had strapping tape on the outside, we put little dots of CA glue along this seam here just to be built-in suspenders to hold that joint together, and here we got a little bit more of that CA glue than we needed, and it dripped down the side. And so we have these drips here; may make it a little bit tricky to get past there, but I'm again, I'm just trying to shave this corner down efficiently that there's no longer a jump there."
"And I'm sticking to that bisecting the angle, you know? We're making a chamfer here, so if I were to go flat against one surface or the other, it's very likely I gouge the plane in there and lift up a bunch of stain down here. It all feels really good here. We have a little bit of an overhang right there, so you get the picture, yeah? And it's all in the hands, feel the surface, and if, if you feel that sort of like, right there you feel that, yep, versus that, mm-hmm?"
"Now are you going to use this plane to knock down this a little, the whole thing a little bit, or you just want to knock off any high spots right now? Let's just worry about the high spots, just the high spots."
"Okay, yeah, there's a little bit of epoxy to fill it, squeeze through here, so I'm just going to knock that down. Be quite careful, it corrects really quickly, yep. If we did a really good job of lining these joints up, then we could do this and have a really fine uniform pinstripe down here, and we could say, oh, that looks cool, we don't need to touch it up, uhh. But chances are it's going to be varying enough that this, the width of this line, would change along the length, and so it wouldn't look cool leaving it as a pencil, right?"
"Right, if we can get away back here without doing anything, that would be great, but we might not be able to, you know? Up here, I'm sort of happy to do any adjustments here we might need to do adjustments, but I'd like to avoid them if possible with these two panels. This has got stained, and this has got stain, right? So this has stained, this doesn't have stain. So when we go to correct the stain up here, bleed out, yeah, this is easy to correct the stain, right? This is here; you got to be much more careful, yeah? When we did the hull, there was a place along the chine where we transitioned from stain on one side to no stain on the other side, and we didn't correct it at all because it was on the bottom of the boat, and you can't really see it, and we did a pretty nice job. But this is pretty visible, and right now this is a really nice crisp line between the two, yeah, it looks good. It, it really looks perfect, so if we can get away with without having to do any correction there, that would be awesome. I'm not sure that we can, so like right here, I'm feeling a little bit of an overhang. You feel that, yeah? So if I just held the same sanding block flat on the unstained surface, now feel it, yeah, that I've removed a tiny bit of stain on this panel, but I've left a really nice crisp, yeah, still a good line, line there, yeah? So that was a situation where the stained was higher than the unstained, right? So I could easily knock it off, but if you got to, yeah, right, okay?"
"Here we have a situation, so right in here, I'm want to be very careful if I sand this surface because even though we put the epoxy on there to protect the stain, the epoxy is not very thick, and the stain's not very thick. It's really easy to cut all the way through that stain. So having something that is very precise to cutting only where you want, that's why part of the reason I use a plane on this, the stuff is because the only place the plane cuts is right there, and the rest of the surface is really flat, where with a sanding block, this is flexible. So if I'm trying to sand right at that edge, it's hard to keep it from sanding anywhere else because it's so flexible. So having some sort of stiff block, so this is just the same sanding paper on a hard piece of plastic, and so now that edge is gone. It's still crisp, yeah, and it's still pretty crisp, and you're using your thumbs on the back side of that to hold it off the deck, yeah? Right, so yeah, I'm making sure nothing else hits the deck other than the spot where I want it sanded. So I've got my fingers is directing where I want the work to be done, and then my thumbs here just keeping this edge from hitting the stain, and it's pretty easy to go too far there, much either. It doesn't take much at all, you know? It's a very fine edge there, you know? There's various strategies to doing this, and this is purely an aesthetic thing, right? It doesn't, doesn't matter to the boat; it's going to work fine, but you know, we're trying to do a pretty boat. Let's do an inspection of all of this, make sure there's no other places. Right up in here, there, there may be a little bit. There's a little here, yeah, have at it with that, and this is another place where, you know, I've said in the past, be intentional. So really, okay, what exactly am I doing? How is this tool going to do that? Do it, see that it did what you expected it to do, and do it incrementally rather than try to do, yeah, don't, don't think you got to rush through this. This isn't going to take very long, even if we're really careful about it."
"Around the cockpit here there's a pretty sharp angle. Start working on knocking that down. So up here we have sort of a chine going on here between the side panels and the cockpit recess, and then back in here, the recess sort of dips down. So this is quite a sharp angle up in here, and glass is going to make it all the way around here. It's going to come up here, down, and then over, and it's a place that the glass is apt to get a little bubble or something because it's having a hard time getting over that edge. Again, that idea of starting with a chamfer, making that chamfer for all up and down that edge, and maybe go for 3/8 inch, 8 millimeters, something like that. This piece of wood sticking up a little bit, we'll want to blend that in a little bit with sanding at some point, but for now we'll just sort of work on that later. This is another situation we're having a good stiff sanding block there, yeah? So we start with the chamfer there, and then ease that head over to round it over. And again, the touch test, do the same on the other side. We're systematically going through the whole boat and finding places where we need to get rid of high spots and blend this in."
"So at the back of the combing there, this is another place where we want to think about. We got a nice crisp line right here, but we've got a little bit of an overhang, and here, here we've got some grain that we're thinking about. If we were to go across here, we'd end up scratching this grain up. So you know, carefully going up and down the grain, it doesn't take much. I'm moving this crisp line back ever so slightly; nobody's ever going to notice."
"And that was with 80 grit or something. This plane on the other side, so we have around the cockpit front and back, around the hatches front and back, all need the same. Right here I've got a little bit of a, the stained bit is slightly low relative to the unstained bit on either side, so again, try and knock that down, make that step go away, trying to keep the crisp color change as much as possible. So even here, even if there's no lip, we still want to do something or just leave it alone? I think you can leave it alone unless, you know, unless you see an aesthetic reason to do something, okay? You know, there's a little bit of an edge there, you know, just, yes, barely touch it just to ease that ever so slightly."
"Okay, this little nubbin at the front of the hatch recess, we can carefully just knock that down, level it down, surf to the surface of the deck. There's a little bit of squeeze out here, so this is perfectly aligned, so we just leave it alone, yeah? We, we will need to round this one over because this is so drastic. The other thing that we're going to do here, remember we've got the big fillet back here for a drain hole? We'll cut a thumb hole in there, but let's just finish up the sanding, then we'll break for lunch, and so we'll give a little bit of an ease there, not too much, but not too much, right?"
"Now idea too is if you do just about the same amount all along there, you get, you get the line that's going to be still good."
"Really blends up nice when you, yeah, okay.
"So we have finished up sort of the first pass at all these corners here, and then we took a break for lunch. What I want to do next is we're going to eventually wrap glass from the deck down onto the hull an inch or so down here onto the hull. I want to scuff this up so when we go ahead and do that fiberglassing, the epoxy has a, you know, roughened surface to bond to, and the process of doing that we may end up sort of hitting some of these edges a little bit. We're going to do a bit of finish sanding before we're all said and done here, so I just want to take care of this scuff sanding before we get too far along.
We could do this all with hand sanding like 60 grit or 80 grit something like that, but I have power tools, so I'm going to use a power. Just going along that whole edge, want to give it a try, sure? We want a couple inches down all the way along that hull. It looks like you're going pretty aggressive. I am going pretty aggressive. I've got 60 grit there, there. I, I want to get rid of basically all the shiny bits, so this is still a little bit shiny up there, so that's not ideal. Here we've pretty much gotten rid of most of the shiny bits. You might find some sticky out bits; we want to level things out. We don't want to dig into the surface at all, right? So keep it flat to the boat, yeah, keep, keep the tool flat to the boat."
"Okay, yeah, it looks good, yeah, yeah. You know, it doesn't need to be perfect, right? This isn't finished sanding; this is just scuffing."
"That's smooth enough, yeah, yeah. And remember, we're not trying for smooth; we're trying for scuffed up, so okay? So you're not even worried about the bumps yet, yeah, I'm not particularly worried about the bumps. To the extent that the bumps are keeping us from getting it scuffed up, then I'm worried about it, but I'm not that worried about it, okay? And we will give the whole thing a scotch-brite rub down, oh, so the gloss would, whatever is left, okay? But that's a good start."
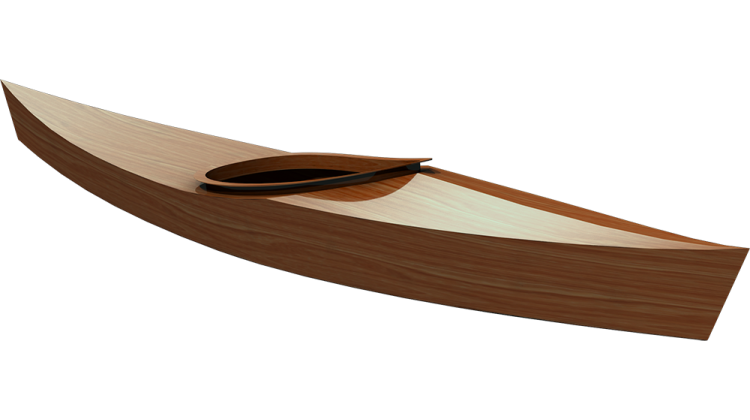
"This is where the hatch is going to go, and just to help you visualize that, the hatch is going to go in like this. This can be a little bit tricky to take the lid off because it's fairly tight in here, and then this whole thing can fill up with water a little bit. One thing I'd like to do, it's not a requirement, but we've discussed this a bit already. We put a big fillet down in here that comes way down like this and way down like this. I'd like to make a little thumb hole there that will help drain the water out of there and also if we should have the tab here tight like this, it makes it so there's a place to get your finger under that tab. So my tool for that, oh yeah, is just little drum sander. I'm sort of looking for the narrowest place here and just make sure the fillet's in that spot, and then I'm going to press this down in there."
"And I'm starting with a small diameter here. I can switch up to a larger diameter, but just to get it started with that, and go up to a slightly larger diameter, and you know, this is sort of, doesn't matter what size it is, but, but that's the sort of idea there, you know? I could go deeper, so you see it just gives a place to grab that if it should end up there, and now it's that much less water that'll collect in there, and you see we've, we've carved into that fillet there. You want to do the other side?"
"Sure, and if you move it back and forth so it tends to get a little dumbed up in one place."
"So now go the bigger one. The reason for doing it in two stages is a little bit of practice with the smaller one, and if you screw it up, you got some room here, yeah? About the same, aren't they? I would say, yeah, pretty close, yeah. I wouldn't want to go much more; I don't think. How much room do we have in here? We do have room to go deeper if we wanted to, but I'd say let's call that good, yeah?"
"The other thing we have is the wires here; those wires are still sticking out. Remember the drill from last time for dealing with those wires, oh yeah? We just put a little tape over them, and then that wire is sticking out, and this, there was a little drip of CA glue there too, took down that little drip of CA glue, so now those are pretty flat."
"Yeah, and as before, they don't have to be absolutely flush, right, yeah? As long as they're sort of flush with the tape, the glass will bury them. So when we were taping up the seam, I talked about sticking the tape down, making sure there weren't any wrinkles because the epoxy will flow through. So here's a place where some epoxy flowed through here; we have no stain, so we can probably be pretty safe in, you know, just going down with a rasp, getting it down close to level, and then hitting it with a sanding block and leveling that out, and you know, basically that disappeared. Up here we have a place where it's on the stain. I want to show you something with the stain, just, I've said this, but you know, people might not believe me. So here's something that I've just stained, it doesn't have any epoxy on it. I'm going to take a piece of 120 grit sandpaper. You can already see a line here that's just two strokes of 120 grit sandpaper, that's showing a light spot."
"Take a power tool to this, yeah, you see the scratches in here? They, they show up immediately, so we, here we have another place where the tape was lifted a little bit. This happens to be where the copper wires were that may have been what was holding that piece of tape up. I want to lower this down. If I were to glass right over this, the glass would be forced up, lifted up a little bit, then when we go to sand the glass smooth, we'd sand right through the glass at that spot, so we want to get that level down. I've talked about not using a soft sanding block for this because that conforms over the whole thing. If I take a rasp or something that's stiff and hold it right flat down against the surface, basically the only place that's going to cut is the highest spot, and I've got some protection here. I've got the, the tape on the end of the graus or file, and so I can work that down, and see the only place that's getting scuffed up is the high spot. This would not be the same case with a soft sanding block; I'd be sanding all the way around here and sanding into that before I got that high spot knocked down. So I'm pressing the tool into the place I want, and now I've got it, and now if I take a little bit of sandpaper on a stiff block, again, I can blend that in. I'm starting to get some scuffing around it, but now that's nice down tight and flush, so the glass will go over that without much of a ripple. So we just want to give the whole boat an inspection for that kind of situation.
"So like right here, there was a little bit of the filling mix, um, squeezed out in this puzzle joint. We can do the same trick we did with the copper wires, knock that down, and we haven't made the thing go away completely, but we've knocked it down enough that the glass will go over it, and, and again, we can give sort of finish it up a little bit of sanding. Be very cognizant of any place else that this might be sanding, so you're concentrating your effort on the place where it needs it. I think we're ready to sort of do a bit of finish sanding, okay?
So the plywood we can get a good aggressive sanding with 120. Don't need to be too aggressive, but you don't need to be shy either, sand with the grain. For the stained wood, we'll take a little bit more care than we did with the hull, trying to make this look good. We'll go over the whole thing with a 120 on a stiff board just knocking off the dust nibs so it feels a little bit smooth to the surface.
As we're doing this, be careful, basically don't even sand the puzzle joints because where this sticks up, if you do a couple strokes on that, you'll go burn right through that spot.
Then we'll go over the stain with a scotch-brite pad just to de-gloss the rest, and we can take the scotch-brite pad and de-gloss the areas below this year that we didn't get sanding, get onto those puzzle joints with the scotch-brite.
So let's call that it for this episode. Later in this same day, we will actually apply the deck fiberglass. We also need to cut the opening to the skeg control slot. We'll just put that into another episode and call this episode done.
So if you've stuck through this episode all the way to the end here, you're probably enjoying this. Why don't you turn on notifications, hit subscribe, hit like, share this video with others? If you're really into this stuff and would like to support the production of these videos, I do have a Patreon site, there's a link down in the description. But just having you guys watch all the way through this, that means a lot to me and really supports what I'm trying to do here. So until the next episode, thanks for watching and happy paddling!