In this episode Nick Schade and Bill continue to work on assembling a Petrel Play SG kayak kit from Chesapeake Light Craft. They begin by cleaning up the sheer line between the deck and hull, sanding down any rough spots or epoxy drips. Next, they prepare the hull in a similar manner, ensuring a smooth surface for the tape.
The bulk of the video focuses on the process of joining the deck and hull together. This involves carefully aligning the two pieces, using tape dispensers to apply tension and hold the seam tight. The hosts explain various techniques, such as using their bodies to apply pressure, and utilizing a putty knife to reach tight spaces. They emphasize the importance of taking the process step-by-step, rather than trying to do it all at once.
Throughout the video, the Nick provide tips and insights based on their experience, such as the benefits of varnishing the interior and the importance of using high-quality tape. They also address common challenges that may arise, like gaps or misalignment, and demonstrate how to troubleshoot and adjust as needed.
The video is intended to be an educational and informative guide for those assembling a similar kayak kit. The hosts' calm, conversational tone and hands-on approach make the complex process seem accessible, even for those new to boat building.
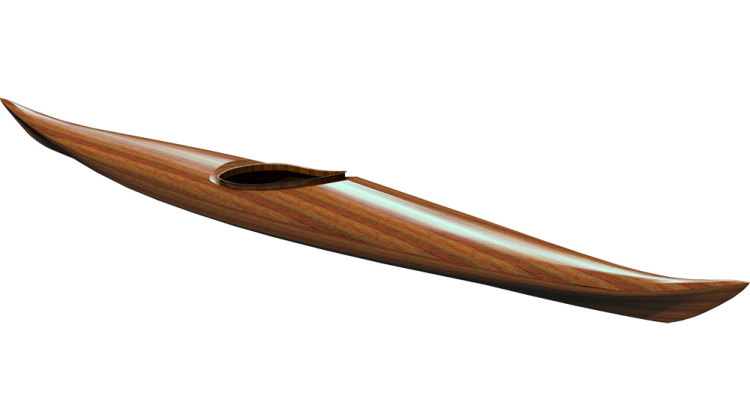
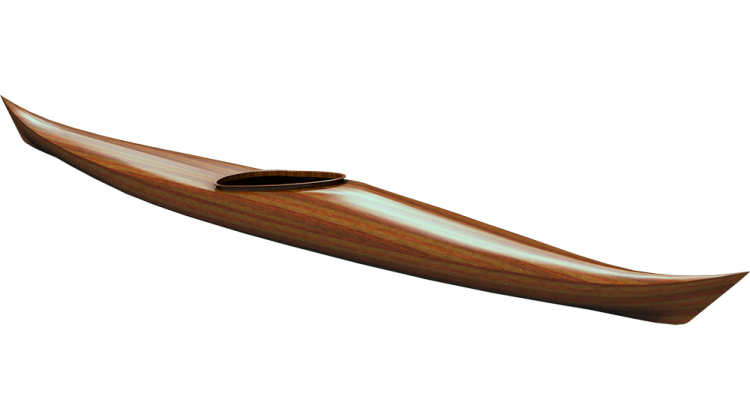
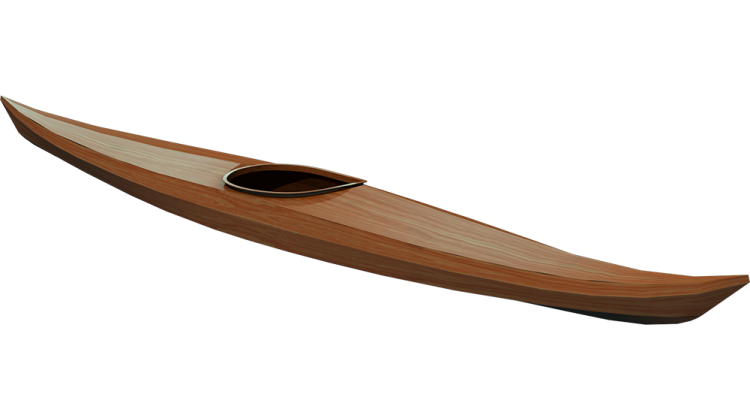
Hey, welcome back to The Guillemot Kayaks Workshop. I'm Nick Schade, this is Bill, and we are working on the Petrel Play SG, a kit that Chesapeake Light Craft makes of my design. They provided me the kit, and Bill and I have been putting it together. I think we're still only just over a week's worth of time in the shop so far, but it's been spread out since like before Thanksgiving and now, nearly March.
The deck is all put together, it's ready to attach the hull. What we will be doing in this episode is getting the deck and hull mated together and taping the inside seam. To get the deck and hull ready to put together, we want to clean up the sheer line, the part line between the deck and the hull. It's got epoxy drips on it, a little bit of fiberglass still hanging out, and it's got a little bit of a bevel on it. We want to make sure that's all clean.
We also want to clean up and sand the surface of the inside of the boat where the tape is going to be and just find any sharp spots that we want to eliminate before we can no longer easily access the inside of the boat. We'll start by just cleaning up this edge here, taking a plane and making sure there's no fiberglass sticking up. We're not trying to adjust the angle at all, we're just trying to get rid of goobers of epoxy and make a nice smooth flat surface there.
And we can use a rasp here, can do a nice job. See what works well for you. So you're trying to knock down this edge? I'm just trying to, you see this flat face there? I'm trying to make sure there's no epoxy on top of that flat face anywhere. So we're not changing the shape of it, and we don't need to make the epoxy completely gone, we just want a nice smooth there.
At the end here, I'm not sure what to do as far as what right. So when we get the hull out, we'll have to look at that, but it's got these bevels open at the top. So if you imagine this upside down, it would be kind of like this, and this right now we've got fiberglass on that edge right there, and we want to clean it up. Okay, so if you see the bevel back here, we want to continue that down a bit and then roll it out to about a 45, which there should be a 45 hidden under all that epoxy and fiberglass.
So we're cleaning this bit up and then sort of blending it in to this 45 back there, and trying to make it clean there. And again, the plane or the rasp, technically you could use some sandpaper, but I'd want sandpaper on a really stiff board. And remember, we're trying to match that 45 that's like 45 right there. If you're holding it like this, then you're going to be, you're taking away a part it doesn't need to be, so just concentrate on this angle, and you know, that'll take it away quickly.
Oh, I see, if you get it at the right angle, it just goes away. Yeah, and so we want to blend that in a little bit there, and that bevel sort of rolls from here to there. A bit, no, maybe a little more here. Yeah, so get your eye down here and look down that, something sort of sticking out right here, work on the bit that's sticking out, and then look at it again and look at it again and get, work on that rolling from here to there.
So it's got to kind of whoop. Yeah, it's probably pretty good, yeah. Yeah, there, really the rest of the seams looked quite good down here, all looked quite good, but just a quick run over it with the plane did the trick. Now, what I want to look at is this excess glass here, this is going to be in the cockpit area. You're going to be putting your hands in there, you don't want anything to slice you up.
The ends here, we've got fillets coming in on either side and the glass coming down there, and the glass that are running off, and that's made this sharp spot there, which I think we can get at with this foreign hand rasp, and is sort of coming down on either side there. Just make feel good to the hand. You could probably take sandpaper on a dowel, a rat tail file can get down in there nice. Find what tools you have in your shop that sort of conform to the shape in there a little bit.
I've got these rasps, they're really kind of cool. It's some sort of carbide spikes in there that can do a lot of damage really quickly. I think these are made by Cuts All, pretty good tools. And it's just easier to handle this now while we have access to it than later on. I've sometimes used the little needle files, they can get into some of these places, sculpt it a bit, whatever works for you. So the idea here is just to get a smooth to the touch.
Right, this is really about what it feels like in your hand if you go to grab this when you're moving the boat around, it's going to feel nice. There's a little drip hanging down here, care that while Bill's working on that. I'm going to just sand along the edge here and feel the inside for just sharp spots. What grit sandpaper do you use for that? This looks like 60, so something pretty coarse. Yeah, we're just trying to give some tooth to the surface here so the epoxy has some mechanical surface to bond to.
Yeah, don't worry too much about that edge there, no, because we are going to put in the combing and goo it up with some more epoxy. All right, and it's going to have to get cleaned again. We are going to be in here putting tape along this seam, it's going to be pretty close to these tubes, I don't want to get a lot of epoxy on those tubes, so I'm just going to put some masking tape over them.
One thing I just mentioned before we go too much further here is I sometimes will varnish the whole interior of the deck and hull. Okay, I'm not going to do that here. You know, I suppose it's a best practice to make sure everything's protected with a coat of varnish, but it's not strictly necessary. I have a bunch of boats in my shop that are decades old where I didn't do that, and they're still fine. On my customer boats, I always do it, and it just makes sure everything's sealed up, everything's protected, it stays shiny longer. The epoxy will tend to turn a little chalky over time, you know, it's just a little bit more protection, little insurance, but you want several coats of varnish, so it takes time.
So, saying the whole, whole thing, put a coat of varnish, leave it for a day, sand the whole thing, give it a coat of varnish, leave it for a day, sand the whole thing. I get the point, you know, sort of a minimum of three coats is advisable. You know, I'm not putting any on, so you could go with one coat or you could go with eight coats, the more the better. It's diminishing returns after a certain point.
We are basically ready to put this aside, get the hull, and essentially do the same drill to the hull. This is full of dust and so forth, so again it's kind of the same drill on the hull where we want to clean up that sheer line, the part line between the deck and the hull here, make sure there's no goobers of epoxy there. We will also have to clean up the top edges of these end pores and do a sort of quick sanding on the interior, make sure there's no sharp spots on the interior.
I've got all sorts of mean, nasty Implements of Destruction here. If you're using a plane up in the ends here, you're going to think, 'Oh, it doesn't cut here, it's the plane's dull or something'. If you see the plane here, you see this light under there, the blade's out here, and you know this light between the blade and the wood, so if you're trying to hold it at this angle, there's no way the tool's going to cut. Where if you hold it like this, making the bed of the plane effectively shorter, now the plane has an opportunity to get that blade in where it's going to cut.
If you have trouble with that, go with the rasp. As you're sanding along the inside surface here, you may come to some spots like this where there was some little wrinkles or bubbles. We just want to essentially sand those smooth so when we put the tape over it, there's no trapped air under it.
So we have these end pores here that are sticking up, we want that flattened down. You know, going at it with the coarse side of the rasp, that's going to do it in time. Basically the only solution to this is a lot of grinding away. The back deck here is flat, we want this to fit down tightly into there. This will all flex nicely to fit, but right now we got this big pile of goo that we got to deal with.
At the other end, the deck here has a little bit of crown to it, it needs to fit over that blob. So we can leave that blob a little bit higher where that, the one in the stern there wants to be flat, sort of below that bevel we were working on cleaning up. The bevel we want clean, but the epoxy itself can stick up a little.
A bit, you can see here it's still lifting up a little bit when you close that up. That's when you know you're done. You can involve your own patience limit in there and decide, 'Okay, it's close enough'. That's looking pretty tight. We will end up rounding this corner over a little bit, some of the gap there will disappear in that process.
All right, yeah, that's good. Yeah, so that fits nicely. I've got a little bit of a crown left in this, but not a lot, and when we go to put this on, we will put a little bit of epoxy on that before taping it down. We've got some little bits of wire here, these are just some end cutters that I filed flat to make them flush cutting. I use these in my strip building, but just to so those wires don't stick out while we're working on stuff later.
All right, so I'm just going to take the deck off one more time, we'll empty out the hull and look on getting started on binding these two together. One last thing I want to do, I don't want to get epoxy on that barb fitting, we will be mucking around in there, just put some masking tape around that.
Now I want to get some epoxy on top of these end pores so when we put the deck down, it's going down onto epoxy and it's gluing that bit down. I've mixed up some epoxy, put some wood flour in there to thicken it up a bit so it stays in place, and I'm not going to put a huge amount on here, but enough that when we put that deck down on top of it, we get some squeeze out there. Make a little bit of a mess, but that'll glue that end down.
This is a place, part of the reason for doing the end pore here is it's almost impossible to get the inside seam tape all the way up into the end, and it is an area that can, you know, experience a fair amount of force if you run into something, just tying it down to the car. We want the deck and the hull to be well bonded together here. I'm going to do the same thing down the other end.
Now we will take the deck and place it down on top of that, and this tends to shift around a little bit when we first put it down. I'm going to take this fiber reinforced strapping tape stuff, happens to be Scotch 893 3M tape, and we're going to take and just stick this down here, get that squeeze out we're looking for, and do the same with the other end.
All right, see how that goes. Now we want to get into the meat of joining the deck and hull together, and the basic process. First thing we want to do is be aware we're taking this tape off, so I'm going to take and fold over the end of the tape like that, so get a little fold over on the end of that tape. Focus, focus. Alright, so you see I folded over the end of the tape there, that way when it comes time to peel it off, I have an easy way of grabbing it.
So then I'm going to stick it up here and get down next to the boat line that seam up and pull the tape tight across that seam. What's going to hold this together is this tape, and you see it wants to spring off, don't try and stick that one back down because it just won't have the stick. Again, fold over the front, and now we want to rub that piece of tape down so it's well stuck, and then we're going to get down here, line that seam up, pull it tight across the seam. And I'm really pulling hard on this tape dispenser, I'm going to stick it down to the hull and cut it off there's a blade on the end of this tape dispenser to cut it off.
Then we're going to go to the other side, similar thing, get down next to it, line that seam up, pull it tight. Oh, I see, so you're starting where you have the puzzle joint, so you can see. Yeah, you know, that's one of the things we want to check. It's nearly lined up there, we're like an eighth of an inch forward here, you know, which it might not go because we've got the tape on it. We'll take these two pieces off and just ease the thing back an eighth of an inch, you know, it's taped up at the end, so it may or may not go. We could if we get anal about it.
Alright, I got a, I got probably an eighth of an inch out of that. Oh yeah, yeah. Alright, so now we will try it again. Alright, so that's lined up there. Now, let's, before this epoxy sets, we want to make sure that this is tight down again. Alright, you're applying quite a bit of force, yeah, it's the friction that you make between the deck and the hull is going to keep things lined up, so you want a lot of force there.
I'm using these tape dispensers because they allow me to pull tight on it. Your natural inclination is going to be, 'Okay, I've got that folded over now, I'm going to need about a foot here'. This isn't going to work right, because you know, you'll get it stuck down here, and now I'm going to pull on this bit, how do I maintain the tension? My hands in the way, I go to stick it down, I've got my greasy thumb prints all over that piece of tape, and now I go and stick it down, and it may not hold, and it may take quite a bit of force in order to make it stay in place.
This is actually, other than that first one, this looks like it's going to go down pretty easily. Just to reiterate, I'm going to take that tape, stick it down on the deck, and then get my deck-hull seam lined up, and I want to pull that really tight, and I want that, like we were lining things up before, so they're smooth on the surface. We want to do that again, and I'm also trying to minimize the wrinkles in this tape because epoxy's going to run through here and fill up any gaps in the tape, and so wrinkles in the tape will be rough spots that we've got to sand away.
I'm pulling it tight, and I'm using my other hand, the thumb of my other hand, to stick this down, and now I can take the tension off the tape dispenser, cut it off, and stick it down the rest of the way. How often do we want to tape it? We want every 6 inches, right? Now we're just going to try and get it down in place and get it. Don't worry about it, just do the next piece.
Oh, I hit it with the right. So you got yourself all tied up in a knot, yeah. Right, did you feel that? Yeah, so I'm going to stick it down, stick it onto the boat, and now I'm squatted down here, I'm comfortable, I can see what I'm doing. I've taken my hands, so remember with the wires, we weren't using the wires to pull it together, yeah, kind of similar here, we're not using the wires to do the work, for the tape to do the work, using your hand more than me. Yeah, I had my hand inside and it was just all weird. Give it another try.
I've said this before, but being comfortable in your position will make it easier to do good work. Oops, there I am, I'm touching it again. Yeah, it's okay to touch the wood a little bit, but I meant I was touching the cutter edge. Oh, yeah, don't cut yourself on the cutter edge. Well, that's, oh, but you're not using the tape, and I'm not helping you now, which if we had another hand to hold the boat in place, you'd be happier right now, I'm sure.
Alright, so make sure that's well stuck down, give it a rub with your thumb. Is that close enough? Yeah, that's very good right there. You know, I didn't get it super tight there, but you know, we can ease into this a little bit. Oh, I see, you're going to go back and ease it, and then the philosophy about where to put the next tape, right?
You can either work your way down incrementally or you can split the difference. That seems like to me would be the way to go for a situation like this with a fair amount of stress in it. I got this all stuck down, you ready to go? I'm ready to go, I don't need to do anything. Yeah, I can get both hands in here, get this lined up, and now pull this tight, and I'm really cranking on it.
Oh, so you are pulling hard on the tape. I'm pulling hard on the tape because I want a lot of tension on the tape, but I don't necessarily need to pull it together with it. And now, does that, and this is well stuck down, and so that's lined up on that side, and now we have a big gap over on the other side.
Alright, how can you sort of be comfortable working on it? I think move it down a little, so I'll have some room, and then I'm going to have to, yeah, you know what I should do is experiment how I can get it together first before I mess with the tape. So I'm only going to have one hand. Jesus, I can't even do it with two hands. That's the way, what's the, taking you need to push out on this. How am I going to do that with one hand?
Push out on this, pushing out and pull on this. So if you have one hand inside pushing out and then using the tape, control this edge. I tend to want the tape in my right hand just because I'm stronger there. Alright, okay, now I got it, and I can use my ribs to kind of hold everything. Okay, I got it, just like that. I'm easily amused.
So I think I've got an idea. Cut the tape, and you can scar up the bat. What I have to be careful of is, if you do this, you cut the tap, you do the cutting of the tape really close to the boat. The boat, you do the cutting to the tape really close to the boat. Yeah, now I got already, and I to edit that one out.
So go slow till you get it how you like it. No hur, there we go. All right, that's nice. If I get my ribs up against there, oh, I'm digging into it. Watch it, it's right. You know, sometimes you need to sort of ratchet it in a little bit, a little bit closer. You know, sometimes you sort of ratchet it in a little bit, and so this is getting a little bit closer, and then with the next one you know, oh yeah, it's partially held, and not all the stress is going on that one, so you don't have to necessarily get each one perfect each time. You can work on it.
So if we go there, there, not bad, better. It's not there, but it's better. So now take this off and go back. No, I let split the difference on this. Oh, really? See if we can get it a little better, a little bit better, a little better, and a little better. Alright, oh I see, this is like a break right there, right? It's a break. I didn't get there, it is quite there, but it's getting there, it's getting there.
Just for the viewers at home, pull on that piece of tape. Okay. Now keep pulling, just by clamping down on this, I can stop the tape from coming out, and if I have my hand here, I can pull pretty hard. That's one of the keys to this tool, is these, this is brakes right there, and so that's how you get the tension on. Let me just, oh yeah, let's, if I get one there, oh, right there is perfect.
Okay, just break, I think that's it. Nope, not quite. Gave out, let's try one over here. So you still reach inside, moving from there, we can probably get it pretty nice. We can try on this side. You don't need to get it perfect all at once, right? You can ease in on it a little bit. You might get this better and then say, 'Okay, this tape's not doing', and peel that off and redo that, but for now, leave it alone, leave it alone until you're ready to really dial it in.
Alright, so now I got to go left-handed with it. That's, yeah, so don't pull too much tape out. I just realize when I was down there, you need more tape now, both smaller up here. Yeah, is it a good idea to go back and forth here or you just do it work? It's good to not go too far on one side before coming back and doing the other side. You can end up with all the stress on one side and just goes one.
So when I'm taking out the tape and sticking it on here, you don't want the wrinkles, right? So I will look at this, is how I want the tape to run, so I'll stick it down like that. Instead of trying to anticipate from here how to make it go, I'll lay it down and what I know will go straight, and now I can come down here. Yeah, you really have to be careful though that you don't gouge into the boat.
Just kind of pops into place, yeah. Having those bevels that we put on makes makes it so there's a place that it wants to be most happy, and that's generally nice and tight where if you had them coming together flat to flat, then they could sort of slide back and forth, but they've got a little bit of a bevel there, so they want to meet in a nice tight corner.
Yeah, so that just all, all together, all at once, oh yeah, look at that. Yeah, all of a sudden it just falls together. Yeah, that's cool. I'm just going to peel some of this was still a little loose on here. Want tape approximately every six inches too, just to be sure it's even. If it looks tight, put some in there, just so it's held in place, and make sure the tape's nice and tight.
I'm going to be 3M's best friend, I think. Yeah, no, I go through a lot of tape, and it does, doesn't pay to buy the cheap stuff, no. You want the good stuff, you want the good stuff. The worst thing you can have happen is be putting the tape on the inside seam and your tape lets go on the outside, and then you want to cry, you know, you got to peel all the tape off, take the boat apart, peel the, you know, it's just a nightmare. So it's not worth it to save a few bucks.
Hey, finally got that. Jesus, I oops, it's one my favorite family television here, one of my favorite phrases. This is all nice, nice, very good, yours. I might split the difference here, just to make sure that's secure. I what you say, put one up here somewhere, wide gap there, and there's a wider gap back, you know, right here, just, you know, get it tight.
One consideration is just get this leveled out a little bit if you can, be pulling down on the V block here, right, that'll support that. Alright, this is springy, ah, there it goes, yeah, it just pops into place when it's right. Okay, now I got my hand on there, oh, it popped down. What I was going to suggest, I'm going to get the tape here, yeah, stuck down, and I've let go of the tape dispenser, yeah. I'm going to get that lined up perfect, and now I'm going to put some tension on the tape dispenser, and now move my hand here, and now I'm pulling really tight on this, that's holding it there, and now I'll get that stuck down.
Alright, so, you know, you can move around a little bit on once you got it sort of situated. So likewise here, yeah, then pop it in place. Alright, so I'm holding it with my hand there, yeah, and you know, maybe I get it on this side, but I'm holding it with my hand, and now it's lined up right there, and now I get it stuck down, burnished in a little bit so it won't pop, I can take the tension off, yeah, the dispenser, oh I see, cut it, yeah. And you know, break it down into s, the manageable steps, right?
And you see what I was saying about the we have these foam V blocks under the boat, I can put pressure down on those, right, if I have it lined up so I try to see where it wants to naturally rest on those V blocks before I put tension on it. And so it's a lot of things to sort of juggle in your mind, you know, where do I need my hand, where do I need the tape, what am I pushing against. This is one of those things with practice, you get a hang of it. And I think one of the things is, you know, you don't have to go right with the tape, you can kind of fool around with it first to figure out where your hand, like you know, right away where your hands go, I have to kind of figure it out.
Yeah, as I go, but by putting my hand there, I get the nice seam, and so I know that now. Alright, yeah, that works better when you break it down to the steps like you said. Yeah, so one thing we haven't addressed because this is a fairly short boat and you know, we've got hatches everywhere, you can reach most of the places on the inside where you might need to put some pressure, there's times when you might not be able to.
So having a putty knife, see I'm levering it now, I'm lines it up, lining it up, and now I'm holding it down with my hand, yeah, so it's staying there. Clever. So far we've been lucky, but you can give that a try, see how that works for you. Okay, yeah, wiggle it around, see what sort of brings it together. See there you go, so you might want the tape stag and ready to go, ready to go.
You know, it's a lot of, again, it's a lot of things to juggle, but can play around with it. So don't take too much out, just let it hang there, and then mess around with it, close up that seam. Got to be a little careful with the putty knife, you don't, you can split the wood pulling that out if it's too tight. Like trying, can you, this is like, kind of can you grab your hand across that seam sometimes that can help, but doing it from there, I'm not sure you'll be able to pull on the tape right.
But if you have it in here, and now I've got my thumb down on the hull, okay, and so, you know, that's holding that pressure down, uh-huh. And so I can let go of the, yeah, okay, so not necessarily have to pull that out, yeah, if it's far enough away, I can just leave it there and then take another piece in the middle here, and the same thing, just wiggle it, get it lined up, and then push down on it, and now I've got tension on the tape, mm-hm. And so that's pulling that tight. Okay, now that looks great.
Yeah, one more, yeah, what's it look like in that last between the two last pieces, is there a gap? Yeah, we got a gap, we got a good gap. Okay, pull, try and tug on it a bit, see if it makes any difference. Alright, you can wrap it onto the other tape, it always sticks great to the other tape. Oh, does it? Okay, that was kind of avoiding that, yeah, the downside is then in order to peel this tape, you got to peel that tape, right. Okay, yeah, that will squeeze up.
Oops, the last thing we want to do, we're going to break for lunch next, I just want to take and spot weld these in between the tape with a little bit of CA glue, that way when we go to lunch, if the tape points, we don't want the tape going springing, yeah. So it's again, belt and suspenders, make sure that it's not going anywhere.
There is some sticky epoxy up there still, and one of the things to note here, since we did this end pore the way we did and put this epoxy on here, we need to get this tape down at least in this area before that epoxy sets up, right? Makes sense, oh to get, yeah, yeah, yeah, because if we have this sprung off here and the hard, then all bets are off, yeah, it's not going to work. But that makes a nice seal when you use that, that's really nice. No, that'll be great.
Okay, tape now. It's tipping towards the barb clamp, a small dot, we don't want a big dot, just every few inches along that seam, so bridging the seam a little bit. And then we will take our accelerant, so we're not trying to make a mess here, just want enough to hold that, take a little bit of stress off the tape. Okay, and don't get it in the tape because it'll glue the tape down.
This is a chance to just do some last minute adjustments, but we don't want it all to go spring, so we'll call that good. Alright, let's flip it over to the other side. Alright, so I think we're ready for lunch. Any comments about this process this morning? This takes a little practice to figure it out, but I, I think figuring that, okay, first figure out where your hands have got to go, then like you said, do the tape in a stepwise process rather than trying to come all around all at once, seems to make the job go a little easier.
Alright, good. Um, yeah, alright, so we will let this do its thing while we break for lunch, and come back and after lunch we will tape the inside seam.
So once again, I think I'll take this lunch break to split this into two episodes. The next episode will continue on with putting the fiberglass tape on the inside seam. Until then, let's do all that great YouTube stuff, subscribe, notifications, hit like, share, all that wonderful stuff, and until the next episode, thanks for watching and happy paddling.