In this episode, we are going to work on some skeg stuff. We'll probably end up editing another video showing the complete process of the whole skeg from start to finish for those people who may not be building the Petrel play but want to install a skeg. Let's get right to it.
To make the skeg box, we need to make a cavity into which the skeg itself fits. We have a skeg box made of side panels which we have started to Glass already. The skeg will pivot around a hole that allows it to retract and deploy. We also need to make spacers for the skeg box using plywood and epoxy to glue this together. After gluing, we smooth out the inner surface and add a control slot trough. We follow the same process on the other side and finish up the skeg with some shaping and glassing.
With all the pieces completed, we work on a simple end pour to strengthen the ends, then we discuss the purpose and benefits of having a skeg and the considerations to keep in mind when choosing to install one.
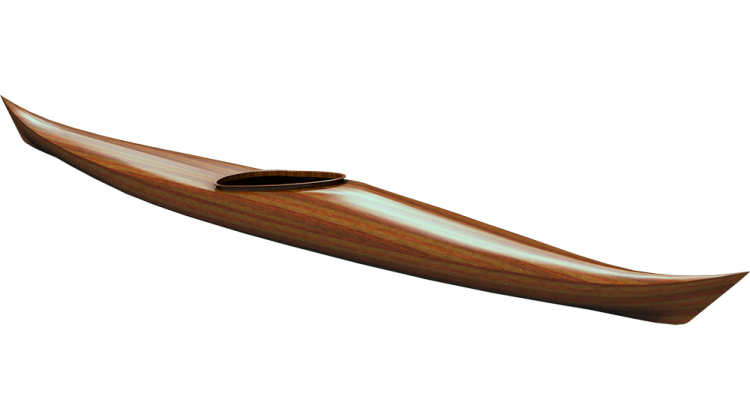
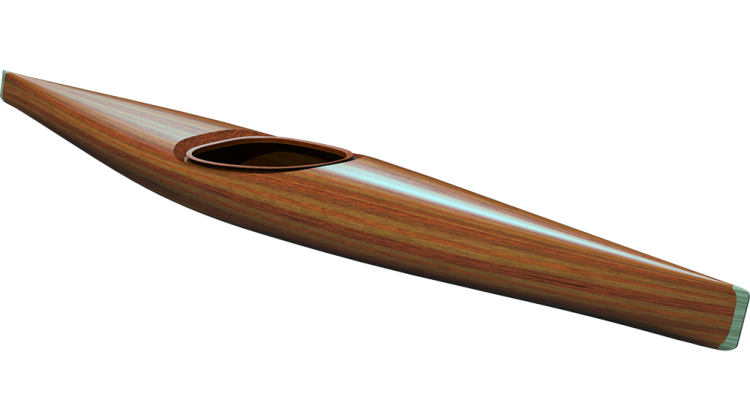
Hey, welcome back to The Guillemot Kayaks Workshop. I'm Nick Schade. Bill and I are working on the Petrel play SG, a kit provided by Chesapeake Light Craft. It's my design, but they make the kit, and you can get the kit through them. They provided the kit to me to do this build series. I took a week off from the videos. Here I went to Madison, Wisconsin to Canoecopia, which is said to be the world's largest paddle sports show. It's a great time. It was great to meet a lot of you folks who watch these videos and hear your comments. I also got to do a little presentation on why we would do this crazy thing of building a wooden boat. That was a lot of fun and got some great feedback. In this episode, we are going to work on some skeg stuff.
We’ll probably end up editing another video showing the complete process of the whole skeg from start to finish for those people who may not be building the Petrel Play but want to install a skeg. But I sort of want to show the chronology of this build, and things are a little bit out of order here, but these little bits and pieces can you can sort of do whenever you get around to them. But let's get right to it. We'll start out with some skeg stuff and finish up with the endp. Okay, so we are going to do some work on the skeg so the skeg itself comes with the manual all its own, which includes illustrations of the whole setup and how it all goes together, but we will sort of go through it on the video here.
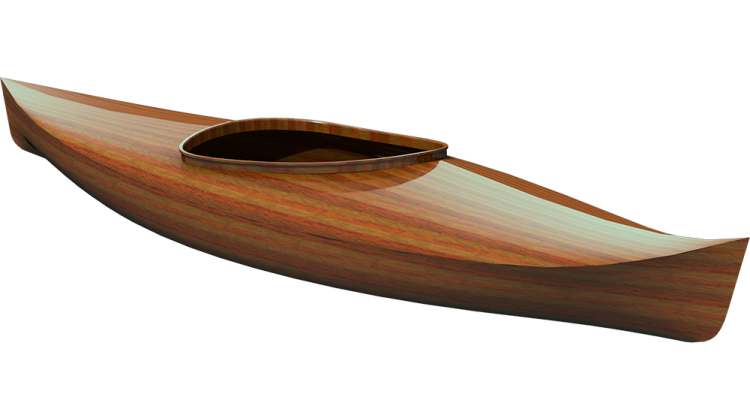
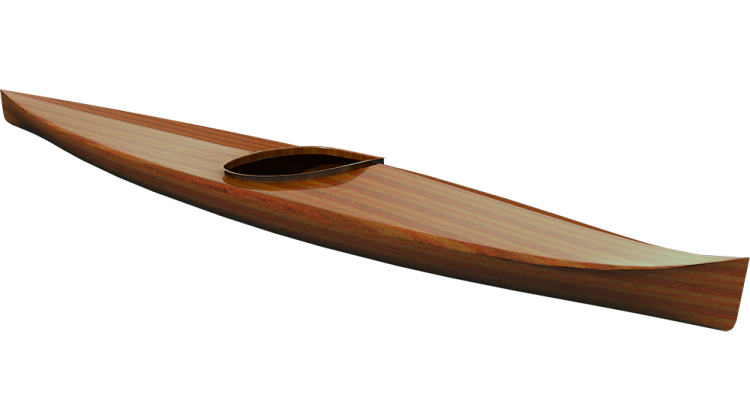
What we have is a skeg box, so the skeg box is made out of these side panels which we started to Glass already. They have a hole here that we taped over and filled with epoxy, and then there's the skeg itself. Skeg will work like this, pivots on this point around that hole so that's retracted and that's deployed. About like that. And so to make the skeg box we need to make a cavity into which this skeg itself fits so this is one side we have another matching for the other side then to make the separation between those two sides we have these pieces, and these are mostly waste all we're going to be using is this bit right here.
These mostly this is just scrap for this part of the process right now all we want is these thin little rings and we've got three of these so the these are 4 mm plywood and the skegs made out of 4mm plywood and we have these sort of spacers on the skeg which are also 4 mm plywood since there's three layers of these spacers plus the skeg, we need three layers of spacers between the sides of the box will end up having to shave down the spacers a little bit this goes something like that and then the skeg will fit inside right now it looks like this bit is going to block the skeg from coming out but really we will end up mounting the skeg box in the boat about like this so this part hangs down and gets cut off afterwards essentially all this length is doing is making sure the width of the skeg box at the bottom of the box is correct. It's okay, it's it's a spacer it's just a spacer it will be cut out when we're done.
We will glue these together, just like we did the riser for the combing and that we could do this glue up all at once with all these pieces glued together all at once, but again, we wouldn't have the opportunity to clean up the inside of this so by doing it as a separate operation we can clean things up a little bit more. So all we're worried about right now is these three pieces gluing those together. We'll mix up a batch of epoxy with the white cellulose fiber mixed into it. So, this is just spreading some epoxy on this surface and we want enough epoxy to make the surface completely wet so we'll get some squeeze out. I'd rather have too much on here than too little.
We only need to glue two of these because there's only two glue joints like that so there's glue on that whole surface I'm getting a few bristles from the brush in there we can pull those out. All right so if we were to put this down glue side down that way so we'll do glue side here glue side there all right so we're just lining that up together and this is another situation where there's no such thing as too many clamps.
So one guy where he made a bunch of clamps out of a PVC pipe yeah no I I've I've used some of those they they works pretty good you know it's not super powerful and they're awkward you know they don't have a system for opening them with the cut rings of PVC pipe you've got to you know grab a hold of the pipe and open spread it and then get it on your material.
Yeah, all right. So this is glued up, so that was not that hard a task, but let's also take and try and smooth out this inner surface a little bit, just some of that squeeze out. Again, we're spreading that into the exposed end grain. This is going to end up all under the boat, exposed to water, water will be able to flow in here, so we want this really well-sealed. And now I'm just going to take put this aside and let it cure.
So, these are the pieces for the control slot. The manual has an assembly instructions for the con control slot, but basically, we're going to take these perforations, cut them apart, and this makes so the staves of a barrel to make a little trough, which will be where the control knob sits recessed to the deck.
We've got these little nubbins here that we can take off. We could use a plane, we could use a sanding block. I'll just go ahead with a sanding block. So, you see these little Nubs right there. We're just going to take knock those off. There are three wider ones and two narrower ones.
I've got CA glue, get rid of some of those perforations. Now, we are going to make a barrel out of these or sort of a trough. Easiest way to do that, let put a little glue down here, little CA glue. I'm going to spritz the edge of this and then carefully put it down here, centered right on that piece, make it nice and square.
So that piece is glued on there. Do the same thing on the other end. Actually, I did it the other way around, but really doesn't matter, and press this down in place. Now, we—so that was one of the wide pieces. We have two other wide pieces. They are going to go like this and like this, get glued in place, and then the narrow pieces are the bottom edge like that.
So, a little bit of glue right here, right there, spritz each end of this, put it down in place just like that, press it down, same thing on the other side, again the wide pieces, not the narrow pieces, and then we'll finish up with the narrow pieces as that bottom edge. So we got a little trough. We can reinforce this a little bead of CA glue right down each of those seams. I'm just trying to get some glue down into that seam. It doesn't need to come outside at all.
So, due to several times due to turning the camera on when I thought I was turning it off and off when I was turning it on, I didn't capture the bit where I cut a piece of fiberglass bias cut glass about the length of the trough and wide enough to span the whole thing and place it in there. I also sanded the ends of the trough to just even things out, and then I place the fabric on the inside and it is long enough to extend up the ends just a little bit.
We now have a small batch of epoxy here, and you want to be a little careful with this bias cut stuff, so start by just pressing it down, don't pull stroke it down because since it's so easily distorted the drag of dragging your brush across it could mess it up. Once it starts to get stuck down then you can start to brush it a little bit. We want to get that wet out all the way to the top edge, all the way into the ends, lift it up a little bit to just try and get more cloth wrapped around that end there.
So, there we have a control slot trough assembled and glass. We'll let that cure up, and it'll be ready to install on the boat shortly. So, the next thing we want to do is shape the skeg. This is plywood skeg as it comes with the kit, and essentially the fin is just this bit here, so it's essentially a surfboard fin. And then it but it retracts inside the boat so the part we care about for the shaping is just this bit down here from the straight edge right here to the corner right there. So there's a straight line that has a little corner right here up to this corner right there. We would like to make this essentially an airfoil shape so this leading edge here is rounded over, and the trailing edge is sharpened.
As an upgrade I do have carbon fiber versions of this. This is a raw carbon fiber version and when that gets all shaped down, it ends up looking like this, you can see the laminations of the carbon fiber as I cut down through them. So, I'm tapering away the back edge and just sort of rounding over the front edge. This is almost ready to go, needs some finished work, but this is what it would look like when it's nearly finished.
And these are the spacers, which right now these plywood pieces are the spacers. A carbon fiber skeg like this will probably be stronger than the plywood, but the plywood will get a couple layers of fiberglass wrapped around it both sides, so it's really very durable. It's designed to kick up, so if you're going along at speed and you hit something, it'll automatically retract, so it doesn't end up getting a lot of force. So, the worst force is surfing down a wave. You get some lateral force right as you're being pushed off course, but with a couple layers of glass on that is plenty strong enough.
Sure, so we want to shape this. We've got those earlier we filled these holes with epoxy thickened epoxy we just like to flatten those out now get them down flush to the surface, more or less.
There's a drip here with that flush to the surface, and this one. So, I'm using the same foreign hand rasp we used on where did we use this. Oh, getting rid of the drips on the deck and halt, so I'm just trying to get this down pretty close to flat. All right, that's good.
Now, I would like to round over the leading edge of this. There's a little bit of a tab here, we can sand that down so it's no longer sticking up here. You could either use a rasp like this or just a sanding block with just knocking the corner off that leading edge. Start by knocking both corners off, so of like we did on the shaping of the chines we make a flat spot and then knock the corners off the flat spot so that's a nicely rounded leading edge. Again, feeling it with your hands now.
To get a little bit of taper in the shape, I'm going to just support this up off the bench a little bit. I'd like to come back and taper it back like a third of the way back more or less. We have plywood here with three laminations; it's hard to see in the video, but there's an outer skin, an inner skin, and the other outer skin on the other side, so we're going to sand down or file down into those other layers. So, I'm going to start with the coarse side. I'm holding at a very low angle here, trying to taper it back.
So, what's the function of the tapering and the rounding? Make it more hydrodynamic, this slips through the water a little better, slips through the water better. Airfoils are airfoil shaped because they work better. I know everybody's seen an airfoil, but basically it starts round in the front and tapers back something like that, the true airfoil would be a symmetrical might be like this, but we're making sort of like the rudder on an airplane. Apparently, one of the things this general shape does is it's less likely to stall, which is lose lift if this is cutting at too much of an angle to the water, the water will run off it and then eventually it'll become turbulent. If it's at too high an angle, then with more of an airfoil shape, the water will stick to that shape longer, and so it'll act as a skeg more effectively longer with an airfoil shape than it would as a flat panel. Oh, okay. If you look at surfboard fins, they're all sort of airfoil shaped, they are okay, and airfoils can get very specific, we're just sort of faking it.
Okay, I've sanded down, and I'm starting to see the middle layer of plywood there, middle ply of the plywood is just starting to peek out. I don't want to go past the middle of that middle ply, so I'll leave some thickness on the back edge, we won't come to a true knife edge with the carbon fiber, you can come to a sharper knife edge because it's a little stronger material, but with the wood, we'll leave a little bit of a square edge there. We can use the appearance of that ply poking out to sort of gauge how far back we've done our shaping, we'd like to move that back pretty far just to get a more precise airfoil, and you see where we've done the rasping we're coming back to about here, so I'd probably benefit from holding the rasp a little lower.
So, I'm just going to put some marks here to make it easier to see what we're doing, so as I shape this, those marks are going to start to go away, and the lower angle I hold the rasp, the farther back I start scraping away those marks. When I have a nice taper there, right now I've been using the coarse side, I'll switch over to the smoother side and holding it low and then can take the sandpaper, blend it in nicely, get rid of the scratches, get rid of the pencil marks, something like that, and we'll repeat on the other side. If you have a vice or something to hold this, that can help, but I'm trying to show you the limited workshop method. I'm right-handed, so it's easier to hold it down the left hand, again we're starting to get the middle ply edge showing there, and I've knocked back the pencil lines a little bit, we still have a bit of a flat edge on the plywood here, but it's sharpened quite a bit, and hit it with the finer side of the rasp and sand it.
I have a little bit of the masking tape left there, we can work on getting rid of that masking tape. So that's shaping the skeg. If you've got power tools, you can use power tools, but can get it away with just a simple rasp and the sanding block.
So, this Leading Edge hole, the pivot hole for the skeg, actually gets cut into a hook so it will slot over that little axle, and you can remove it for servicing. Oh, okay. We want some glass there because, right now, all that's going to be holding that hook is some wood and that thickened epoxy there. So, a couple of layers of Glass on that should make it good and strong. So, I want to put a couple of layers of Glass on this. I'm going to try and put one sort of on the bias, so your Yarns are running this way and this way. If I have the skeg in here like this, then I can try to wrap it around this Leading Edge. We'll see how that goes, but I'll start by just folding it over. So I have a larger piece. I won't be able to wrap it around up onto this, but I can wrap it into that corner. So, I'm going to just make a slit down. We'll see how this works, trying to up the game here a little bit.
Alright, so I'm going to start to wet this out. I'm doing it in free space here. So, I've decided to try and wrap this around both sides at once, just to make it interesting. Trim off the excess here. Get it wrapped as far down around the tip here as we can manage. I'm going to get a couple of spring clamps. We could do this in several stages; might make it a little bit easier. Make sure it's completely saturated. Now, we'll take some more pieces and just lay them over, one side at a time. Now, do you try to get the yarn going the opposite way than the other? Yeah, so it won't be the opposite, but it'll be diagonal to the other, so 45 to the other. We have two Yarns that are 90 degrees to each other in each layer. So if you put the next at 45 to each other, then you'll have them being 22 and a half degrees from some other one. But you don't want them parallel. It's not the end of the world. No.
Okay, since I didn't wrap glass around the hook end here, I'm going to put some extra cloth just on that area here. Overdoing the cloth on that hook is not a bad thing. Do the same thing on the other side, a piece on that hook, and then another piece over the whole thing. Grab it here, and then I can lift this piece up and get where the clamp was before. Get that wetted out, just making sure everything's saturated. So that is four layers total of glass over the whole thing, which that'll be very strong, I would think. Yeah, yeah, that's a lot. I think we could actually probably do this. So these two rectangular pieces, they will end up being the spacers on either side at the back Edge. If we take and cut it, the perforation and then same, and that clean got these two rectangular bits, they go over this hole at the trailing Edge. Let's put a little bit of excess epoxy there, get it on the piece, and we'll place it right up along the top Edge and parallel to, and even with the back Edge. Same with the other piece and put a clamp on that. There's some of that squeeze out. Let's go ahead and get these little Rings, spacer rings. Once again, clean these up, get a little bit of fuzzies off of them.
So, these go where that hook is going to be. So down here, again, you see the hook down there. It's going to end up down there. These spacers, we will fill the holes of these spaces with epoxy, like we did the existing hole already here. I would also like to get the grain of this at 90 degrees to the grain of the skeg. So right now, the grain of the skegs going this way. This piece of grain's going that way, so I'm going to try and put it at 90 degrees to that. I'll get a little bit of epoxy on there, set that up, at 90 degrees, same on the other side, and try and align those rings with the edge of the skeg. Get a clamp on that, make sure they're all lined up. Putting the clamp on them can shift things around; it's all slippery with epoxy. Looks like everything's, so I'll just put some clamps on here, just so it can stand on its own all the epoxy cures. Make sure everything's nice and flat.
So, right now, the second layer of glass hangs over the front, hangs over the back. The first layer of glass is hanging over the back bit but wrapped around that front edge, so that'll all get trimmed back and sanded smooth. So, the other little task I thought we'd do is an end pour. So, traditionally, kayaks, composite kayaks to strengthen up this end and to give a place to run a grab Loop through, we sort of fill up the end with some thickened epoxy. It makes a good strong point to put a grab Loop, tie down, down on the roof, whatever. It just, it's hard to get tape all the way down this inside seam, so it's reaching a place it's hard to reach otherwise. But, the traditional endp would take the whole boat, stick it up on end, and pour epoxy into the end, and that gets complicated. You need a tall place to put the boat up. So, what we're going to do is take an old squeegee and cut a little Dam shaped piece that we can fit into the end here, and then inject some epoxy into that and create a really nice tight little end pour on both ends. So, this is one of my little dams from a previous boat. It doesn't fit this, so we'll just find another old squeegee and make something that'll kind of fit.
So, we want something to fit down there. We'd like sort of inch and a half in each Direction so there's plenty of room to drill a hole through there. So, I'm just gonna kind of eyeball it, cut it with my scissors. All right, so that angle is not too bad, doesn't go in all the way. I could work on the angle a little bit. All right, that angle a little bit better, but it's not going deep enough. So take some off the edge here, a little bit deeper. We'll knock the corners off to make it a little rounder, a little bit deeper. All right, there's still a little gap down in here; so, keeping the angle doesn't need to be perfect, we're going to tape this in and that'll seal any spots. All right, something like that, got my triangle of tape on it, so shove it up in there. All right, so now we've got a little Dam and can fill that up with epoxy. So, let Bill do the other end, he was paying so close attention and it'll do great.
So, this is the other end. The one thing I didn't do back at the other end, we'll go back and do, is just scuff up this area so the epoxy has a nice tooth surface to bond to. I'll go to the other end to see how it goes. Okay, I already went too far; I realized it was going to go that fast; oh boy, yeah I did. I made it too small. Now we want it a little farther up here; you know, we can have it up here. Okay, so I think you've got room to work with that, you know, so like an inch and a half triangle, equilateral triangle there. All right, our inclination is to make it oversized here, but it really doesn't need to be very big. Oh, okay, okay. Then I didn't make it too big; I knew what I was doing, you know, any excess here is just weight we got to swing around when we're playing. All right, that might do it, huh, or you got to get in a little closer. Oh, that's good, yeah, yeah, yeah, okay, yeah, cool.
So, I've just added wood flour to the epoxy, so the same thing we did for the filling mix. You can make it a little bit thicker than the fillet, doesn't have to be, but you can get away with it. Other stuff you could use for this, this is a little bit dense, um, there's stuff called phenolic micro balloons or Q cell, which is a quartz micro balloon, basically balloons full of air, and you can add that instead of the wood flour and it makes a lower density filler, lighter, yeah, so it's just a little bit lighter. This will be fine. So, I'm going to put this in a Piping Bag. You don't need a Piping Bag for this, I just find it's the easiest way to apply it. We're going to be putting a large amount in there, so we can make a big hole, cut a wide hole out and now we're just going to inject it in there, fill it all the way up so it's just a little bit proud of the sides of the plywood. Let's make sure it's filling that whole space up, that will be a good solid spot to drill a hole through for a carrying toggle or whatever. All right, we'll do the same thing at the other end, so again we're just in a good healthy blob in there, filling that whole thing up, and when that's hardened up, we'll shape it down to make it so the deck fit snug. So, having a little bit of excess there when we put the deck on, we will put a blob of thickened epoxy on either end and bond it right down there, that will bond the deck to the hull. So, that's that process, and that's it for today.
I think we covered a lot of different little things today. We did the combing Riser, got that all glued up. We started working on the skeg box, you know, that took a little bit of time, the little bits and pieces on that, and then we did some glassing of those remaining bits and pieces, and we did a little endpour deal so of the Damned end pour Bill and I were talking about the skeg for the Petrel Play, my original Petrel Play that Bill has paddled. I didn't put a skeg on partly it was just I wanted to keep it simple, you know, I didn't think it needed it. I've paddled that boat for 10 plus years however long I've made it and never felt, oh, I really wish I had a skeg, right. But I've had a composite Petrel Play with a skeg in it and sometimes I thought, wow, I'm kind of glad I had the skeg, right. So, it's not necessary, but it can be nice to have, right.
I find that with all my boats, I've put skegs in a variety of boats now and rarely do I think, ah, I really needed that skeg, right, right, right. But there's been times I've thought, oh, I'm glad I had that skeg, yeah. I think it's only in the more extreme conditions that you think about having a skeg and wanting it, yeah, yeah, you know, making a long Crossing even in sort of moderate winds, the skeg can make it so you just don't think about steering at all, you're just balanced, that's true. And, you know, and that tends to be where I find it, and, you know, so not necessarily in this extreme stuff but maybe when I'm too tired tired and it got a long haul, right, yeah, and then in conditions I haven't found a rule of thumb for when I want the skeg generally, I'll be fine without it, yep, but there will be times I'll think I'll drop it and see if it feels better or worse, right, and sometimes it'll feel better having the skeg, other times it'll feel worse, yeah, and again it's just sort of I don't know until I drop it whether it's going to help or not, right, right, right, sometimes I can have a pretty good idea it's going to help if I'm in a slightly tailwind and the bow is tending to wander up a bit. Yeah, dropping the skeg can help, generally if I'm going up into the wind I probably won't want it, but again it's one of those things that you don't know until you try, and that's the when I found that I need when I feel like I'm fighting the bow of the boat, that I want then I'll want some skeg.
The benefit of the skeg is an added dimension of control, an added dimension doesn't mean it's better control, it means it's another thing in your tool kit to provide control, right. The downside is you've got this thing in your hatch area taking up space and a cable running through that might get in the way is another point of failure, sure, and it's adding a couple pounds, oh, okay, right, you know, it's some more stuff, right, that's adding some weight. So, it's not an unmitigated good, you know, there's times when it can be annoying, then again there's times when you think, oh, I'm glad I had it, sure. I don't have an answer for you whether you should have one or not, but you know that's sort of the range of things to think about when you're trying to make that choice.
Okay, the next episode I haven't decided what we'll be doing next. I'm not even sure this will be one episode. What we have to do is finish assembling the skeg Box, the skeg control, we have the a little slider knob to do some work on, so there's still some little things, then the combing we work on the combing, so I'm really happy where we are with this, we're making good progress. I'm pumping out a bunch of videos. It's been a bit of a grind to edit all these videos, it's a lot of work, but I hope you guys are finding it interesting. I don't think this is a video series for everybody, if you're interested in building a stitch and glue boat, I think regardless of what boat You're Building, there should be useful information for you here, but if you're interested in seeing more of this, hit subscribe, turn on notifications, so until the next episode, thanks for watching and happy paddling.