In this workshop episode, Nick Schade and his friend Bill are working on the Petrel Play SG, a kit boat designed by Nick and supplied by Chesapeake Light Craft. They had previously fiberglassed the exterior of the boat, and Nick had applied a fill coat to the deck. The video begins with them removing the blue tape from the deck, which had become stuck due to the hardened epoxy.
Next, they focus on preparing the combing (the raised area around the cockpit) for additional glassing. This involves rounding over the edges using a router and rasps, sanding the surfaces, and addressing any bubbles or imperfections in the existing fiberglass layup. Nick demonstrates various techniques for feathering the edges and ensuring a smooth transition for the new glass layers.
They then turn their attention to the hatch recess area, cleaning up any bubbles or rough spots to prepare for additional glassing. The deck and combing receive a thorough sanding to remove any remaining imperfections. Nick also cuts off the protruding skeg box from the bottom of the hull, ensuring a flush surface for the upcoming keel strip installation.
Throughout the process, Nick explains the reasoning behind each step and shares tips for achieving a high-quality finish. He emphasizes the importance of properly preparing the surfaces for the new fiberglass layers to ensure a strong, seamless bond.
Chapters
- 0:00 - Introduction and Overview
- 0:23 - Explaining the Petrel Play Boat Kit
- 0:38 - Removing Tape and Cleaning Deck
- 1:13 - Preparing the Combing for Glassing
- 3:50 - Removing Clamps and Cleaning Combing
- 6:44 - Rounding Over Edges of Combing
- 9:00 - Sanding and Feathering Combing
- 11:07 - Addressing Bubbles and Imperfections
- 13:34 - Preparing Hatch Recess Area
- 18:54 - Sanding Deck and Combing
- 21:23 - Cutting Off Skeg Box
- 25:41 - Preparing Skeg Box Area
- 27:16 - Prepping Hull for Glassing
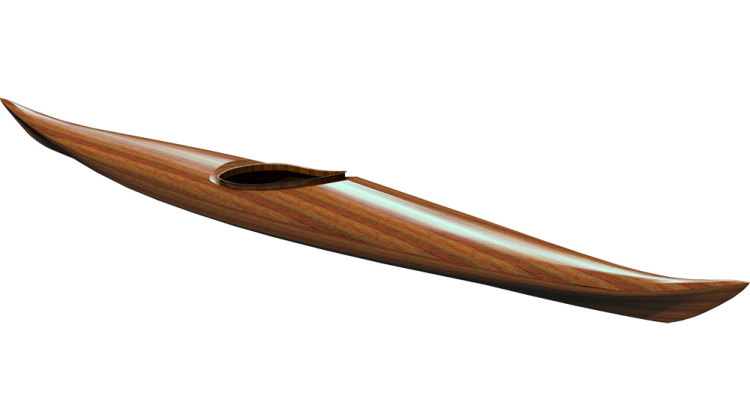
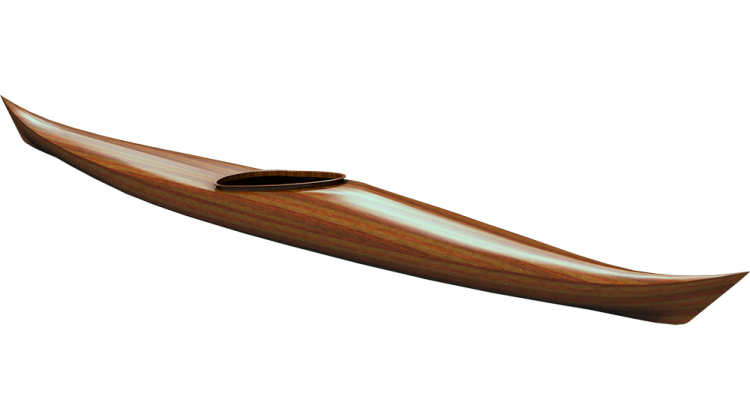
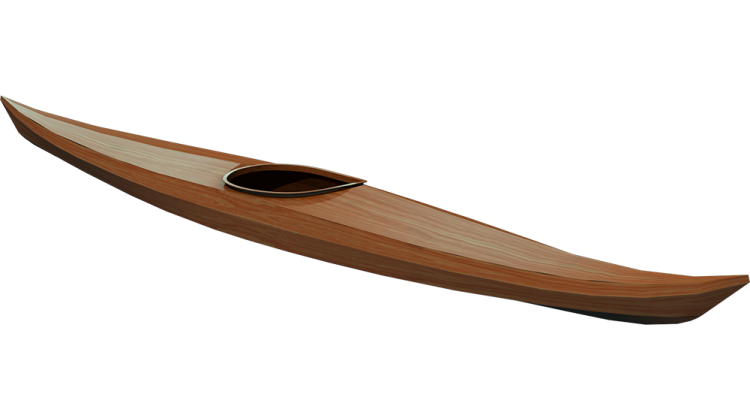
Hey, welcome back to The Guillemot Kayaks Workshop. I'm Nick Schade, this is Bill, and we are working on the Petrel Play SG. This is a kit made by Chesapeake Light Craft; it's my design, and we are building the kit supplied by Chesapeake Light Craft.
In the last episode, we fiberglassed the outside of the boat, and then after Bill went home, I did a fill coat on the deck. I'm pretty sure I said in the last episode that I was going to peel the blue tape off before the epoxy got really hard. I forgot, so you can see it's--it this stuff, it comes off, but it doesn't come off as easily as it might. So, the first thing we are going to do is that, but then we're going to clean up the combing. There's a couple spots where there's some bubbles in the glass that'll be a good chance to see how to deal with that, and on the underside of the boat, there's a skeg box that at some point we left sticking up. We're going to trim that flush and fiberglass that down. We're going to fiberglass the combing a little bit more, and so we'll see how far we get, but we'll start out by peeling this blue tape off, and I think it's going to take--I think a putty knife will help here to just get under the edge of that tape and peel it up. You know, it--it's not--you know, it's going to break away at the seam there. We might leave a little bit of blue tape behind, but that'll clean up pretty easily. So, we're just going to deal with that blue tape for now.
"No matter how. Capital yards?" Yeah.
"Oh, that was you. I was wonder what that was." Yeah.
"Yeah, there might be a few places where the epoxy actually soaked in under the tape." Yeah, I found one of those; it makes it a little more difficult, actually a lot more difficult. So, that's a matter of making sure the top edge of the tape is well burnished down. Oh yeah, yeah, okay. So it seeps under there, and then it gets in from both sides.
"Yeah."
So, if I gotten this the morning after, this would have been substantially easier. You know, the epoxy wouldn't have been liquid, but it would still be somewhat soft, and it would have come up much more easily. So, we got the tape peed off. Now we are going to deal with the combing a little bit, and first thing, let's take all the clamps off, take them off. We're going to clean up this--this face, this face right here and glass from the top side of the combing lip all the way down that face and underneath the deck. It's going to require quite a bit of cleaning up, and in order to get that glass to conform to that shape, we're going to have to round things over here quite a bit. First thing we'll do is just take and trim off this glass. And so, the reason for another layer of glass is another layer of strength. Yeah, again we may pick up the boat by the com--you know, it's an obvious place to grab a hold of the boat, and so you know, the whole weight of the boat and everything that's in it going through a bit of plywood, and you know, I think it's probably strong enough as it is. Essentially that force is trying to rip that plywood apart, and there a narrow piece of plywood in that stack there. I just like the belt and suspenders of putting another piece of glass all the way over that; it's just no way it's going to come apart once it's glass down.
Okay, so what our primary process will be to clean up this Edge is use some sort of really coarse rasp and just knock it down with the rasp and clean that face up. So, holding the rasp vertically, just going along that whole face. Obviously, where the thigh braces are, it'll take a little bit more care when hand sanding. Eventually, we're going to use the round over bit to create that nice top radius. I'm just going to do a quick first pass on it now to remove some of the squeezed out epoxy and so forth up at that area, just so we don't have to do it with the hand tools. Um, we're going to be hitting it again, and the radius on that--that's like a quarter-inch radius, six millimeters, something like that. This plywood, if you remember, is 4 mm plywood, which is about 3/16 of an inch, and then we have the Riser up in here, which is about a half-inch wide, something like that. So, we've got plenty of meat in there to cut away at that. So, fairly large radius, we'll just make our glassing easier. And then we are grabbing this sometimes with our hands, going to feel nice with the hand. I'm just going to do a quick pass here with the router. So, that is by no means done; it's just--it got rid of some of the material. Oh yeah, that we'd otherwise have to deal with with the rasp. Okay, but now we want to knock it down. Yeah, now we want to knock that down, and the bottom Edge as well. So, we want to make this smooth with--this SP--want to make this vertical face here nice and flat, one plane top to bottom.
"Gotcha. These are amazing." Yeah, no, they're--they're pretty--pretty aggressive tools, you see. That could do this with the four-inch hand traditional rasp; works great, use the course side to start with so you can do some damage, and then we'll clean it up later with the finer side. We're going to bring it all the way down flat. So, oh, you're going more aggressive than y--no, yeah, don't be shy about it, get it down so you're starting to hit that--that face there. Yeah, be careful that you're not digging into the top more so than more so than the bottom. We want it vertical; we want--do as little work as possible.
So, I try not to be shy, you know, so use the full length of the tool, covers the ground. And again, the traditional--pass, the nice thing about this is it does cut both ways, where this only cuts on the push and only sort of pushing that direction. Going sideways with this doesn't help much; you need to go so the teeth are really doing their thing. And at this point, it'd probably be good to peel that tape off just so I have more tool to work, but put some gumption into it.
"So, looking like that? Perfect, so we--we've hit all of it once, so that you don't have the dark stuff quite as much. You might end up with a few dark lines, but something like that will be good." Right?
"Yeah."
So, I don't want to chew up this surface too much when I'm working in there. Yeah, this will just make it easier to see when I'm getting over aggressive, provide a little bit of protection. I'll--I'll put a couple layers down just so I can bead it up a little bit and go at it with the Grasso.
So, in--in this area, I'm just using my hands, to my fingers, to sort of hold the tool from dropping down too much and chewing up that face there. So use your fingers as a guide. Yeah, at least that's what I'm doing; you can do whatever you want.
"Yeah, good." Yeah, I think that's good. All right, now let's give the top another rounding over.
[Music]
Over that doesn't do a perfect job, but it--it gives us a good start on a nice, consistent round over there. Oh yeah, the--the hand test is all always a good one, you know? If it feels like it's nice and comfortable, like he has a sharp edge. Yeah, here we have a sharp edge, so we can come and sort of finish up that round over on the top here, and we'll come back with some, you know, sandpaper and so forth. We want to do the same thing to the bottom side. It would be awesome if we get--get in there with the a round over bit on a router, but it ain't happening. So, what we're going to do is take our rasp, whatever rasp we're using, and knock the corner. So remember, we did chamfers on everything before on the chines when we were preparing to round those over. We're going to put a chamfer on all these corners, and yes, we have the cheek plates in the way so we won't be able to do it everywhere quite as aggressively, but we want--knock a nice, you know, quarter inch wide chamfer, you know, 6 millimeter, something like that, whatever we were using before, similar idea here, all the way around. And then we will come back and round that over, and then we'll give the whole thing a finished sanding. Okay? Again, it's going to--we want to--pass the hand test when we're all done.
Right, the Riser stack of rings wasn't centered perfectly here, so it was a little overhang on this side, and we probably--we ended up having to rasp away a little bit of a shelf on this side. So, this Gap he's a little greater; it needs a little more sanding than that does. Either that, if we can't get rid of it completely, we could go in there with a little bit of filling mix and just fill that in when it comes time to Glass it. We'll see how far we get.
Now there's a little bubble here. Should that be ground away? "Yeah, I cut that off." Yeah, and all of this, you know, we sort of wanted to have it meet the hand test. Okay, you know, if it feels good for the hand, then it's probably good. I've got some 80 GD sand paper here. Now I'm just going to try and make it look good. You can sand the top surface of the, um, Coming Lee here. We want to get sanded the underside surface where the glass is going to go as well. So, wrap all the way around these Che clicks again, or no, no, just--but so we do want to clean up those edges is if they're not clean already. Again, the hand test on that. Oh, that doesn't quicker job, huh? It can get right in there sometimes. Yeah, it's the right shape.
[Music] I filed a little Groove in the side of this scraper with a chainsaw file, and I use that just place it on the edge of the combing here, and it will work on the edge of the knee plates or knee braces here just to round that over a little bit. Still need some sanding after, but I can start to round that over. "So you went all along this with this?" Yep, yeah. You see what? See how it works for? Yeah, you know, plywood has grain going every which way, so it won't make it perfectly smooth, but it'll get that round over started, then you can clean it up with sandpaper.
"Okay, yeah, that works nice."
Yep, here at the back of the combing, it can get a little bit tight in here, depending on where exactly the com--coming was placed down onto the cutout here. If it slid back a little bit, this can get really tight back there. Theoretically, we're going to be putting a spray skirt over this com, so we want this--this bit to be able to fit down in there, and you see this--this particular one has got this buildup of heat shrink or whatever it is here. And so right now, that's not fitting in there; it would fit in fine if all it was was the shot cord, but we want to make it so whatever spray skirt you're using will fit down there, and you'll just feel it be a little bit tight. Again, this is a function of where we placed this stack when we were gluing it down back towards the stern, just a millimeter or two will make that a little bit tight. So we want to come in under here at some point; it doesn't need to be now, but we're standing here right now. So, I figured I'd address it while we're here and just make sure that we can open this up if we need to Ras back this Edge a little bit. So be it--that's if that's what it takes. Right now I'm just working on making sure there's a good round over under there because it doesn't take much, but we don't want this situation where, you know, if you have to do a wet exit from the boat, that your spray skirt gets stuck in there, you know? So it's going to take more than that, but that's something to think about. You might check it before you get too far along, so keep that in mind. Now do we want to sand till all these scratches are out, or will they get covered? They will get covered; you might see them, but it--they won't be super evident, you know? It's an aesthetic choice; you can sand all day and get them out. Yeah, like like I said, for the aesthetic sanding, there's no end to how long you can spend trying to make things look perfect. So you eventually you got to decide, okay, that's good enough. But if you sanded it down so there was no epoxy left and then sanded through all the grits, could make them go away, and but there's a lot of endgrain plywood here. We'll see the different laminations of plywood. Yep, it's going to be fairly dark because it's that endgrain plywood, and it's going to be buried under a layer of glass, so it's not going to be super evident. And from a structural, practical part part of what--does it--it doesn't matter for the finished boat, other than will it bother you to see that?
"Right, no sharp edges whatsoever." Yeah, the hatch recess here, the--the front hatch recess looks quite good, you know? This is a complicated thing to get into, but we do have a couple bubbles. There's a bubble right here; let's zoom in on that. You see the glass lifted up? That's a hard concept Contour to get over, and so I think let's see, let's see what if the utility knife will get down? We can s--grab the edge of that and just cut the top off of that. Oh yeah, um, and this will take some sanding. We'd rather not sand into the stain, but if we do, we know how to patch it up. We have the little thumb holes here, which we--we tried to sort of mash some glass down into there, but it didn't get all the way in, so we can sort of trim off the loose stuff, sand that. Actually, we might get the--the little drum sander that we used to make it back out and clean that up. And I just noticed over here, doesn't show up on the camera so well. Oh yeah, bubble. All right, you can see it on the camera there, it's a little air bubble. So we have a little bubble, you know, it happens to coincide with where the puzzle is. I don't think it has anything to do with the puzzle joint; it was probably just tension in the cloth going this way was enough to lift it off there. So we'll try and cut that out. Yeah, cut straight into it, and I'm trying to avoid cutting into the wood itself, making a scar, but we will sand it.
So then we want to do a little bit of hand sanding on that. So this bubble up here, just want to feather those edges away. I'm already hitting a little bit of wood there, so be it. Okay, yeah, so there was a little bit of this Edge was sticking up, the wooden Edge. Yeah, this wooden Edge on this panel was sticking up a little bit above the surface of that panel, and so that made a place where--so now unless you knock that edge down, you--it's going to--right? Yeah, we need to knock that down, so we're going into the stain there, and we--we want to feather this edge of the--so the meniscus of the epoxy there so it--it Blends in, otherwise that'll just cause a bubble there also. But again, I--I want to minimize how much stain we're actually removing from the wood, obviously we need to remove some here. So I'm not just going at it here; I'm doing a stroke, looking, seeing where I'm at, and then we need to ease the corners again, otherwise it'll cause the same problem.
Um, over here, if we can feather in the edges of this, it's--it's a little bit tricky. I'm going to start with some 60 grit here, try and sand around that area. So your inclination is to go directly into the low spot here, right? Right, but really, the--the problem is everything around that's high. So I really want to sand that away and blend it down to the low spot. So you're just removing any place where air might get trapped underneath those edges so you don't see them. Yeah, yeah. And you know, there's a little bit of overhanging fiberglass; I'm just going--again, use the edge of the utility knife as a scraper to start to get those edges knocked down, make sure there's no overhang that's trapping dust. So these white spots, basically, that's sort of overhanging fiberglass just filling up with dust from sanding. So I'm standing here to remove material, so I'm using as coarse of grd as I have available to do it as fast as possible, and I can pay attention to how close to sanding into the wood I am. But I'm just sanding away the edge of the glass, trying to blend it down towards the wood so I don't have a big step there that is going to trap air. There's still some steps there; when we go to Glass that, I'll--I'll address it a little bit more, but I think that's a good spot for now.
So we have these two divots on either side s of drain holes and places to grab the hatch cover. I'm just going to get the drum sander out again and clean that [Music] up, and we'll lay a h piece of glass down in there. Like this, just want to get rid of all the bubbles and up around around there, around those Corners, over a bit. So we--we hadn't stained these bits before, so we don't need to stain them again. You see, these are bubbles, and we're just getting the glass really thin there, so that's trapping dust, that white is trapped dust right there. And if we just were to paint epoxy on there, chances are that white dust would not absorb the epoxy, and you'd end up with a white spot there. All right, so that's ready for a little bit of fiberglass in there. The other thing we have is the ends. So here, the deck glass that came and stuck off the end, we didn't try to wrap it down around the end here at all. We'll just take that loose stuff, feather in the edges of it, and again, we want to try and avoid hitting the stain there. Should be a good layer of epoxy over it, but if we do hit the stain, it's not the end of the world; we know how to deal with that. So, we're going to end up putting a strip of fiberglass from the Keel all the way up the stem here, wrap around that end a little bit, and same at the other end. I think we've got the deck already to deal with, but today I also want to deal with the skeg box sticking out the bottom and start to get the bottom ready to do Keel strips and so forth. We're going to break for lunch. Okay, we're back from lunch; hope you enjoyed your lunch.
So what we're going to do this afternoon is we're going to cut the bottom of the skeg box off. If you remember when I installed this skeg box box, I painted epoxy sort of in the bottom and let that run through, and you can see it's filled up the crack pretty much all the way around. We have sort of there's a little pucker in the glass back here at the bottom of the stem. The process for cutting off this skeg box is basically--it might not hurt to put a little bit of a spacer or something. Yeah, even some tape, just around around the Box, just to sort of provide a little bit of separation between the--the tool and the surface of the boat. I've sometimes will start down here; this thing has these sort of starting teeth on the tip of the saw here. You can use that to get started or get into the major part of the blade and just work our way from various angles around here. We want to be careful we don't slice into the--the bottom of the boat proper, watch happens quick. Yeah, you pay attention to the whole blade.
All right, not too bad. Yeah, so again, all of this material here was just to make a spacer so this thing was the right width at the top and the bottom, and again, we just cut that off completely. So now we want to get this down flush so we can attack that a number of ways. We can PL it down, but we don't want to dig into the glass, and then we can just sand it down the rest of the way. And so then you'll just epoxy the raar edges. We will put a layer of glass. Oh, the--the--the strip will cover that. Yeah, we'll--we'll put a ke strip on here and that will cover and uh, reinforce that. So what I' like to do is I'd like to feather this in, so we're going to--if we put a a patch of glass over this, there's going to be an edge of that glass. And to say that then flat again, you end up sanding that glass almost completely off, right? So what we want to do is sand almost through--through the glass that's here so then the new glass going over feathers in, and it's full thickness around the skeg box itself, right? And then when you go to sand that all flat and smooth, it doesn't end up sanding through the glass much as you would when you do patching a fiberglass boat, right? Yeah, exactly, yeah, because what is this? Fiberglass boat, exactly. So we could do all this--this is 80 grit, you know? You can do quite a bit of damage pretty quickly with this. I--I have this hooked up to dust collection. This I can turn on the back and suck up that dust as i s--this whole stuff we were doing this morning, where we were working inside the combing, sanding fiberglass and epoxy and stuff, we probably should have worn dust masks, you know? It was conscious on my part because I want to be able to talk various times during the process process. So you guys, but I should have made bware dust mask, so I'm--it just doesn't care. So again, I've got like 60 grid on here, and I'm using this tool. I want to hold it flat against the surface. Lots of people really want to sort of dig in with the tip of the sander to get those low spots that are not getting hit by the sander, but we are trying to level this surface, and that means we want to hit it with a flat surface. If--if you see a shiny spot, the goal isn't to make it un shiny; the goal is to get the high spots on either side of the shiny spot down level with the low spot, right? So concentrating on the shiny bits isn't what we're trying to do; we should be concentrating on the stuff that's sticking up.
Right, all right, so now it's level. Again, what I was saying before is I'd like to feather this in so the glass around it is thin or almost gone, so then when we put the new glass in, it has a place to fill up and become level with the surrounding area. You see this texture here? We're starting to see the texture of the fiberglass, the--that weave over and under pattern, right in here. And so we are cutting into the glass right there; you can see it up here, and starting to see it right about here. There's some of it in here; we want to concentrate on just this area around the box. I'm going to slow the tool down a little bit just so I have a little bit more control here.
I've sanded through the glass and into the wood, so you see--I'm not sure how well this will show up on the video, but I've got some weave texture up in here, and then it disappears. So in areas where you haven't sanded into the glass yet, you don't see the texture. Then you'll see the texture, and then it'll disappear, so that means you've sanded through the fiberglass, which you know, I'm not too concerned about sanding through the fiberglass here because I'm going to, you know, I'm intentionally going to be putting more fiberglass over this. There's no benefit ins sanding into the wood at this point; it's just going to be a little bit hard to avoid. So again, no texture of fiberglass, texture of fiberglass, no texture of fiberglass. So we have--haven't touched the glass yet, we're touching the glass, and we've sanded through the glass. That's kind of what we're looking for, a perimeter like that all the way around. They'll go a little bit more in this area, and it'll give a little bit of a hand sanding here. There's sort of no texture here, this texture here, there's no texture. So that--that's that progression of epoxy with a fill coat, fiberglass, then through the fiberglass. This is are just about ready to Glass. What I'd like to do is--is there's some sharp edges on this; we'd like to take and ease those edges a bit, and I'm going to take some masking tape and put some masking tape in there so when we glass over this, we don't get epoxy down into that slot. Okay?
So I'm trying to ease those Corners a little bit, just make it a little bit easier for the glass to conform to things. We're not going to try and wrap glass in there so much; we'd like a transition there that--ground it over a little bit. I'm going to take some masking tape. So we want to get this down below the top Edge there, get it stuck down, and then if we can tuck it down over the top Edge on the other side, we just want to make sure we don't fill the whole skeg box with epoxy. This side's I've been able to press that down, get it well stuck in, but this side it's a little bit harder to do. So I might stick a another--it's worth spending a little time making sure you've got good protection in there. I've cleaned epoxy out of the slot; I don't recommend that is a fun activity. So is the skeg in there now? No, the skegs not in there; we're just getting the--the box ready to for glass.
We've got a little pucker here at either end of the boat, just going to cut that excess glass away. There's no stain on this section, so it'll make it so we don't have to worry about that particular problem. But now we want to blend that in a little bit, and we want to rough up this whole surface, smooth it out a little bit. There's still a little bit of blue tape; you can get rid of that. So we're going to put a strip of fiberglass all the way from the deck down the length of the Keel, a little bit and out beyond the point of where the skeg box is. So for along the Keel line here, we're going to put like a couple inch wide piece of tape so we want to remove the gloss a couple inches and more Beyond the Edge of the KE line, right? Just so we have a good mechanical bond in that area. Okay, is that?
Now at this point we--we want to flatten out most of those drips as well. We don't need to completely eliminate them, doing some at this point would be good, just you know, because we're going to Glass over it. And if it's something sticking up, little sand through the glass to get it down, okay? We're going to do a, you know, major sanding later on in the process. Okay, how far back do you want to go? "Yeah, let's go a foot Beyond The skeg box."
So this was sanding with a 80 grit, and you do see you can cut through the--the--the fiberglass pretty quickly with 80 grit sandpaper. Oop, not that big a deal, but just something to be aware of. Again, we're trying to just scuff this up; we are trying--trying to build up epoxy here. There's no point in getting too aggressive with it because it is fairly easy to cut right through. All right, so I think the Hull's ready for fiberglassing, and the deck is ready for fiberglassing. I'd like to do both today, and just looking at the way this will lay in the Saddles, if we were to Glass this and flip it over, we'd end up with glass on--on our V blocks here, where if we glass this, that's not going to end up on the V blocks, and we have some spots up here for a little bit of glass those. We'll just make sure we don't slide it forward when we flip it over. So I think we're ready to prep some glass. So I'm going to cut this episode off rather abruptly; we're still in the middle of the day here, but I figured the fiberglassing is best served in another episode, and in that episode, we'll get into the wonders of bias cut fiberglass. So if you're interested in that, do all the great YouTube stuff, notifications, subscriptions, sharing, liking, all that wonderful stuff, and until then, thanks for watching and happy paddling.