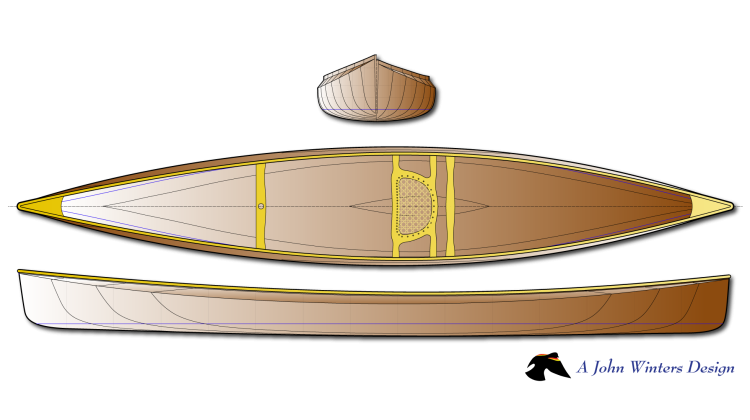
Cutting forms and making mistakes with the ShopBot. CNC router bit discussion.
Tools:
- ShopBot Buddy: https://www.shopbottools.com/products/buddy
- 1/4" Up Cut Router Bit: http://amzn.to/2GDF4JG
- 1/4" Down Cut Router Bit: http://amzn.to/2FEKanH
- 1/4" Compression Router Bit: http://amzn.to/2FDfpzk
- 1/4" Straight Router Bit: http://amzn.to/2GBbchb
Hi, welcome back to the shop at Guillemot Kayaks. I'm Nick Schade and today it's gonna be exciting.
It's the first day we actually start to see the shape of the boat. I'm gonna be putting together the forms. I'll show you the process I use for setting up a set of kayak forms to build a strip built kayak.
For my strong back I use a two inch by four inch aluminum extrusion eighth inch wall. I've rounded over the corners with a router to ease those corners a bit.
An aluminum strong backs nice. It's really straight and true stiff it's great but it's not something everybody's gonna have on hand. What you can use instead is just making a box beam out of plywood two inch by four inch the same sort of dimensions and that will work great
I've built a lot of boats on a plywood box beam. yeah I've also built boats on old two-by-fours it's really hard to find a straight 2x4 these days. But if you find one like a laminated engineered material 2x4 that would work great as well.
But what I've got here is this aluminum it's been stored outside so it's a little dirty I'm just going to scrub it off get the spider poop off of it and other stuff clean it up so my forms will slide easily.
I originally cut this from a 20 foot long piece and I was able to get two 13 foot long strong backs out of that 20 foot piece by tapering the ends so down. Here at the far end I have essentially a scarf cut in that so that allowed me instead of cutting it in half and getting to ten foot pieces I was able to get to 13 foot pieces and that's much more convenient for most of the boats I build and actually having this taper down at the end works nice for a lot of boats where kayaks either sweep up in the end or just plain get narrower.
I build my kayaks on what people call an internal strong back but I also have an external strong back that's this here and I use this for canoes and other open boats and when I'm building a kayak and using the internal strong back off and use this as my base to hold the internal strong back
You can certainly use just a set of saw horses or something like that I have these little cradles that I used to hold the strong back
just that's a little strong back in there and these are the forms for the micro bootlegger left over from a previous build so I've done an inventory on my forms and it looks like I have everything except for the stern end form so I'm going to have to make a set of those and it will probably include a couple of cross-sectional forms on that as well but gives me a chance to show you that my process for that.
So, I've reevaluated. Some of these forms are kind of chewed up I'd had to cut the tops off at in the cockpit area to make things fit in a little bit better just make it easier as I was building in the last boat. I'll probably end up doing that in this boat as well but just decided let's just cut some new ones show you the process on the CNC machine.
We'll have a whole new forms and go from there.
So, here's my cnc system it is a ShopBot "Buddy" with the 48 inch bed. What's different about the buddy system compared to a lot of other CNC systems is here the table moves and the gantry stays in one place. where and then the router moves back and forth but this table slides in and out and what that allows me to do is it's more portable system so instead of having a large system that's sort of permanently on the floor.
This whole system is on wheels I can roll it around again tight space in the shop that allows me to more efficiently use the space it's a nice little system probably not as accurate as a permanently mounted tables stated table system would be but for the purposes I put it to is plenty accurate enough so while we're here let me give you more of a tour of the system Porter Cable router.
For the spindle dust collection I've got two two by threes on either side of a gantry with a cable running between them and then just a couple clips with rope holding the dust collection hose and so as the router moves side to side the hose is free to move side to side as well.
The beauty of this is attached to the system so I can roll it around and if I want to bring it out into the middle of the room I could. One of the reasons I got this system is because in the long run I'd like a four by eight table for cutting plywood prototyping kits and so forth would be awesome if I could lay down my plywood cut through the kits myself to just more efficiently work out prototyping issues.
So with this I can buy a new what they call I think a power stick here and this is removable from the machine and I could get a version that's an 8 foot and just swap that in and put an 8 foot table in here so all I'd be replacing is the powerstick. And the tabletop I wouldn't have to buy a whole new machine to do it this. It'll be a while before I have the space to do that but that was just my rationale on getting this particular machine.
You know the portability and the ability to upgrade it with a fairly low cost part to get more capability. So the computer controller I have is an old Dell I got this probably 10 or more years ago it's plenty fast enough for running a CNC machine the the bandwidth on this is not all that great you know it's you know compared to modern computer technology moving a router from place to place is very very slow so it doesn't require a high power machine to control this.
What I did recently was I used to have a table sitting right here next to the machine now I have this stand up arm and this is I can adjust the height of this as necessary and move it around and this lets me get it up over here right next to the machine where I can see it and so you know you can bring it out move it around as necessary so that's a recent upgrade. Works great.
Again the dust collection feeds over here to my hose I still don't have duct work throughout the shop for running my dust collection so I just moved the one hose from one place to another as necessary. Not the most efficient but it gets the job done and I just haven't gotten around to um upgrading that eventually. I'll run some duct work around and get that to work a little bit better.
First thing I'll do is zero out the x and y axis so it's just using the limit switches to find out where the x and y axis 0 points are. And so now that's found zero and that's a consistent point for the machine it can consistently return to that point by just zeroing out on the limit switches.
Now I want to zero out the Z which is a zero to the bottom of the material or the top of the spoil board and I have a zeroing plate here get the plate directly under the tool wires come down hooking up to the router bit and when it closes the circuit there knows it's touch to the metal plate the zeroing routines calibrated for the thickness of that metal plate so it knows where the zero point is.
Get out some MDF. I've stored it under here. When I buy material from like Home Depot I have them cut it into quarters for me doesn't cost anything to have them do it and saves me time makes my life easier.
So I've got a little fence here set up so if I pull the material in tight to that fence I know it's where its location is and I'll run a few screws down into the corners just to lock it in place. So I'm going to find the part I want to cut over on a preview on this.
Alright so now we'll get ready to cut this so that part turn on the dust collection.
So here we have a nice path going along going along nicely and then there's a screw and there's the end of my router bit. So I meant to check and make sure and none of the screws were in the way of the tool path but obviously I didn't.
So now I need to put in a new bit so I want to re-zero it to the top of the spoil board again and right now I've got the material in place. so I'm going to cut out one of these forms let's give myself access to the top of the spoil board and re-zero it and then I want to find out approximately where it stopped and restarted from there. Line 12,760
That's one piece now here's the next piece. All right and I'll make note that there's something coming all the way into the corner here it's good here it's good all the way into the corner up there if I'm gonna put a screw in here I don't want it right in the corner. I need to step it out a bit same over here.
So I thought I'd talk about the bits available for my CNC machine. These are all quarter-inch bits. These three are solid carbide this has got a carbide insert edge on it. When I was first working before I broke that first bit I was working with what I call the down cut bit. That's this one. If you see this it spins this way and so as it spins it pushes the chip down towards the bottom of the hole as a result the top edge where as hitting intersecting the top surface of the wood gets pushed down also. So it leaves a nice clean cut the problem is is pushing down at the bottom edge and that you know if you go all the way through it'll tend to tear out the bottom push it out and make a sloppy edge on the bottom.
So I was trying to keep it from going all the way through but as a result I was left with a very thin material at the bottom of my slot that I needed to cut through later to get it out of the piece of MDF so after I broke that bit I switched to an up cut bit and so this again spins this way and so as it spins it draws the material up like that. Which you may have noticed I had a very rough cut at the top surface it's pulling that top surface and pulling it up and making a ragged edge there it down at the bottom.
When I I nudged down the tip a little bit so cut all the way through it made a nice clean cut down at the bottom but it was a little bit of rough at the top I ended up switching over to a compression bit which is this so again it spins this way and so at the top it's pushing the material down at the bottom is pushing the material up and so right here in the middle it's compressing the fibers and as a result at the bottom is pulling a chip into the material and the top is pulling the chip into the material so it makes a nice clean cut top and bottom problem is you look at this grind it's a complicated shape going on in there so these are very expensive and these are quite expensive this solid carbide and so I break one of those when I'm not smart enough to double check my path and put a screw in the way end up snapping these off carbides really brittle hits that screw snaps it right off the cheaper option would be to go with one of these straight cut bits so basically the blades just vertical up and down and it's a lot cheaper because the carbide is just this little insert on both sides braised in place there these are quite affordable do a nice cut and they're actually a little bit more durable because it's regular steel through most of it you hit something it'll chip the blade but it won't necessarily break the bit completely off the downside of this bit is here at the tip there's no blade right at the centre so as I plunge the bit into the material it has nothing to cut right down the center of the bit and so it has to burn its way down it works fine and I could set up the CNC machine so it ramped in so it came in at an angle ramped in and then moved along and that way it's never trying to plunge straight down and the tooth the blade is cutting the material out of the way as it proceeds down I'm using the carbide bits because that blade there comes all the way to the middle so it's an easier to push into the material you know again I could use a ramping but I had this I'd made this tool pass for cutting these forms a couple years ago before I understood more about the cutting process and so everything's set up without any ramping and so I didn't want to have to go and reprogram everything to this straight bit so I stuck with these and then played around with the up cut down cut and compression cut in order to get smooth surfaces this will end up with a moderately smooth surface this one happens to be pretty dull so it probably would end up chewing the thing up a little bit but it it would it doesn't have a tendency to rip a chip up or push a chip down so the surfaces would be quite smooth the downside is there's really no chip ejecting capability to this the best is obviously going to be an up cut pulls the chip right out of that slot dust collector picks it up even so I was noticing that the dust collect the it was leaving quite a bit of material down in that slot I'd come back with a vacuum cleaner try and pull it out of that before I remove the material from the spoil board that way I didn't get that dust all over the place but the down cut tends to just push the chips down in and as a result it doesn't really eject them but it does move the chips out of the way of the cut typically so those are the kinds of bits available for cutting my form MDF material on my CNC machine we've got a straight cut an up cut down cut and compression so after all the parts are cut out by the CNC machine I still have the tabs to cut and there's generally a little bit of waste where the bit didn't get all the way down to the spoil board and saw these little tabs so I did something to these forms I don't normally do or I don't always do if you've seen here the edge of this is cut in two parts and so the bottom here is a little bit bigger than the top and so ends up with a little step right in here and if you think about a kayak or a canoe or other boats they taper towards the ends if you have a strip laying across that where it touches the form in the middle towards the middle of the boat is a little bit wider than where it touches the form towards the end of the boat and this isn't usually a big deal normally I make the reference face the face closest to the closest end of the boat and so the strip just touches that and you know as long as this face is right on the reference location everything's good the shape of the boat will come out correct what I've done here is I made the larger face the back and so this corner here is the corner where the strip will hit at the front of the form and this corner back here is where it will hit at the back of the form I really want a bevel there and the reason I'm doing this is because I'm planning on doing this without staples I'll end up hot melt glue in the strip to the form hot melt glue is not very good it's kind of cheap that's kind of the reason we're using it the bond will break quite easily where it does best is if there's a real a tight joint between the thing you're gluing and what you're gluing it to that way when you press the strip into the hot melt glue it squeezes the glue really thin the glue cools off immediately and the bond is almost instantaneous if you end up where a situation where it's like this and there's a gap and you go to press that glue tight against it the glue doesn't cure right away thank you it doesn't cool off you press it in and then you let go and the glues still a little bit gummy and it comes right off again where if I bevel this to fairly tight fit the result will be the glue will harden very quickly and it will have a good strong bond with surface area all the way across the width of that form and everything will hold in place better but again this MDF is sort of cheap stuff and the hot melt glue is kind of cheap stuff so between the two it'll break out when it comes time to get the strip's off the form so my process is going to be is I don't want to disturb either the back face or the front face eye but I do want to get a bit of a bevel in between the two so I'm gonna take and flip this table down a little bit basically enough so it's out of the way and then I'm just going to quickly touch this these forms onto that just to try and even out that step make it a little bit more of a smooth bevel so ideally and of coming cutting half of that step because this step is half the thickness of the form so straight bevel between there should eliminate path you know I've been cutting into this edge a little bit but that's just gonna make up a little bit tighter joint when I go to lay that strip on there I just like to sort things out get them in order and make sure everything's make sense sort of a sanity check so yesterday we finished up by hammering on some of these forms they shouldn't have to be hammered in it should slide in pretty easily and so this is a little bit tight in that slot so I will take a rasp and just open up the slide a little bit it's only off a few thousand all right so that's the men form and there's the other end form and all the stations ready to go sorry I lied at the beginning of the day I thought I was gonna get the forms strung on the strong back and that would mean tomorrow I'd start stripping but as often the case I changed my plans I thought I could use the forms from my previous build of the micro bootlegger sport but after looking at them a bit I decided I'd be better off cutting new forms so I went ahead with that this led to another learning experience for me on the shopbot you'd think that breaking and expensive router bit would teach me to examine my tool path more carefully but I'll probably make the same mistake again in the future maybe I'll get one of those plastic staplers but hopefully you found the discussion and router bits useful and interesting as a result of all that I don't have the strong back assemble just see that you'll need to wait for the next episode where I'll assemble is strong back I promise until then if you have any questions please post them in the comments if you liked this video please press thumbs up turn on notifications and subscribe to keep up to date with this and other projects just as a reminder I have plans for this and a bunch of other kayaks and small boats available on my website as well as t-shirts and other merge thanks for watching and happy paddling you