Nick does stuff without Bill. He provides an overview of the remaining steps, including installing the skeg box before joining the deck and hull. The focus then shifts to preparing the skeg box by rounding its edges, inserting the pivot pin, and sanding the surfaces.
Next, Nick moves on to the skeg itself, cleaning up the epoxy-filled holes and preparing for drilling the necessary apertures based on the plans. He meticulously measures and drills the holes for the control cable, set screws, and pivot points, using the appropriate drill bits and taps.
Attention then turns to the control knob, where Nick carefully shapes it using a belt sander and rasps, creating a pleasing ergonomic design. He also fashions the hook that will connect the skeg to the pivot pin, ensuring a smooth operation.
In the subsequent section, Nick demonstrates the technique of cutting fiberglass cloth on a bias to wrap around the control knob's edges. He applies epoxy and skillfully lays the bias-cut fiberglass, smoothing out wrinkles and ensuring a secure bond.
Finally, Nick concludes by acknowledging the nature of this phase, where small tasks are interspersed with extended epoxy curing times. He expresses gratitude to the viewers and wishes them happy paddling.
Chapters
- 00:00 Introduction and Overview
- 00:58 Installing the Skeg Box
- 03:07 Drilling the Control Knob
- 03:21 Rounding Skeg Box Edges
- 06:42 Inserting the Pivot Pin
- 07:59 Sanding the Skeg Box
- 08:36 Preparing the Skeg
- 10:54 Measuring and Drilling Holes
- 16:30 Shaping the Control Knob
- 18:46 Shaping the Cable Hook
- 19:04 Sanding the Control Knob
- 20:44 Glassing the Control Knob
- 27:49 Concluding Remarks
Hey, welcome back to the Guillemot Kayaks Workshop. I'm Nick Schade. Bill's not here today. I just have several small things to do, and I don't feel it's appropriate to drag Bill all the way from Rhode Island to just come here and do a few small tasks.
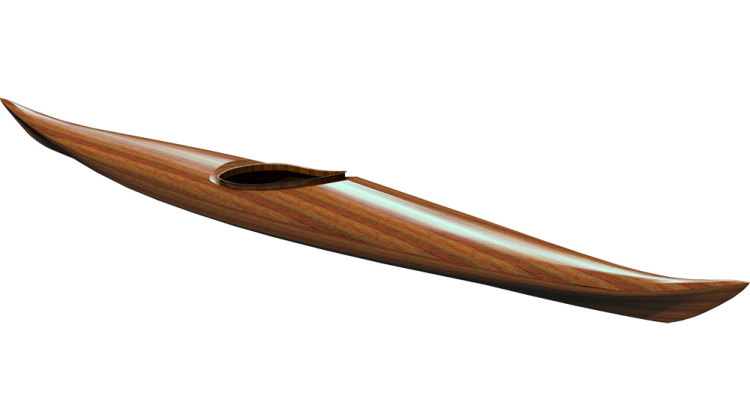
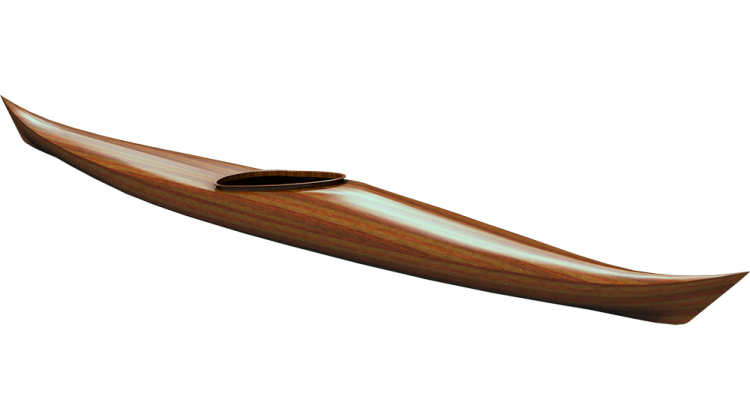
Like I've said earlier, we're kind of in the order of operations period of stuff where we want to pay attention a little bit to what needs to get done in order to go on and do the next thing. The next big task is putting the deck and hull together. Before I can do that, I want to install the skeg box into the hull. That way, once the deck's on, it gets a little bit more difficult to put the skeg box in there. So it's a lot easier to just get that taken care of.
We've been pecking away at various bits and pieces. We glassed the sides of the skeg box, one side in one day, the other side of each side panel in another day. So, there's two days. Then we glued the two side panels on either side of the spacer, so there's another day. And now we are going to round over the corners, the edges of this, put the pivot pin through, and fiberglass it. There's another day. So there, there's like three days of work just on the skeg box before we can get to the hull.
We're just pecking away at things. We've got the skeg itself. We've got the control knob. We filled some of the holes up in these things and had tape over it. And so we now have some small steps to do to get these ready for their next process. Like I said, there's a bunch of little things we got to deal with that don't really take much time. You know, I can probably do everything I want to do here in the next half hour or so. But then it's watching epoxy dry for another 12 hours or whatever.
I'm just going to sort of peck away at these things one at a time, and we'll talk about them as we do it. Tape's going to come off these. The skeg, here, last time we drilled some holes in here that will accept the cable and the set screw to hold the cable. We drilled them oversized and then filled them back up with epoxy. And then we'll drill them to the correct size. We just needed to get that epoxy in there, let it cure, and now I'm just peeling the tape off.
Likewise, on the control knob, we drilled a hole down through the middle and down at the bottom. This is where the cable goes through there, and a set screw will go down through there. Skeg box, let's take the clamps off. We are going to take and round this corner off, these edges, that way we can wrap fiberglass all the way around those edges and make this really solid and strong. Right now, it's a very lightweight piece. It's strong as it is, but what's holding it together is basically the epoxy between the laminations here. I'd like to just super reinforce that with a wrap of glass all the way around that edge. Probably overkill, but it's easy enough to do. It doesn't add much weight. All it does is add another epoxy cure on.
So rounding over the corners here, just cleaning up these edges, we could use a four-in-hand rasp again, same old rasp, just clean up those faces. And then, sort of like we did on the chines of the kayak, take and knock a 45-degree angle onto this. So just making a chamfer. And then we can take and round that corner off. So this is a bit of hand work. Can do it quickly. I'm using the coarse side of the rasp here, just removing wood a bit aggressively, just clean that whole face up. You could also do this, use a power sander to clean that face up and then, uh, take it to a router to round over that corner.
So let me show you that. So I'm getting a perfectly good round over here with the hand rasp. That's perfectly fine. That would be enough. But I know everybody likes to use power tools, so we'll show a little bit of power tool. Start with using a belt sander here to just clean up those faces. Sander is not going to get down into that inside corner, but we'll give her everything else we can. Round over this upper corner right here, just to make it a little easier to get the glass around.
So I put a quarter-inch radius, half-inch diameter round over bit here, and we'll just run that around the edges here. It's going to be spinning this way, so we will feed the work that way. I'm not going to provide an instruction on how to use a router, but if you have one, you should know how to use it.
So the pivot pin comes in the kit, is a little piece of stainless steel rod cut to the same width as this stack is tall. And we're going to drill a quarter-inch hole through here, right down through there. So way back when, we had this 1/2 in hole that was in the kit, filled it with epoxy, and there's a matching hole on the other side. So this pin will go directly through the center of that half-inch hole that's been filled with epoxy. And we will place that in there.
So right now we just want to drill that hole. So went I went straight on through, started on this side, straight on through, and it didn't match up perfectly on the other side. But it's close enough. This pin will just go right down into that like, so it's a little recessed in there. That's fine. That'll do the job. We're going to end up glassing over this, and the glassing process will lock that pin in.
I'm just going to give this, this is sanding, de-gloss the shiny side. This side we had the peel ply on so it doesn't really need sanding. But we had this place where the glass didn't get adhere down, so I'll just feather that in a little bit and then clean up the places that we've hit with the router down that corner there. Going just do a little bit of cleanup work on the skeg itself here where we fill that hole with epoxy. There's a little bit of epoxy around the edges there, and we can just clean up these faces.
We are going to end up re-drilling these holes to their appropriate size. So there's a hole going in here that will be for the set screw. Another hole going down here, which is where the cable goes. And the plans have uh, dimensions for all those, and we'll drill across here just for a place for that clamping to happen on the cable there. There will also be a hook formed up here, which will be used to hook on to the pin. So we have this pin here. This will hook onto that pin and then pivot on that pin. We want to form the hook there. We've got a lot of epoxy in there. It'll be a good strong hook. And then these discs of wood are spacers to make it so this stays centered in the box.
I like to start out with the coarse side of the rasp first, get it down close. I'm not going to worry about um, getting these perfectly smooth at this point. We're going to have to size the skeg here so it fits snugly inside of the skeg box. I want to leave them a little bit thick. They should be a little bit thick at this point, so I'm just going to leave them. Once I got them sort of cleaned up, I'm just going to leave them so I can do the drilling, do the shaping I need to do, and do the final fitting once we have the skeg box installed on the boat.
If you look down inside there, you can see where we originally drilled a quarter-inch hole through the skeg itself. Then we added the spacers on here, and so we're going to just try and run a hole, hole right down through where that original hole was on the drill press down on the back spacer here where the cable goes in. We'll find the dimensions on the drawing for each of these holes and drill those out.
This cable in the kit is what will become the control cable. If we measure that, it is an 8-inch cable. So the hole we want through the top of here should be an 8-inch hole. Again, this will end up going down like this into a hole there and then wrap around here. So we also have a 10-24 set screw. There should be two of them, one longer one and a shorter one. The longer one will actually be for the control knob going down here. The shorter one will go in here. We need a tap to tap these holes. And generally, when you buy it a tap set, it will come with a drill. The drill we want for the 10-24 is a number 25 drill.
So we're going to do a number 25 down here and a number 25 down here, an 8-inch this way, and across here will be the rod that the tubing that goes through the knob. This tubing is sized so this runs right up inside there, and this is a 3/16 hole there. So we want a 3/16 hole through here and a number 25 hole down this way way. In here, number 25 there. So got a couple holes to drill.
So this is a number 25 right here. Oh, I can't read that. And we're going to go all the way down through this block, right down the center of that. We're going to do the same size hole from here down to where this hole is. I want to stop before I come out here, so I'm going to place the stop. Again, we want to set this up such that the drill runs parallel to that edge, and we're going to run it down right through the middle. And you want it to come out down below that hole. So we want to have this enter right down the middle and be quite close to this face here. Our limit for the drill will be how far we can get down before the chuck starts hitting this piece of wood.
We're going to put a 3/16 hole through here. While I have that in the chuck, I'll go down into this quarter-inch hole to get the intersection of those two holes and just give a place for when we clamp down on the cable for the cable to expand a little bit. This hole is going to have a tap run down into it to create the thread. As the tap gets driven in there, pushing a little wedge of shavings out, we don't want to drive the tip of the tap into the wood beyond. It should be good like that. So now we have thread up in that hole. Probably won't show up on the video, but you can sort of see it.
Likewise with this piece. So I unscrew the tap a little bit, just so the threads don't get too jammed up with chips. In this case, we'll run the tap deeply in there. We want to thread it all the way down to that hole. We'll run this hole past it on this side, so the tap won't bottom out.
So on the knob here, the whole block is an inch and a half wide. The tab that sticks down into the control slot is 7/8. We want to take off on either side of that, 1 and 2 - 7/8, which is 5/8, and then half of that on each side. So 5/16 on even either side. And the height of that, um, tab that's sticking down is 7/8. So we'll start with the 7/8, dial this up to 7/8 here, and we'll go across like that. So that's going to be the height of the slot. And then we'll bring this down to 5/16, just like that. So we have these two lines we described in there, like that and like that. So we're going to remove this bit. And then we can round over the bottom edge here and round over the top edge here, just make it a nice pleasing shape. This is going to be shaped so it fits down into this slot like that on the skeg itself.
There was a little notch in the kit right here and here, right in there, that we want to connect up to the hole we drilled, and that's going to make our hook. So we're going to remove this bit here. So we'll start by just cutting out these rectangles, then make a rough cut, some corners off, just to start to make the rounded bottom and the rounded top.
Now we're going to make the slot into the hook there. I'm going to cut it a little small and then file it to size. So now I'm going to shape this knob a little bit. I want to put a nice radius on this edge right there, and then make a nice pleasing shape for the handle itself. You'll end up gripping this bit here. So if you run this against the grain, the sander tends to snag it and rip it out of your hands. Now I like to taper the width up at the top here, mostly an aesthetic thing, but my sanding belts a little do burning a little bit a little bit better at the bottom edge there. So I sort of pinched it in up at the top edge here, and a little bit more hand sanding to refine it a bit.
So I want to wrap the edge of this in glass, so I'm going to take a little bit of glass here, and we've talked about bias cut glass before. If I were to take a regular piece of glass, this is just some scrap. The weave on this piece of glass is running this way and this way. If I were to cut parallel to that weave here, I have a nice looking strip of glass. Now I want to wrap this around here, right here. The yarns are this long. That's enough to get it around there. That's how long it needs to be. Well, these yarns right here are the same length. There's no way for them to become shorter in order to make that turn.
If I were to take a piece of cloth here and now the yarns are running this way and this way, and so cut a similar strip on the 45 to th, those yarns, so these two pieces of cloth are about the same. This is cut straight with the yarns, so you see the weave going this way and that way. Let's just cut it at a 45 degree angle. But you see the yarns are running like this and like this, so it's at a 45-degree angle to the cloth, like this and like this. So now when I wrap this around there, I can actually make the middle of the cloth longer than the edge of the cloth, because here the yarns are running diagonally across that joint. I can end up distorting the weave sufficiently that'll make it around that corner. Can take a little work in a really sharp corner, and it's not so great on an interior corner like this, but it can still do a lot.
I'm going to cut a strip of cloth on the 45 or on the bias. So I'm going to take and turn the cloth at a 45-degree angle, and I'm going to cut diagonally across this cloth. And I want a piece that's, you know, about the width of your hand a little bit wider. And you'll see that those diagonal intersections make some nice lines on the cloth that you can cut along. So we're just going to cut along those visible lines. But here I have a piece of bias cut cloth, and I wanted to get around here.
So I've mixed up some epoxy here, just a regular mix, got a couple clamps. I'm just going to put on here to give me something to hold on to this with. And the bias cut cloth is a little bit hard to have stay in place because it distorts so easily. So in order to help that, I'm going to take and give it something to stick to when I lay it down. So I'm just going to paint some epoxy all around that edge, just like that. And long, long run, I want some epoxy on the ends of that rod, along the sides here, putting a nice base coat of epoxy down so when I lay the cloth on it, tends to want to stay where I've put it. So just get it centered on here.
Get it all centered, and I'll use the brush to brush it down around those corners, start to get it stuck down a little bit. So these wrinkles here, you should be able to sort of distribute those wrinkles along the length of the cloth a little bit. That helps to pull it up and then coax it back down again. And then pull the cloth on either side of it again. This interior corner is going to be a little bit more problematic. If we need to make a snip there, we can do it. So just to give it some room to expand there and to snip it on that side, just give it a little snip on that side. And go ahead and lay that back down. And you see the wrinkles, just a little bit of bunching up of cloth there, but it's well saturated. It's laying down on the wood. You see I've got fiberglass over the end of the pivot rod there. Wrinkles on this side, just sort of stretch the cloth out on either side of the wrinkle and distribute that wrinkle around, give a little bit more of a slice up into the corner here.
All right. So that's got glass all the way around that edge. Going to take a couple small patches and don't think this is necessary, but we're just going to put another small patch over each end of the pivot point there, just to make sure that that rod never pops out of there. Peeling some of the dried epoxy up off this old squeegee, just use that to sort of even out that resin.
All right, just like that. So again, those clamps on there just give it a nice place to rest on while the epoxy's curing.
So I'm not sure how long I was in here this afternoon, an hour or so maybe, with the capturing the video it takes a little bit longer. Again, this is sort of the time of the process where there's a bunch of small things that involve a short amount of time assembling them, and then, you know, 12 hours to watch epoxy cure.
So keeping track of what you need, critical path kind of right now, if we want to put it in those terms, to get the deck and hull put together is the skeg box. Um, this control slot is in there at the same timing, but really the difficult thing is, it is all ready to be installed. The skeg box is just about there.
I'm not sure if this is the end of an episode, but if it is, I'll say thanks for watching and happy paddling.