Building a Boat: Filleting and Glassing Process
Building a boat involves intricate steps, and this comprehensive summary will guide you through essential aspects, focusing on filleting and glassing. Understanding the filleting process, mixing techniques, and glassing application is crucial for achieving a robust and well-finished watercraft.
1. Fillet Preparation and Importance
The initial part of boat construction involves creating fillets, which are thickened epoxy mixtures used to join seams and enhance structural integrity. Fillets play a vital role in boat building as they provide strength, stability, and a smoother finish to seams, creating a seamless transition between different sections of the boat. In the provided instructions, the narrator emphasizes the importance of preparing fillets correctly, ensuring they are neither too loose nor too stiff.
2. Mixing Epoxy and Fillers
A critical component of the filleting process is the mixing of epoxy with fillers, such as wood flour. Achieving the right consistency is essential for successful filleting. The speaker discusses the significance of warming epoxy to facilitate smoother mixing and proper flow. Different fillers, including wood flour and copil, are introduced, with wood flour being favored for its natural look. The mixing process is detailed, highlighting the need for precision in ratio and thorough mixing to prevent uncured epoxy issues.
3. Filleting Technique and Application
The filleting technique is demonstrated using a piping bag, making it easier to dispense the thickened epoxy mixture into seams. The narrator advises against using excess material, encouraging users to start with a small batch for better control. The application of fillets is showcased on seams and joints, emphasizing the importance of sealing any gaps and avoiding excessive material that may require sanding later. The use of a spoon and other tools for shaping the fillet is discussed, underscoring the need for an artful approach to achieve both strength and aesthetics.
4. Glassing for Strength
After completing the filleting process, attention shifts to glassing, a crucial step that enhances the boat's strength and durability. Glassing involves applying fiberglass cloth to the boat's interior, creating a robust bond with the filleted seams. The text emphasizes the option of completing both filleting and glassing in a single day, saving time and improving the bond strength. The significance of addressing any goobers or hard spots before glassing is stressed, as these imperfections can affect the quality of the final product.
5. Challenges and Considerations
Throughout the process, various challenges and considerations are highlighted. Temperature plays a significant role, affecting the viscosity of epoxy and the curing time. The importance of working efficiently to complete the process before the epoxy cures is emphasized, especially when dealing with large batches. The need for precision, cleanliness, and attention to detail is reiterated, underscoring the importance of a well-executed filleting and glassing process for the overall success of boat construction.
6. Clean-Up and Final Touches
The final stages involve clean-up and shaping. The speaker demonstrates the use of denatured alcohol to smooth out any rough spots in the fillets, ensuring a clean surface for the glassing application. The importance of wiping down surfaces to remove any goobers or hard chunks is stressed. Additional tools like spatulas and fingers are employed for the final shaping of fillets, ensuring a smooth and visually pleasing finish. The text concludes with an acknowledgment of the significance of cleanliness and attention to detail for a successful boat-building endeavor.
Conclusion: Crafting a Watercraft with Skill and Precision
In conclusion, mastering the art of filleting and glassing is fundamental to the successful construction of a boat. From precise mixing techniques to thoughtful application, every step contributes to the strength, aesthetics, and durability of the final product. The builder's skill, attention to detail, and understanding of the materials used are crucial in achieving a watercraft that not only floats but stands as a testament to craftsmanship.
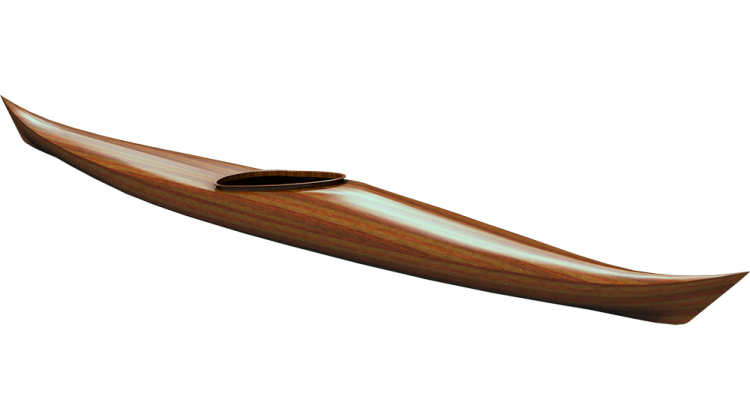
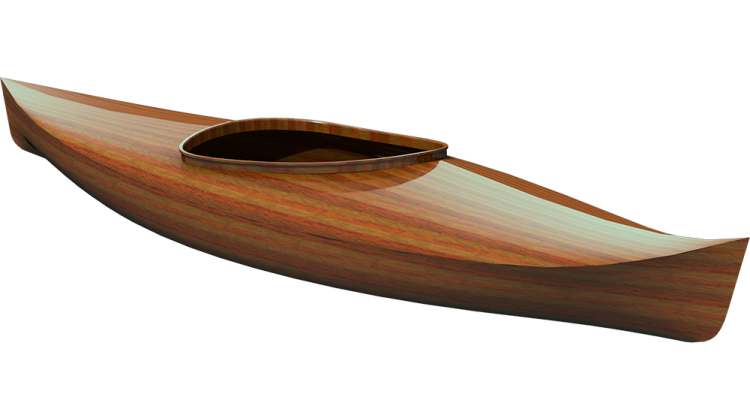
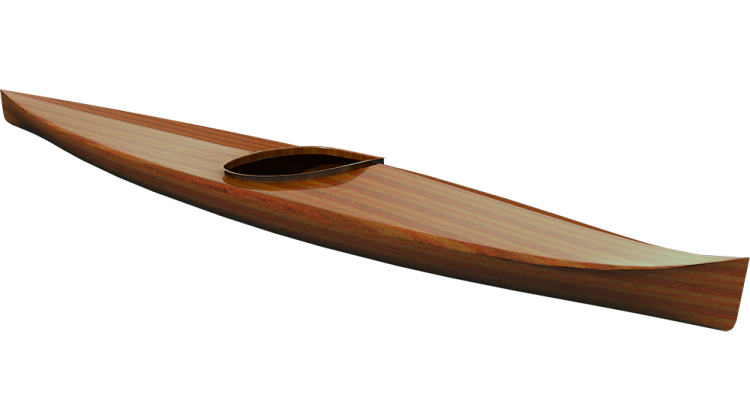
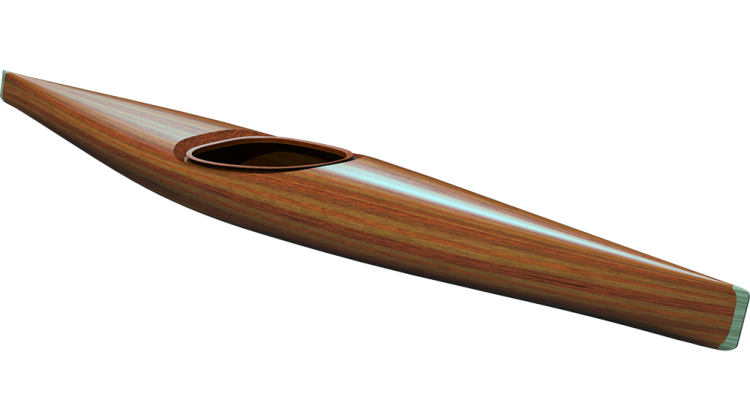
Welcome back to The Guillemot Kayaks Workshop. Bill and I are here, working on the Chesapeake Light Craft kit for the Petrel play SG. This is a stitch and glue sea kayak kit or a recreational kayak kit, depending on what kind of paddling you want to do. It's a kit made by Chesapeake Light Craft; they take my design and cut the panels out on a CNC (computer numerical controlled) router. So, they can take the plywood, cut all these fancy puzzle joints in it, and create a kit that makes it so there's not a lot of woodworking left. This makes the process akin to building a model airplane, where you're assembling the pieces. It's accessible for somebody who hasn't built a boat before. All the materials came in the box, and we did the unboxing before. Fiberglass, epoxy, and everything you need to build the boat are available from Chesapeake Light Craft.
Last weekend, Bill and I went paddling. You paddled a Petrel play out at Catumn rocks. What did you think?
Like I told you before, I just thought it was incredible how quickly you could catch a wave. I'm used to long boats that are 60 plus pounds, 17 1/2 ft, and it takes a great deal of effort to get a boat on a wave. With this, it's two strokes, and you're moving quickly and fast, with probably 30% of the effort that I did in my longboat. It's a huge difference. The longboat doesn't turn nearly as quickly as this. The waves where we were yesterday can be chaotic, so you can get hit from the side and bumped. How did you find the stability?
The stability was amazing. I pearled and had the bow pretty buried under the water, did a 120° turn with the bow buried, and never felt like I was going to broach. Pearling is burying the bow, broaching is getting flipped after pearling the bow. In these conditions, not everybody wants to do that sort of stuff, but the fact that you can go into those conditions, not having paddled this boat much, and still feel comfortable, is a testament to its stability. The comfort you'll feel in lesser conditions is just going to be more stable, and the length of the boat is easier to handle.
My goal with the Petrel play is to provide stability and ease of handling. We fully put the panels together in the last episode, from the flat panels to the initial gluing. What was your impression?
When you have the flat panels and you start putting them together, everything is all floppy. I had the impression of how does this even work? It doesn't look like it's going to make a boat. But then you get all the gluing and wires in, and it makes this beautiful shape. The geometry of the shapes of the panels, if you line up the seams, it basically can only go together one way. Assembling the boat in the last episode, if you have these forms on a level surface, that's going to pretty much guarantee that it's not going to be twisted. Making sure the panels are down tight to the forms is crucial. If the stitches pull those panels tight to the forms, and everything is cut precisely, it should turn out right.
With all the preliminaries done, we can start pulling the wires out. Before that, inspect all the seams, make sure there's glue on all the panels between each panel to hold it together. Inspect for any popped seams, visually ensuring there's glue. If you don't see glue, like in the ends where we edge glued it, feel the seams to check for movement.
So, we'll take that one. Oh yeah, you can feel the stiffness elsewhere. Just get a little bit of glue in there, make sure it's got some glue, give that a spritz. The process of taking these wires out, generally, I'll grab the wire in question on the outside, go on the inside, clip the wire, and just wiggle the wire out. Not too much to that process; almost all the wires come out. The only wires that don't come out are these ones at the top of the forms, which hold the panels to the forms just to make sure the width is there. All the others come out, even the ones down here at the bottom that were securing the bottom panel to the forms. We want those to come out.
Okay, so it's now just a matter of going through, clipping them, and working on down the line here. [Applause] Go. And what would one do if this did spring apart? Glue it back together, just put a wire back in it?
So, I gathered the idea behind cutting from the inside is so you don't mar the exterior of the boat while you're... yeah, and it's just easier access. Okay, you know, it's easier to see what you're doing, and you can grab both sides of the twisted wire. If you were cutting from the outside, you'd need to cut on both sides. Okay, there's just more involved, but it really doesn't matter how you do it, just so long as you get the wires out, whatever works. Some of these up in here are a little bit hard to get, specifically up in the stem here. So it might be a matter of cutting on the outside and pulling through. Some of these might have some glue on them. If you can reach in and grab them, you can. But yeah, this one seems to be glued in. If you can't get the wire out, you can just cut them flush. At the stems, in particular, we're going to round over these ends and basically file down or plane down to the stitch holes, so those wires will come out. But, oh, so that just popped. Oh yeah, my solution here. We'll go ahead and get some glue down along that seam there, make sure it lines up well, give a little spritz in there, and hold it together. So, see how that goes. Again, a problem like that, it's not the end of the world; just got to deal with it. All right, so we'll continue taking these wires out, and we need to go down the keel line also. You want me to start there? Sure, okay. One thing I just discovered that seems to make it a little easier is if you cut closer to one end than the other, then that little end comes down easier.
Yeah, if you do a lot of stitch and glue boats, you end up with a lot of pieces of copper wire, and potentially there's some scrap value to this. Down at Chesapeake Light Craft, they have big buckets from doing classes of copper wire to help pay for a holiday party. So that's kind of satisfying to pull those wires out. Cleans up the look of the boat. One thing I should have done a little bit earlier is we've got some little nubbins here. We have these little nubbins here from spot welding the panels together. Just a little bit of sandpaper knocks the tops off of those. Probably best to go with the grain, so any scratches I have, uh, 100g sandpaper on here, but whatever you have. We're not trying to make those go away; we're just trying to sort of smooth them out a little bit. So there's these on the bottom panel and up here on the side. We can just hit all of those as well. See, that's about it. There's one last set up here. Okay, so this is strictly for aesthetics; this really doesn't accomplish any structural thing. If you have too much of a bump there, the glass has a little trouble laying flat under the seat here. Yeah, this is under the seat; these ones are sort of under the deck. They're hard to see. So at this point, wires are all pulled out. The only thing holding it together is that CA glue, the super glue. So it's a little bit delicate, so we want to be somewhat careful about handling it. There's really no reason to handle it at this point, but if you're working in your garage or something and you need to park the car, by all means, you can move it. But don't kick it around any because it isn't super strong. With that sanding and the work we've done, there's probably some crud in here. So I would tend to vacuum it out at this point.
So with the panels all assembled, all the wires pulled out, remember, all the wires except these top ones, we're leaving those in. But the next thing we want to do is reinforce these seams and create a fillet between the panels. So, the fillet is some thickened epoxy that makes a nice radius right here in the corner. You're kind of taking the corner of those two panels and filling it. So, you want to fill the fillet, and we're going to make a nice smooth radius in there. The fillet reinforces this seam here and eases the transition across the chine, so the fiberglass isn't trying to go at a sharp angle. It has a nice smooth curve there, and it reduces the stress riser at that chine, making the boat stronger. Essentially, we're welding together these two panels with thickened epoxy. What we will use to thicken the epoxy is the wood flour. So this is the Woodlow Mas product; again, this is essentially ground up MDF, a fine grade of sawdust. Theoretically, you could use sawdust out of a sander, but you want it pretty fine. You don't want sawdust out of a table saw that's all lumpy and gritty. So, what the process will be for making that thickened epoxy is we will first mix up some epoxy and then thoroughly mix it together. Remember, resin and hardener are both at all times whenever you're mixing epoxy in the correct ratios. Once it's thoroughly mixed, then we add enough of the wood flour to make kind of a peanut butter consistency. I have my epoxy workstation over here. We're just going to use the standard kit pumps that come with Masas epoxy. I have a light bulb here, which this is not an incandescent, but it's providing some heat, and I've got a little heat band wrapped around the epoxy. It makes the epoxy easier to apply if it's warmer; it lowers the viscosity. Just makes the pumps work better when we're going to do the fiberglassing. The lower viscosity resin soaks into the fiberglass more easily. So I like to warm it up, and just having a light bulb right next to it provides a little warm situation near it. Otherwise, these heat pads, I think you can buy them for terrariums or something like that on Amazon for taking care of your lizard, I think, or snake chicks. Right, yeah, there's lots of reasons for that. I have that on a little timing outlet so I can turn it
on for a few hours and not forget about it. So what we're going to do is mix up some epoxy, thicken it with wood flour. Then we're going to put it into a bag and distribute it along that seam. You can use a standard Ziplock bag, cut the corner off, and use that to pipe the fillet material into that seam or the high-tech way. This is a cake decorating bag; I think CLC may actually sell these as well. Same deal; you put your stuff inside here, clip the tip off, and then use that to dispense onto your seam.
So, whenever I'm dealing with epoxy, I put on gloves. Epoxy, I don't think it's directly necessarily all that toxic, but you can get an allergic sensitivity to the material. Okay, um, so if you get a lot of it on your skin, that can start to build up an intolerance to using epoxy, and for me, that would be a real bummer. Yeah, that would be a problem for you, you know, because I use epoxy a lot. So, I try to be as religious as possible about protecting myself. Um, so gloves, I wear long sleeves, long pants so if you splatter any around, it doesn't get on the body.
We're going to mix up some epoxy; you can buy fancy calibrated cups, and these have a way to measure the ratio on the cups, which can be quite useful for mixing up good large amounts. I tend to use the pumps, and I go through a lot of yogurt, so a yogurt container (make sure you clean it out) works very well. They're reusable; you can generally pop the epoxy out of there a couple of times and use that as a mixing jug. Is any plastic okay to use? I've used Solo cups; these are the big red Solo cups. Yeah, epoxy should not eat through the red Solo cups. I, I, I, yeah, it should not. Um, polyester resin probably will. Oh, so maybe I had a different type of resin. Yeah, polyester resin has styrene in it, which is a solvent that melts a lot of plastic. Polyester resin is fine in yogurt containers and then fine in those specialized resin mixing containers. But Solo cups, don't use wax-covered cups, you know, paper cups are sometimes wax-covered, sure. Um, don't use those because as you're stirring down inside, you can scratch wax off the interior surface and get that involved in your resin, and that's not a good thing. Most paper cups should be fine, and there are times when I specifically want a paper cup, and that's part of the reason I have these little Solo cups. But let's go ahead and mix up a batch of epoxy, and we want to start with like a 1 in the bottom. Okay, so remember what the drill is with the epoxy. Oh, you got to get it going. Well, this one's already going. So, okay, yeah, make sure it's going. It's okay. It's flowing nicely. So, it's one to one. One pump to, oops, that was a fart, so that didn't count; you barely got anything out of there. And this is part of the reason I want to warm things up because that epoxy when it's cold in the shop can be really hard to flow through the pump. Here we go, all right. So make sure it's all the way up, yep, and yep, all the way down. All right, same with this one. Pump to one pump, and just double-check; it's pulled all the way up. Okay, with both of those, and then go all the way down to the bottom because they can stick sometimes. Yeah. So, you started with the bigger Blue Pump. I did. Why? And so you'll always finish with the smaller red pump in this scenario. Yeah, it does go much quicker when they're warmer. The other day it was a little hotter; I did turn up the heat in here just so it's a little bit warmer for doing the epoxy work. So is there a temperature range for doing this? Over 65°F, um, but there's times when I will turn it up quite warm. But the warmer it is, the fastest stuff cures, which can be both a blessing and a curse.
Now, mix it thoroughly, and how long did you say to mix this for? About a minute, about a minute of vigorous, and right, scrape down the sides, dig into the corners. I know we had a class one time in Pharmacy where we mixed a powder with another powder, and uh, we had different colors, and it was amazing how long it took to get a homogeneous mixture. Yeah, yeah, it takes quite a bit. Yeah, I had a student in one class; a friend of theirs had done, as a, an engineering project for college, a study on how many stirs it took to mix epoxy together, um, and it was over 100 W minimum stirs. Yeah, this is what the wood flour looks like again; it's just a fine wood dust. So what would happen if you got your ratio wrong, and this didn't cure, and you put it in your boat? That would be a real problem; you really need to clean it out. And if you put glass over it, and the glass epoxy cured, you'd kind of want to strip that glass out, scrape out all the schmutz in your fillet, and then redo it. You want to get this right the first time. Yeah, you want to get it right the first time. So that's probably well-mixed at this point.
We've got this wood flour here; this is a bit of an art to this how much you need. I start with about as much wood flour as I've got resin. So if there's like an inch of resin in there, we will put about an inch of the wood flour. Probably not enough, but so we've got that in there and now start mixing that. Start slowly to incorporate the stuff in there without making dust fly everywhere, and it'll initially feel like you've added too much, and then it'll come in there, and oh yeah. And now this is still pretty loose; it runs off the stirring stick. So again, a little bit of an art to this. So how much to add? Now this is your first time doing it; I would add like one scoop, incorporate that in there, and again start stirring a little bit gently until it's more incorporated. Then you can be a little bit more vigorous. So still kind of drippy. And if you look at this, it's got a bit of a shine to it. In there, it's a little bit shiny. So again, first time we've done this, so we're going to just add one scoop, incorporate, incorporate that in. All right, so now it's still got a little bit of flow to it; it's lost a little bit of its gloss. I'm going to add just a little bit more.
So, is the idea that when you place it in the hole, you want it to stick to where you put it, right? We don't want it to sag down in the hall. So I tend to think of when I'm mixing stuff like this up. I tend to think in the terms of, uh, food products. So, this, this would be sort of good old-fashioned natural peanut butter, um, something like that, you know. The color is that's some rich peanut butter, but, um, it stays in place, you know, I put a stirring stick in there; it stays upright. It's not super stiff; you know, I can still
run the stick through that. It is very important that we pre-mix the epoxy because if you have unmixed epoxy in there and then you put the wood flour, and some of that wood flour is going to drop into the resin, some of that's going to drop into the hardener and not allow those to mix together completely. So you want to pre-mix the epoxy before adding any of your thickeners, whatever they are, whether it's this wood flour or the colloidal silica. So this is starting to cure right now, so we, at this point, want to get it out of the bucket onto the boat. And how long did you say you have? Um, it depends on the temperature, but probably 15 minutes. Okay, same process applies for a Ziploc bag. We're going to just stick it into another container here just to sort of get it under control. Have the cavity in there, pull this down on the sides. We're going to take that material and put it into the bag.
Get most of it out of there. This mixing cup is reusable, even if there's some uncured material in there, but we've got it mostly out. Now, we'll take this bag, shake it down a little bit; we want to get the stuff into the ends here. So I'm going to give it a little spin, and now it's all the way down into the ends. Now we want to cut the tip off, so we'd like this to be about a quarter of an inch wide, you know, half a centimeter, something like that. I've twisted the top so it doesn't squeeze out the top, and now I'm going to grasp it here and put a nice worm right down, sort of injecting into that seam. So this is kind of like cocking. About a quarter of an inch bead, maybe a little better than that, something like that, yeah.
We want to go down both sides of basically all the seams. As at a flatter seam, you're not going to need quite as much of the filling mix. So you're doing the puzzle joints with this as well? Well, there's a couple that we will, but we don't need to do these puzzle joints here. These puzzle joints here on the side, this one happens to have a couple little gaps; we can inject some into those gaps. Make sure it's, so you're just sealing up any light holes anywhere that there might be a little bit of light shining through. Yeah, but this isn't necessarily gluing that together; it's just filling those spots. But we want to keep on going down here, and we want to get this stuff out of the bag and out of our hot hands fairly quickly because again, exothermic reaction on a chemical reaction that generates heat as it reacts. The warmer it is, the faster it reacts, and your hot little hands are pretty warm. This was a fairly big batch, that 1 in the bottom of the bucket. So why don't you try distributing down that? Okay, there's an art to this, isn't there? Yeah. Oh, I see; you got to put it right up against it, and then that injects it in. Yep. Am I getting enough on there? Yeah, that looks good. It is pretty stiff now; it takes quite.
So, I would suggest on your first batch that you're doing this, make a pretty small batch. Don't think, "Okay, I'm going to mix up enough to do the whole boat all at once." Mix up enough to do a couple of feet of boat, just so you have a chance to get some experience with this, with a small batch that won't cost much if you fail to get it out of the bag in time. So I guess when I'm doing this, I have to be thinking about on the seams where we want it to be a nice roundover that you'll probably want a little more material. Yeah, flatter seams, you don't need less, uh, deeper seams, you know, sharper seams you need more. But you'll, you'll get a little hang of it as we start to do that. And of course, when you use a spoon, it's going to push it into that seam a little anyways, right?
You can really feel the heat coming off this thing now. Yeah, be aware as it heats up, if you find it actually hot, stop using it. Oh, okay, because once it's hot and you distribute it out, it's going to cool off very quickly, and when it cools off, it's going to stiffen up, and we won't have the ability to shape that fillet. So I'm thinking, as I get up here and it becomes flatter, I'm going to use a little bit less, yeah. And right now, since you feel it starting to warm up, the goal is to get it out of the bag onto the boat. And so do it where it's easiest to do it; we can come back, okay? Okay, can come back wherever we need to, um, so just get it out for now. Yeah, oops, oops. Yeah, the seam is much easier to do. So, this being a fairly flat seam, you're really just filling the, uh, the seam more or less. Yes, and flattening it, yeah.
All right, we're getting down towards the end. Oh, maybe, yeah, you don't need to, you know, I wouldn't worry about getting every last bit out of there. All right, well, it's not quite as neat as yours. Now, we want to shape the fillet. There's a couple of ways you can do it. My go-to way is a plastic spoon; you can also use a tongue depressor. This is a fancy epoxy-applying tongue depressor, but just a wooden tongue depressor will work fine. Um, the basic process is take your tool, and in this case, with the spoon, I'm going to put my finger right inside the spoon, press it down into that fillet, and then draw it. And don't do this to the best of your ability; do one nice long smooth draw down that whole seam. And there's going to be a little bit of excess here; we come back and pick that up later, spread that into that seam. We can take this excess and just put it into the mixing cup. Scrape up some of this stuff; you see if I do this in a bunch of short strokes, it makes a mess. If I do it in one nice long stroke with good pressure on it, it makes a nice clean fillet.
Will this uh, require sanding afterwards? No, no sanding. Stick to a good schedule; we need to do anything. I want to put the glass down on it while it's still wet, right? Last one here, and then we'll mix up another batch and do the rest. See a nice long pull there, spread that in. I want to clean out the squeeze-out on either side. So, with this squeeze here on the bottom, this works great, doesn't work everywhere, but I'm going to put a little bit of radius into that squeegee just by ripping it funny. Come down here, lift it up; nice. The side shines; it's a little bit more of a process because it's hard to bend them all the way in there. Basically, you'll have a sort of light spot in between the fillet and the squeeze-out. You want to take the corner of your squeegee and sort of like a snowplow, right down that light spot, sucking up the squeeze-out. Take this excess, put it back into your bucket. Do the same thing on the other side. Notice I've got the blade of the squeegee aimed up, so the material I'm removing is piling up on the top of the squeegee, yeah.
So what remains there is a nice smooth radius in between the two panels, and that's been pressed into that seam, yeah. It becomes structural, welding these two panels together, and it's really strong. All right, so let's do some cleanup. So that's a flat seam; you might be able to just do the bridging straight over, okay, here it's fairly flat seam; we can probably just come along this way. I've aimed the surface of the squeegee up, so the material I'm taking off piles up on top of the squeegee. I generally, even if there's big blobs, I sort of scrape it up lengthwise, with okay. So you don't do what I did, yeah, so you don't get the point of the squeegee into that of corn and pull up, pull out the material. So, so basically you're trying to make this squeegee conform to the shape of the bottom of the Y. So the first time around, you probably want a little smaller batch, yeah. We have these fingers; they're really wonderful tools, um, and we really wanted times get in here and smooth stuff out with our fingers. And there are times when really the best tool for shaping the fillet is your finger, but if you do it by dabbing at stuff, you're going to just make it rougher. You want to sort of drag it through and smooth stuff out by dragging, not by sort of jamming at it. Very similar to when you're seeing a window or a door, yeah. It's really the same idea.
All right, so let's mix up some more. So Bill's just mixing up some more epoxy in the same bucket we were using for the thickened epoxy before. Any excess thickened epoxy is pushed off to one side; we mix the new epoxy on one side. When it starts to get mixed together, we just mix it all together in one big batch. So now we want to make peanut butter again. So now it's still pretty gooey after adding in the old stuff. So you started off with, I think, about eight teaspoonfuls before. Well, yeah, you know, since we have some in there, it's a little bit hard to figure it out. I'd start with a couple of scoops, mix it in and see where it gets you. Since you haven't mixed it before, you don't really have a sense of how much it's going to take. Right, I know many of these processes; it's been my experience that you go a little too far and all of a sudden, uh, you've got quite a bit too much.
Yeah, all right. So that's still very loose. Yep, so we'll go another one. Yeah, that's so loose; I'd go two again. Two again, yeah. You know, when you start getting close, then start easing off. How much you add goes in a little slower now? Mhm, yep, you really feel that start to thicken. All right, let's take a look at it. Yeah, that's probably good to go. Oh, okay. So you can put it in the piping bag. Try not to get it on the outside of the boat. Don't spend a lot of time fussing with that because we've got our clock; it's ticking. Okay, yeah, the centrifugal force method works pretty well too. Okay, but that's part of the reason to put it in the bucket is so you don't get up near the top edge. Yeah, all right. And the scissors are right there, so like a quarter-inch wide tip on it. All right, now how about here down in here; you want... I don't worry about it too much, but you don't want a lot of air in there. Just get it about a quarter of an inch; you said a quarter of an inch, so about there, a little bit this way too, yep, yeah, right in there. Okay, all right, all right. Now have at the seams; all of them need to be done.
All right, so I guess the thinking here is a little better, a little too much than too little. Yeah, if you have too little, you can always pipe in some more, right? But I really encourage people to do all the dispensing of the fillet material from the bag. It's really easy to think, "Okay, I've got this extra here in my bucket; I can take that and smear it in with my fingers." It always makes a mess; it always will take longer than piping it in with the bag. Okay, so I talked about we have the wood flour then the copil. Copil is essentially bleached wood flour. Technically, you could use this to make your fillets, but they would be white, and that just looks kind of ugly. So one of the reasons for using the wood flour is it just looks a little bit better than the copil. Gets hard to do up here, yeah, sometimes it's easier from the other side. Okay, oh yeah, okay from this side, it's easier. Now, at some point, you can't get up any further. Yep, up at the very ends, we don't have the bevel, so we don't have that gap to fill in, but it doesn't matter because it's fairly flat there anyway. Oh, there's a... listen, do the bottom first, 'cause now I got to get around it. You dope, guess you... you know, use up what you've got in whatever seam you want to use it in. All right, not too much more, nice. I think that's about it. All right, so we still have the ends here to do and deep into the stem here, um, but let's first shape these fillets with the spoon, and before mixing up another batch, should I clean this old stuff off? Um, it shouldn't matter too much; you want this side fairly clean, but once you start dragging, it will sort of clean itself.
Okay, so maybe I should drag this way? Yeah, so with the spoon, you can use the tip of it to reach into that. All right, use that contour to... yeah, you can almost deform it a little too. Yeah, beautiful there, and nice lift up on the end there. Instead of stopping and lifting, take off like an airplane, the whole length, yeah, the spoon works nicely though, yeah. I like the spoon again; different spatula shapes can work better. Sort of a tongue depressor works well, and CLC has a nice set of different tools that they offer as well. So come in like landing an airplane, right? Yeah, keep it moving. And I tend to just go the full length of the seam in one long pull and worry about the fact that I'm getting an accumulation of ugliness there later. Okay, so I'd start where it's nice and smooth and draw into that, branching down the other seam. There you go; angle the boat really holds the spoon right where it should be. Yeah, a little more gloopy this time. So again, for all these major glops, I just come right through here, scrape them up rather than diving in, right? Yeah, all right, and don't be worried about switching sides if it's in a more comfortable position to work. Okay, if you want to do good quality work, doing it from a comfortable position makes a huge difference. It's a big difference if you're awkward when you're doing it; the work's going to look awkward when you're done. At this point, I have to remember that my hands are all full of goo, and holding outside of the boat is probably not a great thing unless you use the back of your hand. Here's a towel, a rag, so wipe your hands off so they're clean. To really clean things up a little, denatured alcohol. Oh, okay, let me see that. So another way to smooth out a fillet, um, if you get some rough spots, a little bit of denatured alcohol on the tip of your finger and then rub down the area you want to smooth out, and that will do a nice job of blending stuff together.
What about way up there in the front? We need to get up there; we'll need more filling mix to get up into there. But I mean, how do we smooth? Just use your finger to smooth that out. Um, yeah, if it's a place it's hard to reach, um, use your finger and try the alcohol; see what you think of that. Okay, you know, get a little bit of a wet finger of alcohol. Okay, oh yeah, that smooths it right out. Yeah, any goobers we want gone because we're going to glass right over this while it's wet, and those goobers are going to stick up, and the fiberglass is going to have a hard time getting over it. Now I just... Mo noticed one spot here where I totally missed. Okay, well, we'd still have more to go, so okay, it's not a big deal. So get all the bumps off; you want to use this alcohol when you see that the fillet is very rough and grainy. Yeah, it's a good way to smooth it out, as opposed to getting in there with a dry finger which will tend to actually make it rougher. Okay, so in the deep V of the ends here, we want to get... we do want a big fillet up on the ends because we're going to hit stuff with the bow of the boat, and this fillet will be the reinforcement to make it strong. So when we smooth that over, we're going to leave the majority of the material in the boat, yeah, and up in the stem here, we really want a big thick fill, and it's really hard to get in there. So basically,
we're going to have to let gravity do its work. This is going to provide a lot of strength up in the MS. Then I'm going to take some sort of tool and try and spread that, press that down in there. It's so narrow in there that sometimes that tool won't get to it, so this is a time to break out your old finger. We really want to smear that up deep into that narrow point so you have a good flat spot in there. Theoretically, it should be rounded a bit, nice and smooth in there as best as possible, but that really fills that corner up in there so towards the bow.
Do we tend to try to leave more or, yeah, yeah. So the whole process here is one of trying to get this smooth enough so we don't have to sand before we do the, um, that's right. And you know, my goal is to do this to do the glassing while the fillet is still wet. So again, up in the stems here, we want a nice big fillet, so the stern is a little bit more open, so a little bit easier to get into with the idea of a big honk can fill it in there. All right, now let's try shaping that, see what we come up with. Want to reach in there and, oh, you want me to dry, okay, sure. Um, I do it with a finger; you know, these are good old spoon stuff. But up in here, I think try it with a spoon, um, see how that works. All right, if it doesn't reach in there, then try it with a finger; you can try it with a popsicle stick there, a spoon over there. There's a spoon, all right. I don't know if the spoon's going to get in there, maybe to a point. All right, now I'm dragging it out, so you probably don't want to use a spoon too long. Now, how about pressure while I'm doing this? You want to put shove it into the ends there, so having some pressure is good; yeah, it's pretty tough. Yeah, right down at the knuckle there, it's good to have a good chunky fillet down in there. Okay, did I drag too much?
Oh, I got a bit of my finger; if I can get it back in there, let's try it. Yeah, that looks good. Now just get rid of the goobers, spoon these side seams as well. Okay, my tendency is to want to forego the alcohol, but I know that will... this will rough everything up again. So now we just need to clean it up with the, uh, spatula. Oh, I ran into the dry spot; okay, it's hardened off. So we just smooth that, I think. Yeah, how's that? Get the goobers off. All right, so now the hull is all filleted, um, and we want to make sure there's no goobers left. Any little hard chunks will end up being something the glass has to conform over, um, so some things we might be able to just pick out. Other stuff, um, we want to wipe down with some alcohol just to make everything nice and smooth, so the glass has a nice chance to lay down. So I'd say we could break for lunch. Okay, that sound good? Sounds great.
Okay, so we are looking at this fillet here, which makes a nice radius between the side and the bottom, and this fillet over here where we've dragged a little bit more of the, uh, fillet mix out of there. And so it's still a bit of a sharp corner; this will work fine, um, but again, having a bit more radius in there would be stronger. So this over here where you see sort of a, a band where it's like a half-inch wide versus over here where basically you just have the width of that groove there. Having that more smooth transition is better; it's going to be stronger. Um, the smaller one's going to be lighter; it won't, it won't weigh as much. Um, we want to get that transition between the two panels and a real fill-up there. And frankly, these are small compared to what some people do. Some people will really fill that up, and I don't, I don't think it's necessary to make it so it's like an inch wide, and you've got a quarter-inch thick piece of fillet there; that's Overkill. Okay, um, you know, the, the boat you were paddling yesterday, it's... I built that, and at least 10 years ago, and I've bounced off rocks, and I've hit stuff, and it's fine, and its fillets are like this or smaller. Okay, so once again, this video's run a little bit long today. We glued up the inside seams of the hull, and we will continue today glassing the inside of the hull, but that ran a little bit long. So I'm going to break it right here.
After filling those inside seams, generally, I will do the filling and the glassing all in one day. It saves some time, um, it eliminates some sanding, it makes the bond a little bit stronger, but I know as a practical matter, you may not have the time to get through the whole thing all in one day. So doing what we did in this episode, filling the seams one day and then glassing another day is perfectly fine. Just be prepared to sand those fillets a little bit to get the gloss off, make sure there's no hard spots that are sticking up in the glass, and smooth everything out a little bit. That's perfectly acceptable; there'll be nothing wrong with the boat if you do it that way. I just do it this way because it tends to save time, but I know that means you need a bigger batch of time all at once in order to get through the whole process. So if you want to break it up into smaller bits, perfectly acceptable. So in the next episode, we will go ahead with the glassing. If you're enjoying this series and want to continue to see the video videos as I post them, uh, hit the bell at the bottom of the screen to turn on notifications, subscribe to my channel, like this video, all that stuff helps me get the word out. The more people that see this, the more people YouTube will show the video to, and the more people that YouTube shows the video to, the more advertising revenue I can get on this. And that makes it that much easier for me to produce these videos. So this is a big project; it may look like a lot's happening with the boat, but really, most of the work on making these videos is sitting at my desk, editing everything down to digestible chunks. So again, subscribe, hit notifications, hit like, and if you want really want to directly support the production of these videos, I do have a Patreon channel. And, uh, and my Patreon supporters get early access to all these videos. But in reality, the reason I do these videos is I want to get you guys interested in the idea of building your own boats or building anything. I really enjoy sharing my experience in building these boats and making it accessible for you guys so you can see how it's done and maybe get you interested in building one yourself. And in the ideal world, the best way to support me would be to buy a set of plans or buy the kit from Chesapeake Light Craft and then build that boat, finish it, get it out on the water, and let other people see how much fun you had building your boat and how much fun you have out on the water paddling your own boat. So until the next episode, thanks for watching and happy paddling.