Bridging and Wrinkles: Troubleshooting Cloth Conformity for Interior Kayak Glassing
Introduction
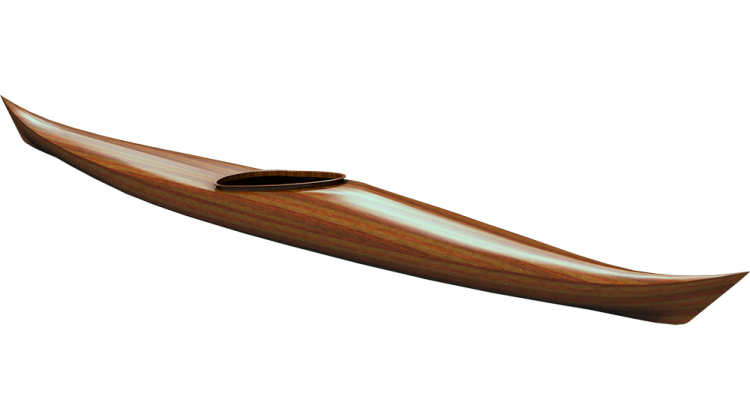
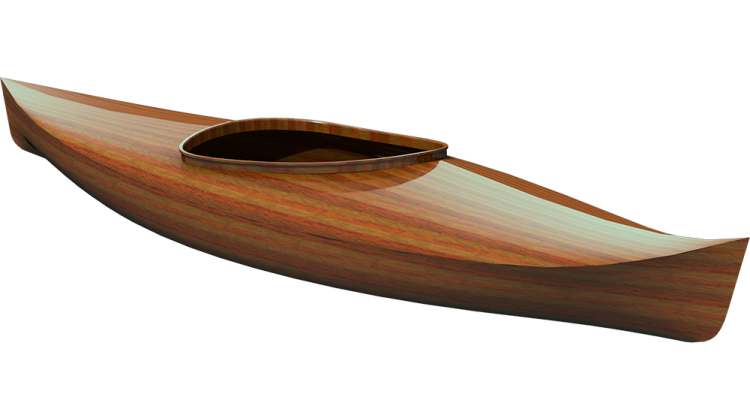
This video is part of a multi-part series showing the process of building a stitch and glue kayak kit. The specific model is the Gilat Kayaks Petrel Play SG kit. At this stage in the build, the hull pieces have been stitched and glued together. The current step is to fiberglass the inside of the hull.
Fiberglassing Challenges
Fiberglassing the inside of the hull presents unique challenges compared to the outside. Gravity works against proper draping and conformity of the cloth on vertical and inverted surfaces. The fiberglass wants to "bridge" across corners, leaving gaps rather than a tight fit. There is a temptation to overwork small areas to perfection right away. The key is to focus on getting reasonable coverage then finesse problem spots.
Adequate Cloth Coverage
The bridging issues that occur are typically not due to trapped air, but insufficient cloth to reach down into corners and seams. If an area seems to bridge or bubble, the solution is to feed more cloth into that area. "Push some more glass in somehow...make make sure there's enough glass." Care must be taken not to poke the fillets if they are still soft. Lifting the edge and easing the cloth down works better.
Epoxy Application Process
It is best to go directly from wet fillets to glassing so the cloth lays into the still-soft epoxy. This wasn't possible here due to timing, but the fillets were still flexible enough to bond. Small batches of epoxy are mixed and applied in stages to progressively wet out the dry areas. A squeegee held at 45 degrees helps move the epoxy across and up the sides. Too much pressure causes bridging. The goal is to get coverage without overworking while the epoxy is fluid.
Grunge Cupping
Once initial coverage is achieved, "grunge cupping" removes excess epoxy by using a slit cup and squeegee. Excess epoxy adds unnecessary weight and weakness. The ideal is 50/50 ratio of fiber to resin. Removing the glossy finish allows the cloth texture to emerge. This takes some calibration of squeegee pressure.
Dealing With Wrinkles
The nature of wrinkles reveals whether there is too much or too little cloth in a given direction. Pulling wrinkles perpendicular to their orientation removes them. For stubborn wrinkles running the length of the boat, hand tension from the outside lets them travel down to the end of the cloth. The goal is to finesse the cloth into place rather than force it.
Finish Work
Small custom cloth pieces are cut on the bias then eased into place at the ends, making sure they reach all the way into the corners and seams. The top edge is trimmed and checked for any dry spots. The finish work takes patience, using minimal resin and strokes towards dry areas to spread it effectively.
Next Steps
An additional fill coat will even out the interior texture before sanding and varnishing. This protective finish prevents UV damage over time. The deck will be constructed next using the same stitch, glue, and glass process as the hull.
Conclusion
Fiberglassing the interior has unique challenges but similar principles apply through the whole build. Ensuring adequate cloth coverage takes priority over perfectly finishing each area. Grunge cupping removes excess resin for optimal strength and weight. Reading the cloth's wrinkles and bridges reveals how to finesse it into place. Patience and the right ratio of materials helps the cloth conform rather than fighting it.
Hey, welcome back to The Guillemot Kayaks Workshop. I'm Nick Schade. Bill and I are building The Guillemot Kayaks Petrel Play SG, which is a stitch and glue sea kayak kit that Chesapeake Light Craft puts out. Chesapeake Light Craft provided me with the kit, but it's my design.
Building Progress
In this series of videos, I'm going to be taking you through the whole process of building the boat from start to finish using the kit. At the start of this video, we are actually in the second half of day three of the build. By this time, I think we're up to six episodes, and it's probably more like nine total videos I've produced on building this. But we're only up to the third day.
The first day, we unboxed it. The second day, we started to assemble the hull. On the third day, I think we spot welded the seams, filleted, and then started glassing.
Glassing Process
In this episode, you're joining us after lunch. In the morning, we had done the filling, and now we are starting to proceed with the glassing. I want to apologize in advance for trouble with the audio. I have a brand new lav mic which is causing me some problems, so a lot of the audio you are hearing is actually captured by a GoPro. It's a little boomy, echoing in the room. I apologize for that upfront, but I think you can understand everything; it just doesn't sound great. So let's get right to it.
Just took a break for lunch; the epoxy and the fillets here are still a little bit soft, which is good. The best situation, at least from my perspective, is to go directly from filling without taking a break at all, going to the glass. That way, you're laying the fiberglass cloth down onto a wet fillet, which is completely soft. That way, if there's any ripples or irregularities in that fillet, it has the ability to conform a little bit to the cloth. And since the epoxy is not yet hard, the new epoxy will bond to it completely with the best chemical bond.
Glassing Technique
I know for some people that's not practical; just your timing is not going to work out where you can do this filling and then have enough time in the day to do the fiberglassing. If that's the case, you should come and sand all fillets to get rid of the gloss to give something to mechanically for the epoxy to bond to and also to knock down any high spots that might exist from just goobers in the epoxy or in the fillet.
At this point, I'm ready to glass. So I'm going to get the glass, and I could take and roll this glass down the length of the boat. It's 50 inches wide cloth; the boat at the widest point here, the girth is 30-something inches. So there's going to be 10 to 20 inches of excess cloth on either side, and down at the ends, it's going to be a lot of sort of big triangles that's excess and not easily added back onto the boat.
Glassing Placement
If we run it across the boat, and I'm going to place this first one down in the cockpit area, run it all the way across the boat. I've got a little overhang on that side and a little overhang on this side. Now I'm going to trim it with just a couple inches excess just to make sure I don't cut it short. But now my wasted cloth is just whatever is hanging off the edge here, which is a couple of inches. We're not going through a whole roll of cloth at a time just to get a smooth interior finish. The only difference between this and one piece of cloth is this will have some overlaps, which will not be smooth. If we did this on the outside, there'd be some ripples in the finish, which would be hard to sand away. Here, it's on the inside; we don't really care. We can just take and coax this down into the shape.
Glassing Technique (Continued)
We don't want to take and, with the edge hanging over the plywood, try and jam down into there. Two things: the fillet may still be soft, and we don't want to be making fingerprints in there. And second, we don't want to have the cloth snag on the edge of the plywood and get little snares, little snags in the fabric. So if I lift up the edge and then coax it into that shape, a dry chip brush can do a good job of getting that shape laid down in there and brushing wrinkles out the ends. And if we get this reasonably down smooth on the surface, we should have a minimum of wrinkles when we go to add the epoxy.
Now I'm going to grab the roll of cloth again and overlap an inch right at the end of that previous piece of cloth. So, as you see, I don't chase every wrinkle out of this; it's just... no, once I get the epoxy on it, it will lubricate things that allow those wrinkles to move around a little bit more easily. Spending a little time to get it nicely laid in there can be worthwhile, but I'm just trying to get this overlap right here to be right. Now it's like an inch and a half; an inch is probably the minimum overlap you want there.
Having an overlap is actually reinforcing that area, sort of making a rib a strong point. And the bulkhead is going to be somewhere in here, so it's not a bad place to have a little bit of reinforcement. But right now, the cloth is overlapping towards the middle. And if I were to brush epoxy out this way, I tend to snag that edge. So let's just fold this back, fold this back, lay this down, and lay that down on top of it. That way, as we brush this way, we're not snagging the edge of that cloth. And now we can go ahead and coax this down and into the shape, and we will likewise do the same thing at the other end.
Final Steps
I happen to have a piece cut to fit; get this overlap going the way we want it. So, as you see, as I'm brushing it this way, I'm sort of lifting and pulling it to get the wrinkles out. So right now, we've got most of our cloth in; we've got two spots at the bow and the stern where we don't have any glass. But we'll cut a piece to fit in that later on. Now we're pretty much ready to start laying in epoxy.
Epoxy Application
Tools Required
Some tools we want to have before we start: some chip brushes and some squeegees—clean ones, clean squeegees.
Mixing Epoxy
Now I'm going to mix up some epoxy in the usual way—one pump to one pump. And again, we'll start with a fairly small amount, maybe an inch in the bucket. One thing that's a little bit tricky with the stitch and glue construction is we tend to work on the inside first. It's an unfortunate fact that fiberglassing the inside is harder than fiberglassing the outside. So, in learning this new skill, we're doing it on the hardest place to do it. It's a lot easier to get it draped on the outside because gravity is working in our favor. Here, gravity is kind of working against us.
One thing that's going to happen is we're going to find that the glass is pulling off the inside of the boat, and that's going to really frustrate you. You're going to think, "How do I get rid of this air trapped under the glass?" Part of what to understand is it's not that there's air trapped under the glass. It's bridging; there's not enough glass to lay down into the corner. Yeah, so it's bridging; it's not trapping air. It's bridging over that. That's the first insight to understand how to fix it.
So, if you think there's not enough glass in thereHow do you fix that? By making it further down in the seam, push some more glass in somehow. Make sure there's enough glass. We'll start with the regular mix here. This first maneuver is very tricky; you can watch it carefully. Amazing technique, right? Yep, you like that technique? It's alright, impeccable.
Epoxy Application (Part II)
So now we've got some epoxy in the boat. We want to get that from the middle of the boat up the sides of the boat. It's just going to be drawing it across and up the sides on both sides at the same time and then moving it down the length as we can. We want to make sure we get it all the way up to the shear and don't end up with a lot of holidays up at the top.
By the shear, you mean the joint between the deck and the hull? Yes, this is the shear. The shear is the joint between the deck and the hull, and we also don't want a big puddle running down the keel line.
Managing Excess Epoxy
So, we can take any excess. If you see shiny fabric, you can move the epoxy in that shiny fabric to white fabric or dry-looking fabric. The place we get bridging, so if you see over here, yeah, there looks like an air bubble. Basically, that's just not enough glass in that area. So, I'm going to take my brush, feed a little bit of glass down.
So you don't poke right on the seam; you poke above the seam? Yeah, I'm moving glass into the seam. Remember, the fillet may be wet, so if you poke into that fillet, you mess up the fillet. If you don't lift up the edge, it will tend to just sort of make a snag in the cloth, disrupt the weave without actually moving it. By lifting up the edge and feeding it down, that way I know I've fed cloth into that problem, and I know that I've solved the problem of not having enough cloth to get into that area.
Later in the process, we are going to do grunge cupping. So, I have a paper cup and I've made a little slit in it. I'm going to run the edge of my squeegee through that slit and then take the excess resin off and run it through that slit. It pulls on the edge of this cloth.
Addressing Bridging Again
The last thing we're going to do after grunge cupping is going and fixing those bridges. Oh, it just goes right into place, goes right back into place. So if you stop every time you cause a bridge, you're just slowing everything down. You're going to have to fix the bridges anyways later in the process. Just don't let them get out of hand, but don't get frustrated each time that happens, because you're going to revisit it. The quicker we do this, the earlier in the cure cycle we get back to fixing all the problems. The wetter the epoxy is, the less sticky it is, the easier it is to deal with.
So when we mix up epoxy, you know, I was sort of dramatic in pouring it out here, but part of the thing is, as long as it's sitting in this cup doing that feedback cycle of heating up and speeding up the cure, I want to make small enough batches that I can get it out of there quickly and onto the boat. Once it's spread out like this, the air temperature in here is 65°. We've got a lot of time to work on it. Leave it in here for 10 minutes, 15 minutes, and you will literally have a smoking hockey puck. This will start to bubble and smoke. If you don't get it out of the bucket, you don't want to rush, but you don't want to fuss around. Do it with all deliberate speed, I guess is the word I was looking for. We're not obsessing about every little potential problem.
Mixing More Epoxy
Alright, let's go ahead and mix up some more epoxy, and I'm mixing right into the same bucket I used before. With two layers of cloth here and potentially the bulkhead going directly on top of that, would that concern you that this will take up space, and the bulkhead won't fit properly? We can sand the bulkhead; we can make the bulkhead smaller if we need to. It's possible it will affect the fit of the bulkhead, but not enough to worry about, really.
So, have at it, see how it goes. Let's start here where you're not on that edge, just to deal with the easy part. Go ahead and right in the middle, right start at the wet edge and move towards the dry. So, we don't want to make any islands or peninsulas, but you don't need to rewet out the area that's already wet. It can let's get it into the dry area and be working there.
Alright, so hold the squeegee at like a 45-degree angle to move epoxy. Don't let it flop down flat; we're trying to move the epoxy. You don't need to press on it hard, but keep it at 45, and bring it all the way up the side. Again, at a 45° angle, and you see it just created bridging there. How do you think you can avoid making bridging there? Ease off on the tension, just don't press as hard, yep. So, a light touch while you're spreading it around like this, and I go all the way up to the edge, but not... you don't want a goober falling over the side. So basically, no pressure at all while you're doing this spreading. Remember, those air bubbles are not a lack of epoxy; introducing more epoxy into it is not going to solve the problem.
Alright, and when you basically run out of epoxy, don't keep on working the epoxy. Just make some more epoxy. If we've got shiny spots, that's excess epoxy. So, we can take that and put it someplace where it's dry. Listen to this; the sound it makes as I go by here, not much sound. As I get to here, you'll hear dry or drag, but that's about as far as we can go with that batch of epoxy. Instead of continuing to work that, we'll make more epoxy and continue on getting everything wet out. Because the sooner we can get everything wet out, the sooner we can get to the grunge cupping, the sooner we can get to fixing our problems.
Yeah, I think the tendency is to want to fuss around with all these small problems at a time, right? Just ignore the small problems; we'll deal with them later. Get everything wet out. So now it's just a matter of mixing more epoxy, and how much in this cup should we have? Like 3/4 of an inch? Okay, always err on a smaller batch than you need. You can always mix more, right? But if you mix too much, it might get away from you.
Where do we start next? Let's start on the other end, so we keep switching ends. Okay, so start at the wet edge, but you don't need to pour it on the wet stuff. But overlap the wet stuff a bit. Okay, and you can run it down the length a bit if you need to. Alright, now 45, just run it up. Oh, I went over. Yeah, just leave it. Just don't do that next time. I was concentrating so much on this part of it, and you see the dry spot over here. Oh yeah, get that before you get too far along, and make sure you get this side before you get too far along. Can you go this way? Yes, alright. Don't fuss; don't fut [Laughter]. There's this inclination you want to make you feel like you need to make it look perfect before you move on, right? Exactly. Don't feel that way; just get it halfway decent looking, and we're not trying to make it completely saturated.
Oh, you're not right now? We want it saturated, but you don't need to keep fussing at it until it is completely saturated. Alright, because it will soak in over time. I would be moving like this and, you know, get this stuff spread around, and then move it up the side. You move much faster than I do. Again, there's this inclination to make it look beautiful right away. Right, up the back. Don't fall, yeah. Don't fall into that trap because we want to get this wet out. When I do this, the whole interior glassing process takes 20 minutes, really. It ends up being better than if I'd taken longer because I can get rid of the excess epoxy.
All this shiny stuff is excess, excess. So when you're doing this, you're going from here to here, right? Yep, why? To get it wet; this is already wet, okay? But this is over wet, so go from here to here. This is dry; put it where the dry. You don't need to make the wet spot wet; the wet spot's already wet. Make the dry spot wet. That makes sense? That makes sense. The less you can squeegee a surface, the better. Oh, okay. You start introducing air.
Now we've got some wrinkles. These are fun. So, you see those wrinkles. Let's zoom in on those. These wrinkles here, they're running side to side on the boat. How do you think you get rid of those wrinkles? Push my... yeah, basically, if it's going this way, we've got too much yarn going this way. Yeah, so it's buckling and lifting off the boat. I'm going to come up here and find those yarns and pull on them. Oh yeah, look at that. And you can help it along with the squeegee, moving those to the dry area. Once it's in the dry area, those wrinkles travel more easily. If it's glued down, they have trouble moving. We have a dry area pretty close here; let's just move it to that dry. Okay, now what about this glob here? Yeah, if you have a useful place to put it, bring it quickly down there. Okay, done. Leave it.
Now we've kind of used up that epoxy. Let's make another batch. Okay, so if you have enough epoxy to wet the area out, you don't need to add more epoxy to it. That makes sense, right? And you should sort of get a gauge on how much epoxy it will take to wet it out. Essentially, if it's glossy after you've gone past it, there's epoxy still to be soaked in. So, these double layers will take longer to soak in, but give them a chance. You don't need to keep on playing with them. Just give them a chance, just soak it up. All right, there is definitely an art to this. Yeah, you know, it absolutely takes some time to sort of figure out the touch.
You're done with your batch. So, we've got a little bit in here. Okay, when we get up into the ends, instead of making a big puddle way deep down in there, we'll mix up epoxy and brush it on to get it distributed. And again, this is a situation where we don't need to make it perfect with the brush. We're just trying to distribute epoxy onto the boat with the brush. And notice I'm stroking from the center towards the end, so the wet towards the dry. That way, any wrinkles get pulled towards the dry, where they'll tend to disappear. Okay, I've put some epoxy on there. Now, I can take and squeegee that, and there's excess epoxy on that squeegee. Yeah, and so that's wetting out those incompletely wet-out areas. Oh yeah.
And I've got some up by the top there. There's probably enough on this brush to just go ahead and put a little bit on there. You don't need to make it look perfect with the brush. That's only a tool for transporting epoxy from the tub to the boat. And then take the squeegee and go over it again, and that gets your excess off, and yeah, it spreads the excess to a place where it's more useful. I'll make another batch. Okay, but let's not make... we won't make it as big. We only have this cloth left to work with. Okay, you have a wrinkle there. How do you get rid of a wrinkle? You pull on it. Which way is the wrinkle gone? This way. Yeah, so you have too much yarn in which direction? The yarn, too much yarn this way. Yep, so how do you... You were doing it right there. Give it a little light tug, and that will get rid of that wrinkle. Oh yeah, there it goes. Yeah, okay. So, I have another batch of epoxy.
So instead of just pouring a bunch of epoxy down into the bottom and having to wipe it out, squeegee it out, I'm just going to use my brush to transport epoxy from the tub into the boat and start to get this laid down. So, I'm stroking from the wet towards the dry, and I'm not trying to completely wet out the cloth with this. I'm just trying to get some epoxy in the general vicinity of where it's needed. So I get these sort of mangy-looking spots where it's not getting a lot of epoxy on it. I'm not going to worry about that just yet. I'm going to do both sides. This is a small batch of epoxy, and just in the time I've been working on this side, that side's got better-looking. Yeah, so now I'm going to take my squeegee, pull it all the way down here, and that's suddenly looking better. Same down here along this seam. This area and same on this side. And now that's not perfect, but there's only a couple of spots, and without even adding more epoxy to my brush, I'm just going to go and wipe these couple spots right there. That's now completely wet out without a lot of fussing.
I have some more dry spots in here that need a little bit more work. I will mix up some more epoxy and work on that. Let's work on the grunge cupping. So, if you look down here, there are places that are really shiny, places that are sort of matte, where you see the texture of the cloth. In here, the texture of the cloth. In here, we see the texture of the cloth. But other places where it's a bit shiny, we want to see the texture of the cloth everywhere. So, I'm going to do the grunge cup thing, which is to just drag my squeegee kind of at a 45 with a little bit more pressure this time and pull it all the way across. And you see all the shoo on my squeegee. Just run that through the slit. And now this area is looking much drier. So, you see here compared to here in the video, you can see there's a difference there.
I'm going to do the same thing in this area, just go over one squeegee width. We get a little bit of a ridge there; we'll get rid of that. Look what's happened way over here; we've made a mess of things. I'm not worried about it. So, I'm just going to go down and get rid of all this excess epoxy in this area. And Bill is itching to do something about those bridges over there, but I don't know what. But that goes to the fact that, okay, so, at the very beginning of this, worrying about these small amounts of bridges, yeah, no, I've made a hell of a mess right now is inconsequential because later on, it's going. So if you try to fix those early on, it just makes it harder to fix them now, and you'll get behind. And, you know, it may seem like, you know, what's the harm of too much epoxy on here. The scrunch cupping is all in the interest of getting rid of excess epoxy. And what's the problem with too much epoxy? Well, A, it's heavy, right? And then B, it actually is weaker than fiberglass with just the right amount of epoxy.
So, the epoxy is not that strong by itself. If it doesn't have glass in it, it's just another kind of plastic. They actually call fiberglass products fiber-reinforced plastic. So, it's the fiber that's reinforcing the plastic. The plastic isn't that strong. What that's doing is just bonding the glass to the boat. And so, we want just enough epoxy to bond the glass to the boat, and any more than that will tend to crack, cause problems. Right. In actual fact, for our boats, it's not that big a deal. We're not making the space shuttle here; we're just making a kayak. It serves no benefit to keep all that excess epoxy on there, and it does serve a benefit to take it off. It makes it lighter.
Removing Excess Epoxy - Grunge Cupping
Sure, so we want to take it off. Grunge cupping is something we're going to do on both sides. Even come up here and take it. See, that makes that bridging even worse. But we can get rid of the bridging by lifting the edge and easing the cloth back down into the chine. If I put too much in, I get wrinkles, so just draw those back out again. Push it down, and we're not jamming your finger or squeegee into that; we're just easing some cloth down. Generally, at this stage of the game, any bubble is not trapped air; it's either too much cloth or too little cloth. This is too little cloth; that's too much cloth. So it's a matter of getting that balance – just enough to lay down flat on the surface.
Finessing the Grunge Cupping
Yeah, it's just finessing it into place. Once we've done the grunge cupping, we've got a lot of time to work because the epoxy is quite thin. It's not doing that thermal meltdown thing. In this temperature in the shop, we've got a lot of time. So if we go ahead, do all the grunge cupping, and then come back and fix all the bridges, we're in good shape. We still have the ends to do.
Working on Grunge Cupping
Why don't you start working on that grunge cupping? There's a cup, and when that gets filled, either throw it out or drain it out. So, you're drawing from one side to the other with enough pressure that you're building up some epoxy there. I think I've done this section, so move that way.
Calibrating Pressure and Speed
Alright, so how far? Go right to here. Yeah, you see the ridge there; it takes a bit of pressure. It does take some pressure. Go right up the side. Yep, right up the side. Alright, just do that. Yeah, okay. Now that was probably a bit too much pressure. You start to calibrate your pressure a little bit and see how much it actually needs. Have a speed as you do this; play with it.
Applying Bias Cut Fiberglass
So, I've cut off a little triangle of fiberglass that I'm going to lay into the boat. The weave is going across and up and down here. Now I'm folding it at a 45 and then going to lay it in this way so that the 45° weave is going across the seam at a 45. This is called bias cut, and being on the bias, it can conform to funny shapes better. Just do my best to lay it in there wrinkle-free with an overlap.
Working on the Ends
When I'm going into the end here, the first place I wipe it down is right down in the deepest part of the stem, making sure it fits all the way down in there. Then I'll start to brush out the sides. It doesn't need to be aggressive pushing at it; it just can take it. If you've got something, just lift the sides, push it down the sides. Oh, I see, okay.
Dealing with Wrinkles
At this stage of the process, when I'm doing small patches of glass, I'm making very small batches. We're not trying to force the glass around; we're trying to persuade it to go where we want it to be. Speed is of the essence. You're not in a screamy panic; we're just doing what needs to be done and not anything more.
Managing Wrinkles and Bridges
So here we've got a situation. You see all these vertical wrinkles. No amount of pulling it this way is going to get rid of those; they're running up and down. We do have some bridging down here, and we have that to deal with. But these wrinkles need to travel towards the end of the cloth. So that cloth is going up this way, so I want to pull that cloth this way, and that will make more wrinkles up here. But then I'll pull those wrinkles down towards the end of the boat.
Finalizing the Process
Now, I've got this coming under the piece I just put in the bow. So I'm going to lift the bow piece so I can get these wrinkles out off the end of that cloth. Now, I'll put the bow piece back in there. So now we still have some wrinkles going this way up here. So they want to be pulled this way. And we've got some bridging, so push down. It's a dance; it's just finessing it.
Troubleshooting and Tips
You know, one of the things they say with kayaking is, if what you're doing isn't getting the results you want, don't do that anymore, try something else. It's part of figuring out what your other options are. If you keep going over the same ground doing the same thing and nothing's getting better, stop doing that; find a different way to attack the problem.
Applying Fill Coat and Conclusion
At this point, the last thing I'd like to do is inspect the top edge and make sure there are no dry spots. Trim off excess cloth hanging over the edge, allowing it to lay in. Tomorrow, we'll apply another fill coat to even out the surface and prep for varnishing. If you're enjoying these videos, hit notifications, subscribe, hit like, and until then, happy paddling.