Continuing on the bottom. Fitting both ends of strips in a precise manner.
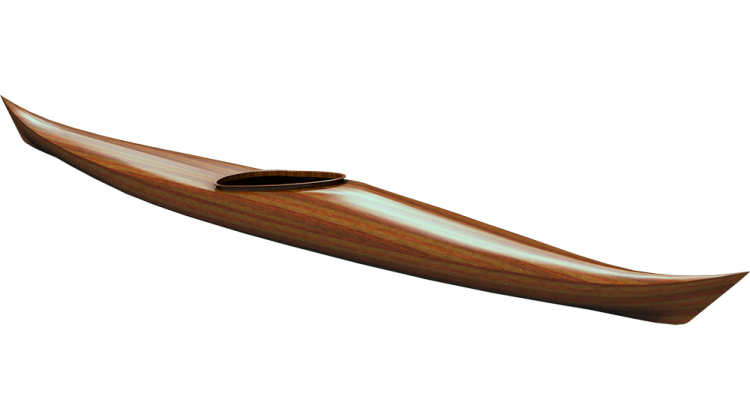
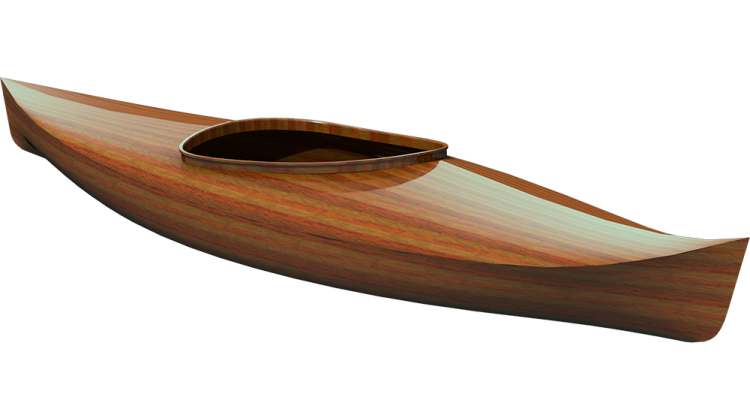
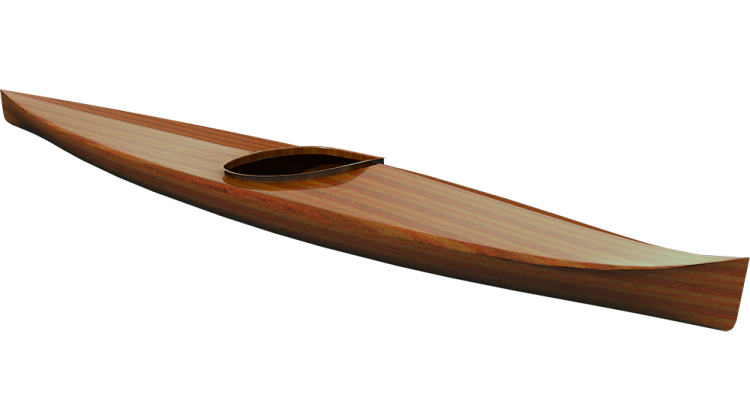
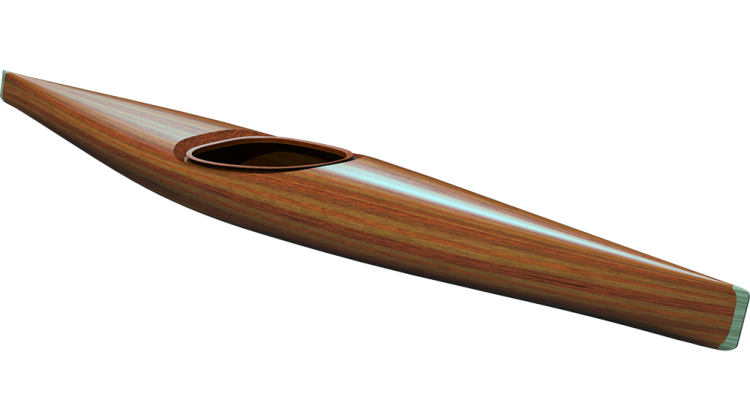
- microBootlegger Sport Plans
- Robo-Bevel
- Get the "Just Build It" T-Shirt
- Read along in my Book: Building Strip Planked Boats
Tools:
- Adjustable Temperature Professional Heavy Duty Hot Glue Gun - http://amzn.to/2nSK3OW
- 3M #2060 Masking Tape: http://amzn.to/2CeLOdF
Please support the making of these videos through my Patreon site: https://www.patreon.com/NickSchade
Music:
- Achaidh Cheide - Kevin MacLeod (incompetech.com) Licensed under Creative Commons: By Attribution 3.0 License http://creativecommons.org/licenses/by/3.0/
- Out for Blood - Jingle Punks
[Music]
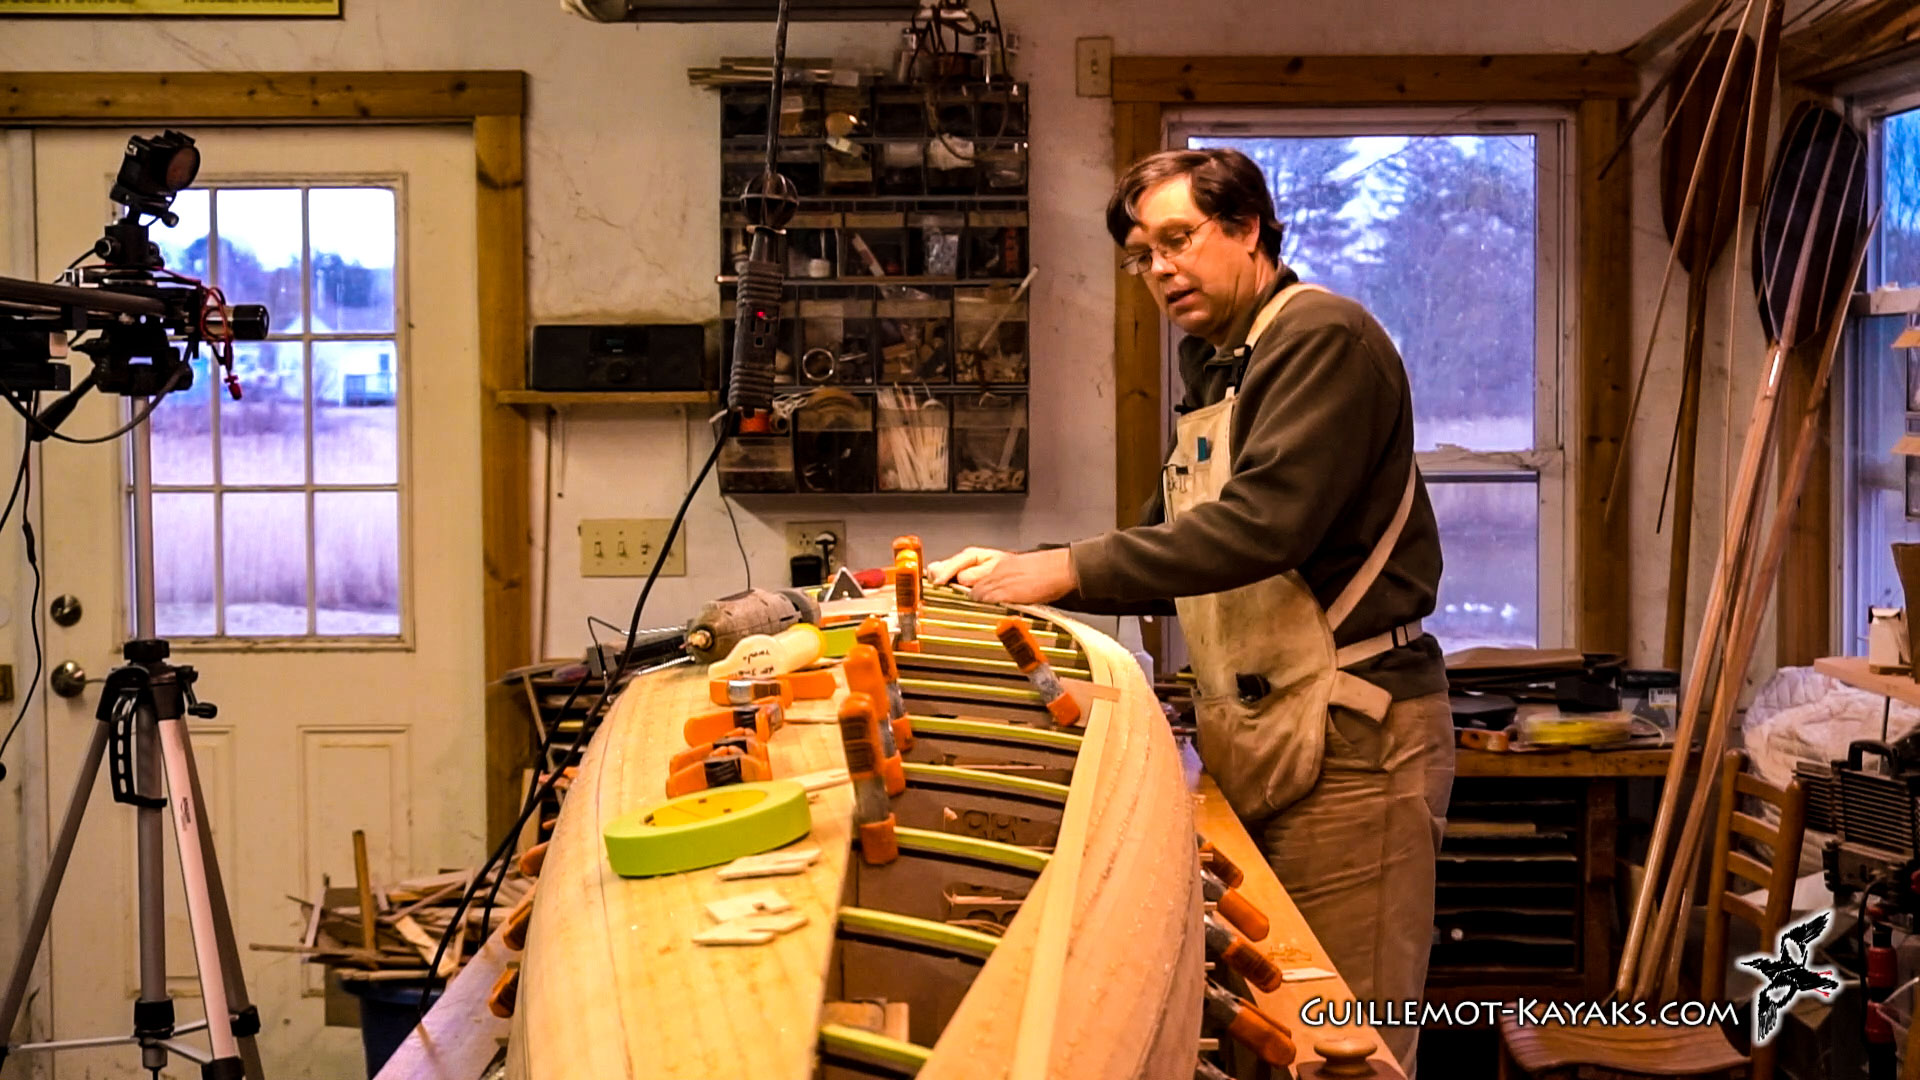
hi welcome back to the Guillemot Kayaks
shop I'm Nick Schade. Yesterday I took a
day off from the shop to go down to the
road to Mystic Seaport my friend Dave
Fasulo had some of his students there
doing some boat building and they were
building like ganymede kayak then all
comes on the staff of Mystic Seaport and
he was guiding two of day's students to
the building of the stitching glue kayak
and using my ganymede design chesapeake
light craft had provided them with a kit
and Ben was showing them the steps of
doing filling and putting glass on the
scenes so that was a fun break to just
wander around the Seaport briefly and
see what they were up to and today I'm
back in the shop and I'm going to be
working on trimming up the chine line
throwing it up and then stripping from
there up to the keel line I probably
won't close off the bottom today but
like to make some good progress in the
last episode when we've left off the
micro bootleggers Sport build I have
just added strips up to the chine line
and I left off without throwing up that
new edge so like we did on the other
side back in whatever episode that was
I'm going to mark out the where the
chine line is going to be sawed off
playing it down through get the bevel
right and then from there we can start
adding strips across the bottom so I'm
not going to spend a lot of time talking
about what I'm doing trimming out this
giant line if you want to see how I go
about doing that go back to the other
episode I'll try and put a link up here
let me just get to work on this see if I
can knock this off pretty quick and
we'll go from there
[Music]
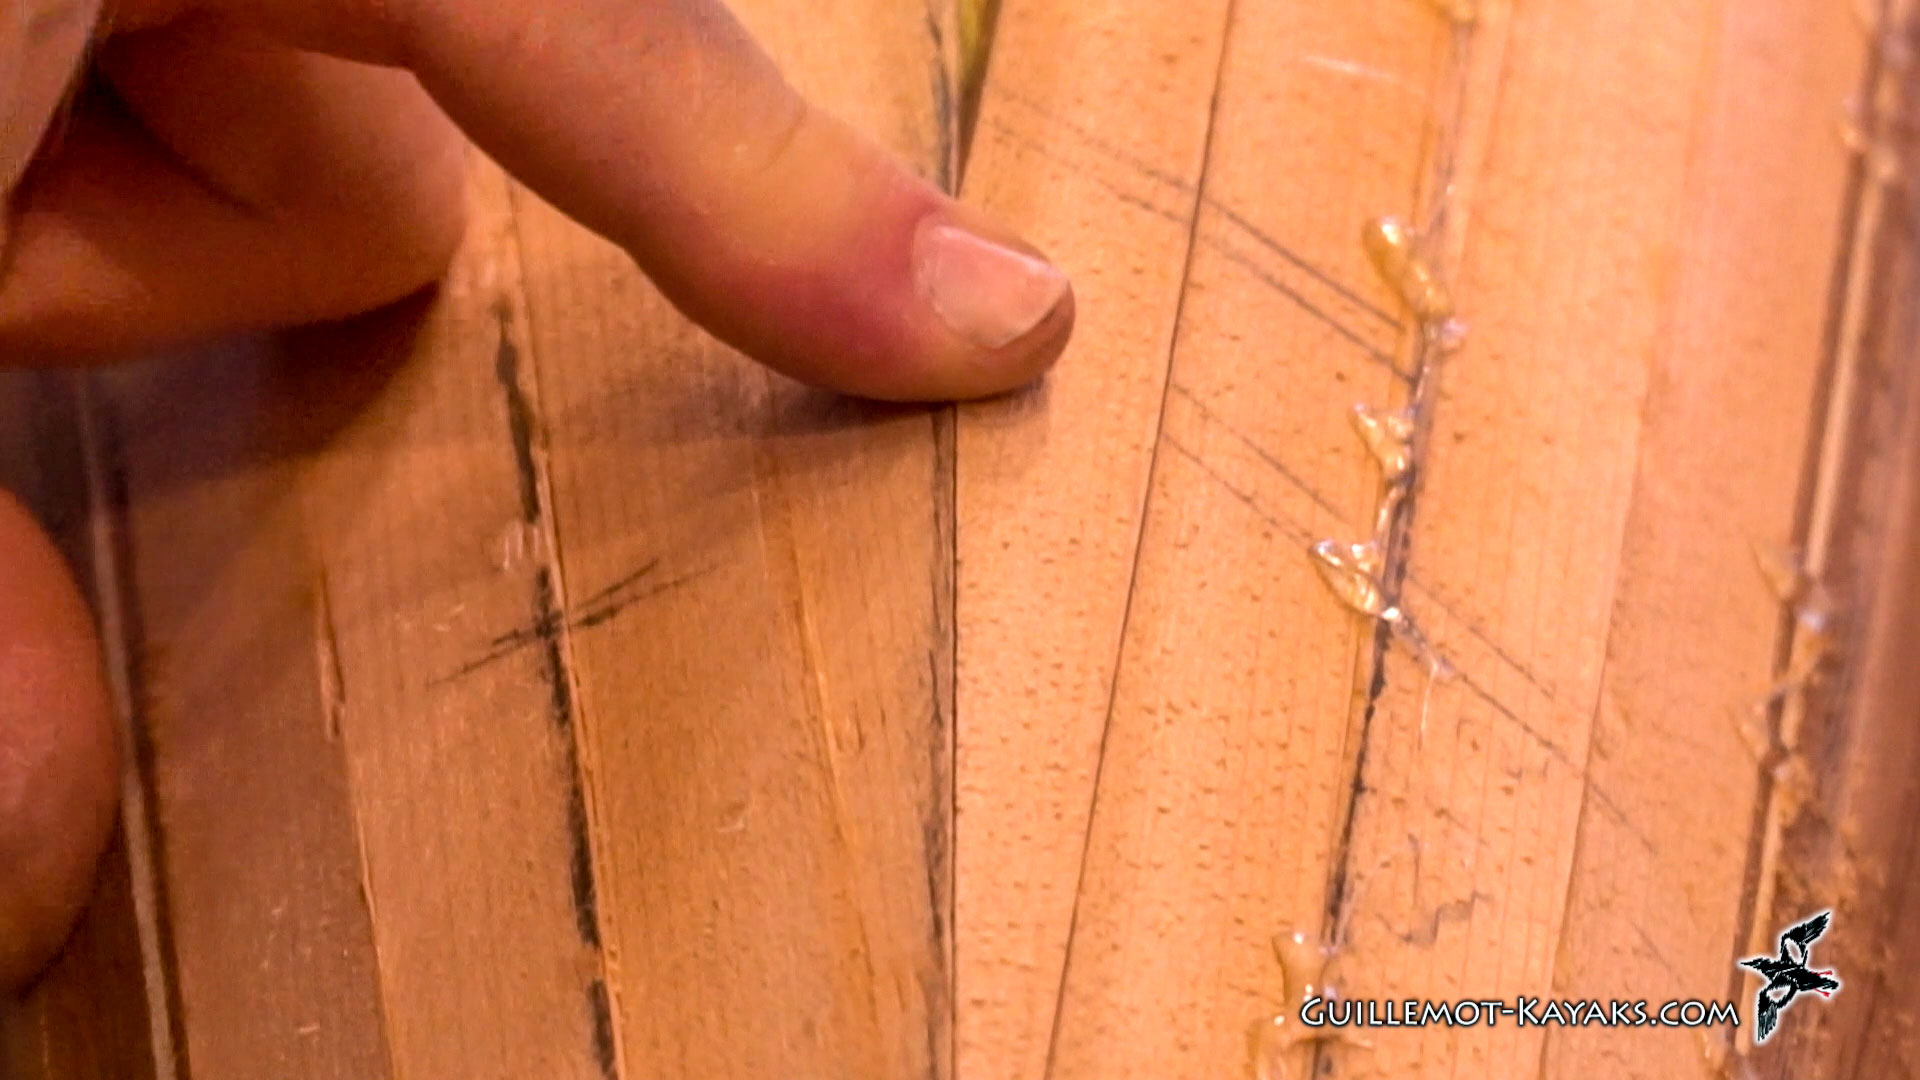
I tried clamping my spline below my
marks and putting the clamps here where
you have to jump around with the pencil
just because I don't have a lot to clamp
on to in the middle here where the last
strip is pretty much right on the line
that I'm trying to cut to so I don't
have anything above it to clamp to but
the problem with this is now the clamps
are in the way for even citing down the
line so it really pays to have the
spline above the line and that way the
clamps are out of the way and you've got
a clear view of the line you're actually
trying to get right so I'm going to move
the spline up above the marks and then I
can look at the bottom edge because that
will be the edge and actually trying to
get right
[Music]
so after lunch I sharpened the tools and
I got the top edge of this first strip
after the chine beveled out with a robo
bevel and a little bit of hand beveling
here and there now I'm dry fitting the
next strip after that first strip so
I've got the alignment marks here in the
middle all lined up I'm gonna have to
fit both ends this time but first I'm
just gonna mark this end and get this in
fitted in eventually I'm going to have
to do the same drill down at the other
end but I want to get this in fit first
just in case I overshoot this or
understood it a little bit I want this
end to be marked to fit correctly
however the first end is fair so even
though theoretically I could mark it
right now just I know this is a distinct
possibility that things won't be perfect
up there but I wanted a good tight fit
at both ends as closely it can get to a
good tight fit so I've cut my marks
there I can release the clamps now again
I'll pack this off an inch or so mark
where the ends gonna be cut it off
assuming that's the finished end I can
just mark where it crosses the center
line here and choose one of my plethora
of straight edges mark that I've gone
over this all before us I'm doing it
quickly
and off the excess it's just a little
bit more comfortable to stand on this
side as I'm fitting it especially if I
want to show it in the camera all right
again so I'm going to hold this is what
I think is that angle it's gonna be on
the boat and I'm gonna hold my block
plane vertically and now them down
towards that line and again this is one
of those situations where I don't try
and get the perfect fit on the first go
I'm gonna ease into it I could spend a
lot of time really accurately measuring
this get some bevel gauges out really
get it all dialed in and then try and
cut it right on that line so it just
drops in the first time that would be
awesome I just can't do that so in order
to get an accurate tight fit here I just
accept the fact that I'm not going to be
perfect and try to ease into it one step
at a time so the first thing is just to
get a rough approximation of what I
think this tape is going to be and based
on holding this strip at some
orientation holding the plane at a
vertical orientation then bringing it
down so I get this cut parallel to that
mark I made and I go ahead and try and
fit it in and you know with some
experience I've gotten to the point
where I can generally get the taper
pretty much first shot and right here
I've got like 1/32 of an inch opening
gap at the top so if the taper is good I
just need to adjust the gap a little bit
so again hold the plane up against the
surface tilt it out a little bit so
there's a little bit of a gap up at the
top matching what I just saw
that's my calibration on what's going to
be the right
angle and so now I'll just hold that
angle until I see the gap disappear
bring the piece back drop it in and
right now I have basically no gap up at
this center line I've got a little bit
of gap along the side here I was not
able to get my Robo bevel up in here so
I have not squared that up to the
orientation of this strip it's tight
down there starting to get a little
loose there so what I'm going to do is
just again look at the gap on the bottom
side of that strip and see if I can get
that planed away so I'm just going to
hold the plane kind of approximating
that gap I just saw doing it left-handed
for the camera
all right so now it's tight on both
sides top and bottom but my mark on the
boat is here in the mark on the strip is
here so again and inch and a half or so
away so holding it tight it flat up
against the taper and bevel I've made
already go the full length and then I
was what four swipes five swipes you
know try to fit again all right so now
I'm down to about an inch my taper is
still good my bevel is still tight cut
that very tip off the end there all
right it's starting to be a little tight
at the toe a little bit looser at the
heel a little bit of open at the heel
I'm down to three quarters of an inch
extra swipe at the tip with the toe hold
it out a little bit at the heel it's a
nice long strokes now when I place a
strip in here I could really jam it in
and make it tight it would tend to peel
this side up a little bit as I do that
thus wedging this wedging a gap into the
already installed strips here and you
know I could make it fit so the goal is
to have it just slide in and stop
rightward wants to be and right now I'm
seeing when I do that the tip is down
low it's recessed from the surface a bit
and it's tight at the heel so I think I
overdid my adjustment last time yes bet
it's even even the whole way across
nouns 1/2 inch and it's starting to open
up at the top pretty good
3/8 of an inch quarter inch very tight
and good so I'm adjusting as I'm going
and the goal is to have it by the time I
get these length marks lined up
everything should be a really nice tight
seam good sixteenth of an inch all right
so that's perfect right up there if the
alignment marks lined up right here type
full-length of the scene now with that
still in place I'm gonna clamp the strip
back down and make marks at the other
end so my length marks are now made and
I can unclamp the strip I set up these
little clamps on my work surface here
just as a place to catch the end of this
strip as I'm working on it so it's not
just dragging around on the floor
breaking that tip off that we went
through all that effort to make perfect
all right so it's gonna fit in like that
and they will back it off an inch or so
make a mark there one thing about having
a plane in your pocket you've always got
a pencil sharp huh there we go nice and
sharp
same drill at the other end
it marks up at each end and so now I'm
ready to put some glue on it and install
it I'm also gonna put some glue on the
tapered ends they just I don't go quite
all the way up the end of the taper
because I'm going to end up sliding it
into that space and that's gonna smear
some glue back along the length I don't
want to end up with a blob of glue on
the center line that's going to
interfere with the next strip so I go
from the tip down to just shy at the end
one of the things they like about using
tape as a clamp is it lets me get a lot
of clamping done quickly while the glue
is still wet and easy to squeeze out of
there as the glue sets up it gets harder
to squeeze out it's harder to get a tape
joint so if you spend a lot of time
trying to get one spot together other
spots are starting to set up a little
bit and it's going to just be a little
bit harder to get those nice and tight
so tape is quick gets the job done
quickly while the glue is still soft and
wet now I can come back and supplement
that with some stitches
[Music]
[Applause]
[Music]
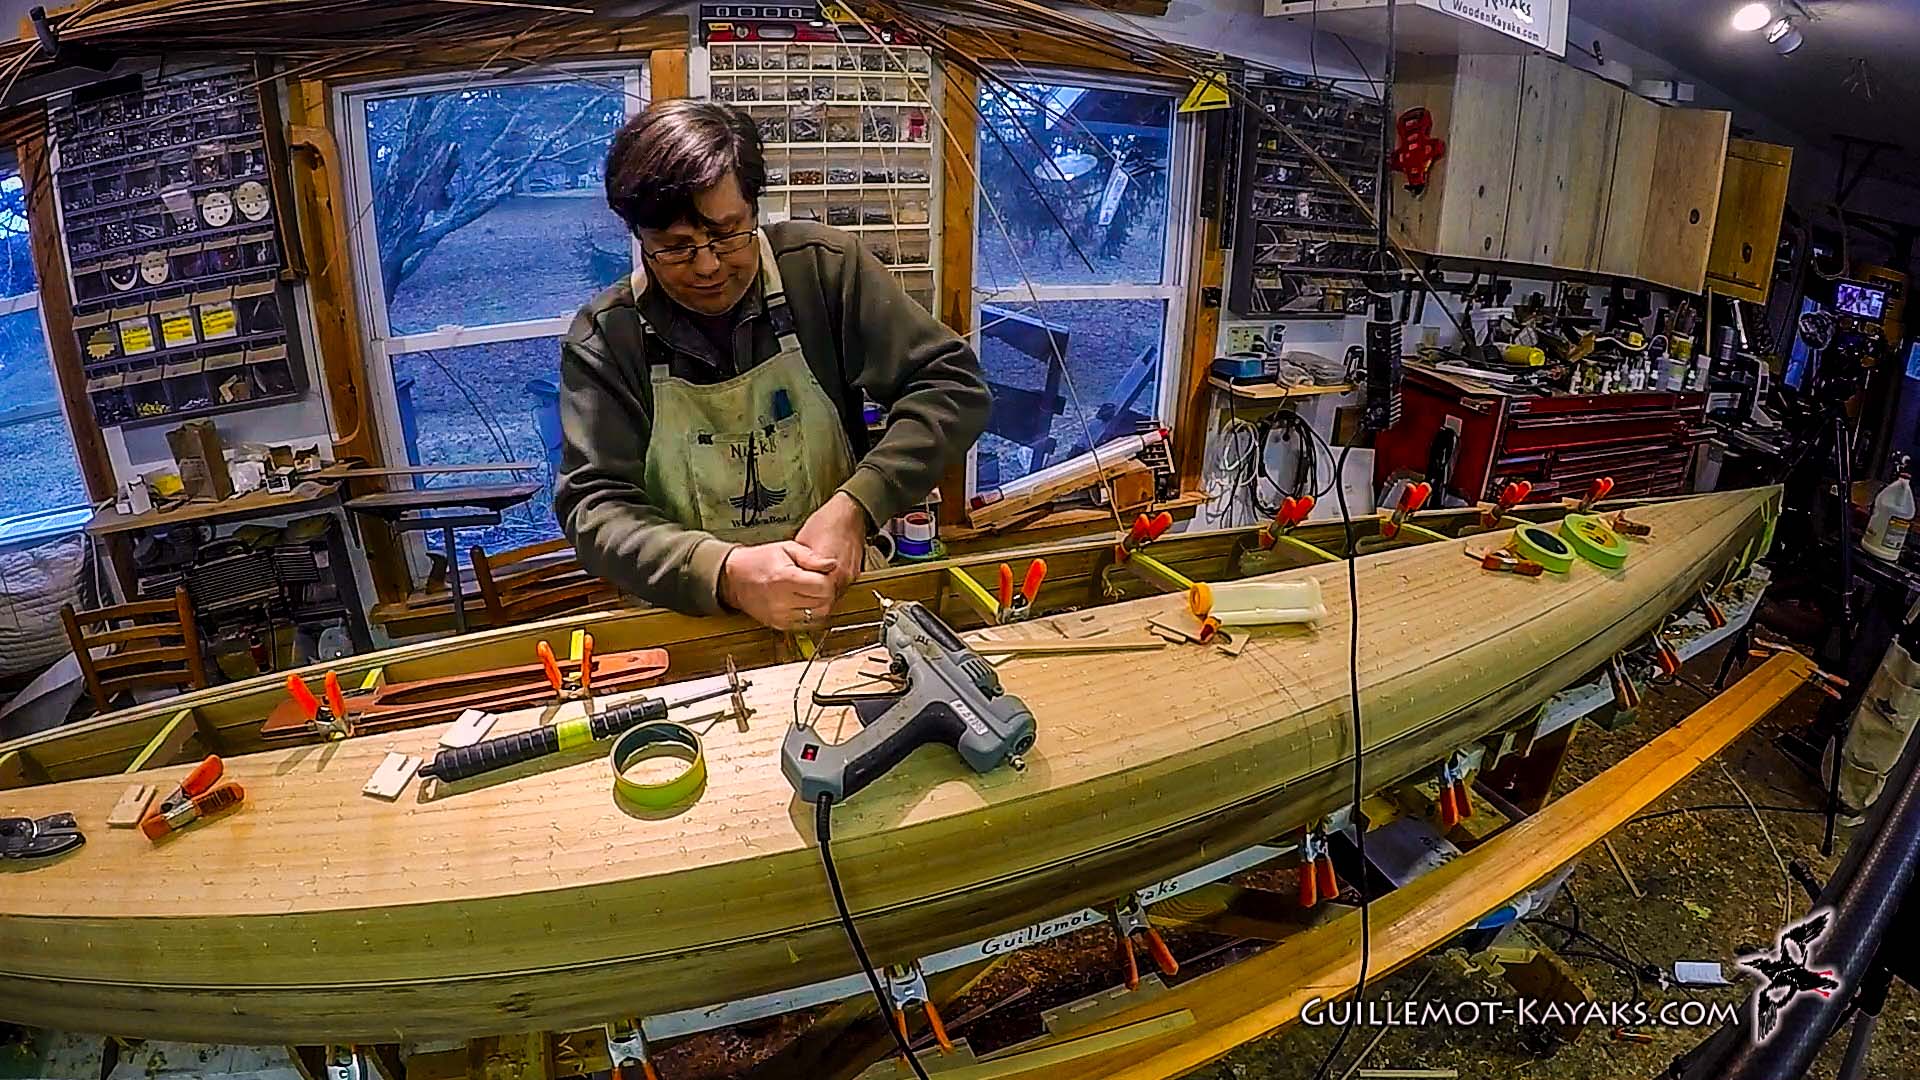
okay I'm gonna call that a day I don't
know how much that actually got recorded
today but I'm now three strips beyond
the chine so I've got three strips on
today total it's not bad
this is slower going because I'm fitting
strips at both ends but it's looking
nice things are lining up really nicely
I think it's really going to look sharp
if you've watched this far you should
probably be hitting like and subscribe
and all of that stuff and it would be
awesome if you have supported me on
patreon but I appreciate the support of
just likes and subscriptions in the next
episode I should make it most of the way
to the end on the bottom here probably
won't make to the closing strip of
better known as the whiskey strip but
we'll see how far we get until then
thanks for watching and happy paddling
[Music]
hi welcome back to the Guillemot Kayaks
shop I'm Nick Schade. Yesterday I took a
day off from the shop to go down to the
road to Mystic Seaport my friend Dave
Fasulo had some of his students there
doing some boat building and they were
building like ganymede kayak then all
comes on the staff of Mystic Seaport and
he was guiding two of day's students to
the building of the stitching glue kayak
and using my ganymede design chesapeake
light craft had provided them with a kit
and Ben was showing them the steps of
doing filling and putting glass on the
scenes so that was a fun break to just
wander around the Seaport briefly and
see what they were up to and today I'm
back in the shop and I'm going to be
working on trimming up the chine line
throwing it up and then stripping from
there up to the keel line I probably
won't close off the bottom today but
like to make some good progress in the
last episode when we've left off the
micro bootleggers Sport build I have
just added strips up to the chine line
and I left off without throwing up that
new edge so like we did on the other
side back in whatever episode that was
I'm going to mark out the where the
chine line is going to be sawed off
playing it down through get the bevel
right and then from there we can start
adding strips across the bottom so I'm
not going to spend a lot of time talking
about what I'm doing trimming out this
giant line if you want to see how I go
about doing that go back to the other
episode I'll try and put a link up here
let me just get to work on this see if I
can knock this off pretty quick and
we'll go from there
[Music]
I tried clamping my spline below my
marks and putting the clamps here where
you have to jump around with the pencil
just because I don't have a lot to clamp
on to in the middle here where the last
strip is pretty much right on the line
that I'm trying to cut to so I don't
have anything above it to clamp to but
the problem with this is now the clamps
are in the way for even citing down the
line so it really pays to have the
spline above the line and that way the
clamps are out of the way and you've got
a clear view of the line you're actually
trying to get right so I'm going to move
the spline up above the marks and then I
can look at the bottom edge because that
will be the edge and actually trying to
get right
[Music]
so after lunch I sharpened the tools and
I got the top edge of this first strip
after the chine beveled out with a robo
bevel and a little bit of hand beveling
here and there now I'm dry fitting the
next strip after that first strip so
I've got the alignment marks here in the
middle all lined up I'm gonna have to
fit both ends this time but first I'm
just gonna mark this end and get this in
fitted in eventually I'm going to have
to do the same drill down at the other
end but I want to get this in fit first
just in case I overshoot this or
understood it a little bit I want this
end to be marked to fit correctly
however the first end is fair so even
though theoretically I could mark it
right now just I know this is a distinct
possibility that things won't be perfect
up there but I wanted a good tight fit
at both ends as closely it can get to a
good tight fit so I've cut my marks
there I can release the clamps now again
I'll pack this off an inch or so mark
where the ends gonna be cut it off
assuming that's the finished end I can
just mark where it crosses the center
line here and choose one of my plethora
of straight edges mark that I've gone
over this all before us I'm doing it
quickly
and off the excess it's just a little
bit more comfortable to stand on this
side as I'm fitting it especially if I
want to show it in the camera all right
again so I'm going to hold this is what
I think is that angle it's gonna be on
the boat and I'm gonna hold my block
plane vertically and now them down
towards that line and again this is one
of those situations where I don't try
and get the perfect fit on the first go
I'm gonna ease into it I could spend a
lot of time really accurately measuring
this get some bevel gauges out really
get it all dialed in and then try and
cut it right on that line so it just
drops in the first time that would be
awesome I just can't do that so in order
to get an accurate tight fit here I just
accept the fact that I'm not going to be
perfect and try to ease into it one step
at a time so the first thing is just to
get a rough approximation of what I
think this tape is going to be and based
on holding this strip at some
orientation holding the plane at a
vertical orientation then bringing it
down so I get this cut parallel to that
mark I made and I go ahead and try and
fit it in and you know with some
experience I've gotten to the point
where I can generally get the taper
pretty much first shot and right here
I've got like 1/32 of an inch opening
gap at the top so if the taper is good I
just need to adjust the gap a little bit
so again hold the plane up against the
surface tilt it out a little bit so
there's a little bit of a gap up at the
top matching what I just saw
that's my calibration on what's going to
be the right
angle and so now I'll just hold that
angle until I see the gap disappear
bring the piece back drop it in and
right now I have basically no gap up at
this center line I've got a little bit
of gap along the side here I was not
able to get my Robo bevel up in here so
I have not squared that up to the
orientation of this strip it's tight
down there starting to get a little
loose there so what I'm going to do is
just again look at the gap on the bottom
side of that strip and see if I can get
that planed away so I'm just going to
hold the plane kind of approximating
that gap I just saw doing it left-handed
for the camera
all right so now it's tight on both
sides top and bottom but my mark on the
boat is here in the mark on the strip is
here so again and inch and a half or so
away so holding it tight it flat up
against the taper and bevel I've made
already go the full length and then I
was what four swipes five swipes you
know try to fit again all right so now
I'm down to about an inch my taper is
still good my bevel is still tight cut
that very tip off the end there all
right it's starting to be a little tight
at the toe a little bit looser at the
heel a little bit of open at the heel
I'm down to three quarters of an inch
extra swipe at the tip with the toe hold
it out a little bit at the heel it's a
nice long strokes now when I place a
strip in here I could really jam it in
and make it tight it would tend to peel
this side up a little bit as I do that
thus wedging this wedging a gap into the
already installed strips here and you
know I could make it fit so the goal is
to have it just slide in and stop
rightward wants to be and right now I'm
seeing when I do that the tip is down
low it's recessed from the surface a bit
and it's tight at the heel so I think I
overdid my adjustment last time yes bet
it's even even the whole way across
nouns 1/2 inch and it's starting to open
up at the top pretty good
3/8 of an inch quarter inch very tight
and good so I'm adjusting as I'm going
and the goal is to have it by the time I
get these length marks lined up
everything should be a really nice tight
seam good sixteenth of an inch all right
so that's perfect right up there if the
alignment marks lined up right here type
full-length of the scene now with that
still in place I'm gonna clamp the strip
back down and make marks at the other
end so my length marks are now made and
I can unclamp the strip I set up these
little clamps on my work surface here
just as a place to catch the end of this
strip as I'm working on it so it's not
just dragging around on the floor
breaking that tip off that we went
through all that effort to make perfect
all right so it's gonna fit in like that
and they will back it off an inch or so
make a mark there one thing about having
a plane in your pocket you've always got
a pencil sharp huh there we go nice and
sharp
same drill at the other end
it marks up at each end and so now I'm
ready to put some glue on it and install
it I'm also gonna put some glue on the
tapered ends they just I don't go quite
all the way up the end of the taper
because I'm going to end up sliding it
into that space and that's gonna smear
some glue back along the length I don't
want to end up with a blob of glue on
the center line that's going to
interfere with the next strip so I go
from the tip down to just shy at the end
one of the things they like about using
tape as a clamp is it lets me get a lot
of clamping done quickly while the glue
is still wet and easy to squeeze out of
there as the glue sets up it gets harder
to squeeze out it's harder to get a tape
joint so if you spend a lot of time
trying to get one spot together other
spots are starting to set up a little
bit and it's going to just be a little
bit harder to get those nice and tight
so tape is quick gets the job done
quickly while the glue is still soft and
wet now I can come back and supplement
that with some stitches
[Music]
[Applause]
[Music]
okay I'm gonna call that a day I don't
know how much that actually got recorded
today but I'm now three strips beyond
the chine so I've got three strips on
today total it's not bad
this is slower going because I'm fitting
strips at both ends but it's looking
nice things are lining up really nicely
I think it's really going to look sharp
if you've watched this far you should
probably be hitting like and subscribe
and all of that stuff and it would be
awesome if you have supported me on
patreon but I appreciate the support of
just likes and subscriptions in the next
episode I should make it most of the way
to the end on the bottom here probably
won't make to the closing strip of
better known as the whiskey strip but
we'll see how far we get until then
thanks for watching and happy paddling
[Music]